Maximizing BitTorrent Speeds with uTorrent (Guide / Tutorial)

What We Need

What We Need


  1. An Internet Connection and its maximum download and upload speed. If you are not sure of your download/upload speeds, visit http://www.speedtest.net/ to run a speed test. Select a download location closest to you, especially if you are outside US. The Recommended Server (golden pyramid) works out most of the time.

    speedtest.jpg

    Partial SpeedTest.net Screen Shot: Clicking the gold pyramid works out most of the time

    Once the test is done, you get the results:

    speedtestresults.jpg

    Results of the speed test

    Note down the numbers under Download and Upload including the unit; in this case, Mbps. You will need them later.
  2. Patched TCPIP.sys to allow more concurrent half-open connections. Windows XP SP2 and Vista limits the number of half-open connections to 10.

    NOTE: This step has been generally found not to make any improvements in Bittorrent speed. In fact, it can even cause problems with certain routers such as auto-restarting and stalling of internet access. Do this only as a last resort.

    To increase the limit, there are two freely available patchers:

    Lvllord Patch - ONLY for Windows XP Users (NOT Vista/Windows 7 users, see next step for Vista/Windows 7 users)
    UPDATE: There has been a recent Automatic Update (MS08-001) released on January 8 2008 that addresses some network security concerns. The below has NOT been tested with the latest TCPIP.SYS (v5.0.2195.7147) file. Update:The patch has been tested with KB941644 (an automatic update) and works perfectly!
    1. Go to this site - http://www.lvllord.de/
    2. Click on Downloads.
    3. Right-click the link and click "Save Target As".
    4. Save it in your Desktop.
    5. Open the file and run the program located inside the archive, agreeing to the security warning.
    6. Some text should scroll by in a MS-DOS window, after it ends, type C.
    7. Enter 100 for the number of concurrent half-open connections and press Enter.
    8. Type Y and the file should be patched. Cancel any Windows XP warnings that should appear, it is part of Microsoft's way of ensuring its files are not tampered with (the utility tampers with them on purpose to change the limit).
    Half-Open Patch - For Windows VISTA / Windows XP / Windows 7 users
    This patcher works for both 32 and 64 bit Vista and XP versions.
    1. Go to this site - http://half-open.com/download_en.htm.
    2. Download the ZIP file in the link titled Half-open limit fix 3.6 (as of Feb 2009)
    3. Extract all files to one folder in your desktop
    4. Open the folder and run the Half-open_limit_fix_3.6.exe file
    5. Click English
    6. Under 'New value', set it to 100 (if it is not already set)

      halfopenvista.gif

      Set the new value to 100
    7. Click 'Add to tcpip.sys'
    8. Click OK.
    9. Click OK again. Cancel any Windows XP warnings that should appear, it is part of Microsoft's way of ensuring its files are not tampered with (the utility tampers with them on purpose to change the limit).
    10. Restart your computer.
    11. If something is not working right (e.g. Internet access does not work anymore) and you want to undo the changes, run the software again and click "Restore original file".
    NOTE: The patchers above are known to trigger anti-virus alerts. Ignore them. The alerts are triggered due to the patcher making changes to the way Windows works hence the anti-virus software interprets it as suspicious.
  3. A BitTorrent Client - I recommend uTorrent. This guide uses uTorrent for the tutorial.
  4. And finally, some torrents to kick off a download. A sample torrent file will be provided later.
 
Configuring uTorrent

The configuration part is where most people mess up. Most of us will just click through the dialogs accepting the default values. This may apply to some of us, but not the majority. The below installation guide uses uTorrent Version 1.8.3. Older versions may have some steps missing.

  1. Run the program. Ignore the security warning if any appears (Click Run) - we know perfectly well that the file is legitimate.
  2. You get the welcome screen when it runs:

    welcomeutorrent.gif

    Welcome screen

    Click Next. A scam warning will appear due to many people being tricked into paying for utorrent which is supposed to be free.

    Anyway, click Next.
  3. New to utorrent version 1.8.3 - a license agreement! This used to be as a link in the Install location.

    utorrentlicense.gif

    License Agreement

    Read the mambo jambo. You must click I Agree to continue if not the installation will not continue.
  4. It will give the following dialog:

    installutorrent.gif

    Choose Install Location

    You want the program to be easily accessible, don't you? Click Next > and the shortcut will be created in your desktop, quick launch and start menu, as well as installing it to a permanent location.
  5. uTorrent Setup asks your permission to associate with files:

    configuration.gif

    Configuration

    All are fine except for the last one - 'Start utorrent when Windows starts up'. This used to be optional but with version 1.8.3 onwards, utorrent is set by default to start along when Windows starts. This may irk some users, especially if you pay for Internet Access by the megabyte. How? If you close uTorrent after you are done with it without deleting the torrent and restart your computer, utorrent starts in the background and continues leeching and seeding the torrents.

    Bottom line? If your Internet Access is unlimited, leave the checkbox checked. Otherwise, uncheck the last box.
  6. The latest releases of uTorrent now come bundled with Ask.Com Toolbar:

    asktoolbar.gif

    Ask Toolbar

    This is NOT required, 100% optional and will not affect your download/upload speeds. Installing this will insert a Ask.Com Toolbar in Internet Explorer and Firefox (if you have it).

    The reason uTorrent is including this is because it gets paid for every installation and is a means of revenue for the company. So it is up to you whether you want it. If you find that you don't like it later on, you can remove the toolbar from Add/Remove programs later on without affecting uTorrent.

    Make your desired checkmarks and click Install
  7. This step only applies for versions older than utorrent v1.8.2. It ensures that utorrent is set to handle all torrent files automatically.

    defaulttorrent.gif

    Making uTorrent the default application for torrent files

    Click Yes. On current versions of uTorrent, this is done automatically.
  8. And the next dialog box is the most important step

    networksetup.gif

    uTorrent Speed Guide

    Now the value that we are interested in right now is the Upload Limit in kB/s (aka KBps). If you have trouble understanding your speed, consider this: Internet Explorer shows download speed as KBps when you download a file.

    There is a big difference between 5Kbps and 5KBps. Make sure you got the right values in KBps (not kbps, the cAsE of 'b' matters) . Use Google Calculator if you need help with conversions.
  9. Click the (Current Settings) drop down

    speedvalues.gif

    Preset Speed Settings on clicking Current Settings

    The authors of uTorrent have been very helpful in providing a list of predefined values. Your connection should be near to one of the above categories. "xx/384k" means that your download is unlimited and your upload is limited to 384kbps (which is 48KBps by Google Calculator).

    With your results of the speed test you did above, select the closest upload speed from the list. uTorrent immediately adjusts the "Affected Settings" area with recommended values for your upload speed. We're not finished yet.

    Note: The default download speed in utorrent is Unlimited. Even if your download is limited in some way, it is always better to leave it at unlimited to get maximum download speeds. However, if you need to limit your download speeds, right-click the utorrent icon on the system tray (bottom right), click Download Limit and set accordingly. You can also set this in the Preferences dialog.

    Note: uTorrent randomly generates a port number in Current Port. This guide assumes the port number to be 55641 - but you can substitute it with the number uTorrent shows.
  10. Port forwarding is also important. Click on "Test if port is forwarded properly" to run the test. If you have trouble running the test, it could be due to one or more of the following reasons:
    1. Home Router
      If you are running a router (sometimes called wireless access point) at home, you will have to configure it to route all TCP / UDP BitTorrent traffic to port 55641 to your computer. If so, visit this page for a guide on how to port forward. Click the router you are using and follow instructions. When following the guide and the router asks for a range of ports to forward, simply specify 55641 to 55641 (remember to substitute it with the actual port number you are using).
    2. Personal Firewall
      If you are running a firewall software such as Norton Internet Security, Norton 360, Kaspersky, ZoneAlarm, etc, then configure your firewall such that uTorrent has access to port 55641. This is normally accomplished by starting up utorrent. The firewall should spring up an access alert. Simply select the option to "Always Allow" to allow the program to access the Internet. Messages such as "utorrent wants to act as a server" or "utorrent is attempting to listen for connections" must be allowed as well. In fact, if the program in question is utorrent, you should always check "Allow" no matter what request it is.

      Windows Firewall Users
      uTorrent will automatically configure Windows Firewall for you so there is no action needed from you.
    3. Corporate Firewall
      Are you running this software in a corporate network? Bad news - you have to inform the admin that you want the port to be directed to your computer. The good news - you can still go by without port forwarding, but speeds will not be optimal.
    4. Utorrent.Com Port Forward Checking Website has a problem
      Yes, especially if you are accessing the Internet through a transparent proxy that your ISP forces you to use. This simply means that the website is checking for open ports at the wrong computer. To verify if this is the case, uTorrent port checker runs an alternative port checker at port 16000, which you can access by using the form below:
    1. uTorrent Port Checker​
      Enter the port number in this box: and click .

      Sometimes the utorrent port checker server may be down - you may get 'page cannot be displayed' or a blank page 'unable to connect' if this is so. If this is the case, the only way to check is to run the actual torrent.
    Having done all the above, if the website still says that it has problems accessing the port, the ultimate test will be when we do a test file downloading. For now, let's click on Use Selected Settings.
    1. Now you see the full uTorrent window in full glamour.
 
Starting a simple torrent

We need to start a simple download, and the one that will be using is a 650MB file of Ubuntu! It is a perfectly legal and free file to download. We will be downloading this file purely for testing and delete it later on (as it is of no use to us)

  1. Minimize uTorrent for now. Notice that it resides on the system tray (bottom right) automatically.
  2. Click to http://torrent.ubuntu.com:6969/.
  3. Look at the column labeled "complete". Find the row with the largest value. A quick way is to scroll down and scan for a 3 digit figure in that column.
  4. Now download the torrent - click the link in the 2nd column of that row
  5. You should get this dialog:

    ubuntudownload.gif

    The IE6 "Save As" Box for torrent files

    This is the metadata file, it contains information on the file you want to download eventually. That is why the file size is so small. We want uTorrent to automatically start downloading it, so click Open.

    NOTE: The "Name and Type" may differ on your system. This is normal, as Ubuntu is frequently updated

    NOTE: If the Open button does not appear, save the file in your desktop. Then start utorrent, File > Open torrent and open the torrent you saved. Delete the torrent file in the desktop as uTorrent automatically makes a copy of it.
  6. The file opens with uTorrent which automatically pops up this dialog

    addnewtorrent.gif

    Add New Torrent dialog box

    All values are automatically filled in for you. Here is also where you select files that you don't want to download - if the download has many files which in this case is not. Remember where the file is stored in "Save As", or save it in a different location that is more convenient for you.

    All looking good, click OK.
 
Progress of the Download

Click on the Ubuntu torrent (the only item in the list) to view more information on it. You will see all the values at the bottom suddenly burst with activity!
downloading.gif

uTorrent with one torrent downloading
Looks like the torrent has a total of 42 seeds and 4 downloaders. 42 seeds is a lot (but some torrents can have 1000+ seeds, depending on popularity) and it means you should get the full file in no time! A seed is a term used to refer to peers who have downloaded and are sharing the complete file.
However, after running for 5 minutes, the speed refuses to go above 20 KB/s, which is not possible for a highly seeded torrent. Could it be our ISP throttling?
 
Enabling Protocol Encryption, uTP (UDP Packets) and Increasing Speed Via Max Half Open Connections

uTorrent by default disables protocol encryption. We need to enable this so that the ISP's packet shaping hardware will detect our BitTorrent traffic as normal traffic and hopefully let it pass.

  1. Click on Options, Preferences.
  2. Click on BitTorrent.
  3. You should get a dialog similar to one below

    preferences.gif

    Bittorrent Preferences Dialog Box
  4. The one we are concerned about is Protocol Encryption. Set the Outgoing to Enabled.
  5. Click on Advanced on the left column.
  6. If you did NOT patch your TCPIP.sys to allow more concurrent half-open connections above, SKIP this step.

    maxconnect.gif

    Advanced Settings Dialog Box

    Change "net.max_halfopen" value to 50 by selecting the line, modifying the value at the bottom to 50 and clicking Set.

    NOTE: It is normal for a asterisk(*) to appear. This is to indicate that the value has been changed from the default value.
From uTorrent version 1.8.3 onwards, a new UDP protocol named uTP was introduced which sends UDP packets as well as TCP packets. The main benefit is that it provides a new avenue of bypassing ISP throttling limits resulting in a more efficient torrent swarm.

  1. At the same Advanced screen, Change "bt.transp_disposition" value to 255 by selecting the line, modifying the value at the bottom to 255 and clicking Set.
  2. Click OK. Stop all torrents (red stop button on toolbar on top), wait 10 seconds, and Start the torrent (green play button on toolbar). Now let's watch the speeds.
Hopefully, the above changes will improve speeds. Ultimately, it depends on the number of seeders and peers with high upload rate. Remember, you must upload to enjoy good download rates, but not so high that it affects download speed. Experiment.
 
Bonus Tip!

This part only applies for public torrents. It is useless for private torrents as they specifically prohibit sharing with other trackers.
The tip: Look for more public tracker servers that have the file. However, this tip does not work for torrents that are private i.e. the DHT Status field shows 'not allowed' for the torrent.
Before:
onetracker.gif

Only one tracker under Trackers
After getting the same torrent from ISOHunt.com (a site that consolidates multiple trackers into one torrent file)
fulltracker.gif

Many tracker servers!
Needless to say, the speed increased tenfold!
How do I find similar torrents?

The easiest way is

  1. Highlight the row of the torrent by clicking on the torrent name
  2. Click on the General tab below
  3. There should be a field labeled Hash near to the bottom with a string of 40 alphanumeric characters. Right-click the value of this and click Copy.

    torrenthash.gif

    Hash value of a torrent
  4. Go to ISOHunt.com
  5. Paste the value into the search box. To paste the value, right-click the search box, and click Paste. Click Search.
  6. There should only be one result. Click that result and download the torrent.
  7. You should get the box below. If not, you are downloading a wrong or different torrent. The torrent must be exactly the same except for the tracker servers.

    torrentexists.gif

    uTorrent warns you when you are adding the same torrent. Just click Yes to load the trackers from it
You can also search Google with the torrent hash and download similar torrents.
 
Bonus Tip 2!

Optimize your TCP settings. Speedguide.net provides a free utility to make this step as easy as cake. We also have a mirror of the file.
WINDOWS VISTA USERS: Windows Vista / Windows 7 is not listed to be compatible with this as of May 2009. However, there are many reports on the net that it works and that it will need to be combined with the Disable Auto Tuning to make the registry changes effective. Personally, I recommend against using this if you are a Windows Vista user.
mainwindow.gif

TCP Optimizer Main Window
Steps to optimize your internet connection.

  1. First, download and extract the files to any folder.
  2. Double-click on the TCPOptimizer application in the folder to launch it
  3. At the bottom of the window, click "Optimal Settings"
  4. At the top of the window, select your connection speed. If you are not sure, run the speed test. Use the value that you get for the Download field (which is in kb/s) and set the slider to it.
  5. If you are using ADSL, check with your Internet Service Provider whether it is based on PPPoE or PPPoA. You may also be able to obtain the information via your router's homepage.
  6. Click 'Apply Changes' at the bottom of the window.
  7. Ensure that 'Backup' is checked and click OK at the next confirmation box that appears.
  8. Once the changes are done, reboot your system.
 
Further Tips You Can Try For Optimum Speed

Pointers 3 - 7, 9 and 14 below have the potential to affect your speeds **negatively**. Experiment.

  1. There should be a green tick at the bottom, not a exclamation mark as below.

    redstatus.gif

    Unconnectable situation

    If uTorrent keeps showing this even after 5 minutes, check the possible causes.
  2. To get more peers, right-click the entry on the list, and click Update Tracker (disabled, grayed out and throttled in utorrent 1.8 - you need to wait for some time). Do this especially if you are on a private tracker before you exit the application, so that your ratio is maintained.
  3. Setting a high upload can sometimes slow down a fast torrent. For example, in our ADSL connection, if I do upload at 10KB/s I can get up to 350KB/s. If I upload at 30KB/s, the download speed gets limited to 200KB/s. The total upload available to me is 60KB/s.

    This is where you have to experiment by setting a low upload rate (from 10 at Options > Preferences > Bandwidth > Maximum upload rate) and watching if the speeds increase for 5 minutes, especially if the torrent is heavily seeded.

    But remember, you must upload in order for peers to share their downloaded data with you. It is possible to set a very low upload, but the chance of peers sending you their data will decrease, pulling down your download speed.
  4. Some people have reported speed increases by setting the peer.lazy_bitfield setting to false in Options > Preferences > Advanced. However, in our case, it lowered the speeds.
  5. Change the Options > Preferences > Bittorrent > Protocol Encryption to Forced. This will force encryption on all outgoing packets and will not fallback to un-encrypted mode if the peer refuses to co-operate. Good to connect to only encryption-enabled peers. Avoid doing this for torrents with low peers/seeds.
  6. Remove the check for Options > Preferences > Bittorrent > Protocol Encryption > Allow Incoming Legacy Connections. This will make all your outgoing and incoming packets fully encrypted, except for tracker communications. Peers who are using a torrent software that doesn't support encryption are dropped. Avoid doing this for torrents with low peers/seeds.
  7. Private trackers, especially those that specifically tell utorrent to disable DHT (effectively disabling Peer Exchange and Local Peer Discovery too), can affect speeds negatively. You can tell if the torrent is private by selecting the torrent and looking at the DHT value. If it says "disabled", it is a private torrent.

    That said, the main reason private trackers exist is because they enforce sharing rules that tries to prevent a person from downloading a torrent and running off without uploading back the same amount of data he downloaded.

    For new and popular torrents on such trackers, you may be able to get good speeds as everyone will be trying to increase their upload/download ratio. Again, experiment. The key point here is the seeds/leechers ratio and the popularity of them in public and private trackers.
  8. Check the Availability column for the torrent. If it is less than 1, chances are that the torrent is new and the original uploader is still uploading. However, if it remains at a value less than 1 (eg, 0.98) for more than a day, either the torrent does not have seeds or it is fake. (Thanks TTbarDJ)
  9. Some people have reported speed increases using an older version of utorrent, specifically utorrent version 1.6. You can download it and try it instead.
  10. Reset your internet connection by switching off and on the modem and router (if applicable).
  11. Download the latest network driver, uninstall the current one and install back the latest network driver you downloaded by using Device Manager in Start > Control Panel > System > Hardware > Device Manager.
  12. Make sure you did not set a download limit accidentally! Many people unknowingly set the download limit when they actually intended to set the upload limit in the right-click menu of the tray icon. To check, Options > Preferences > Bandwidth > Maximum download rate > Set to "0" > OK
  13. Some people use software such as Peer Guardian or Protowall to 'protect' from spy computers. At last check, Peer Guardian blocks about 773,125,915 out of 4,294,967,296 possible IPv4 addresses. That is about 18% of the whole Internet World Wide Web! Which means lesser peers and that means lower speeds! For the protection it claims to offer, speed is a compromise.
  14. Increase the number of connections in Options > Preferences > Bandwidth > Number of Connections. Experiment by increasing the number of global/max connections in steps of 25.
  15. Windows Vista users! Disabling TCP/IP Auto Tuning helped improve speeds for some people
    1. Click Start.
    2. In the box at the bottom, type CMD and do NOT press Enter. You should see CMD come up on the list as shown below:

      vista_cmd.gif

      CMD shows when you type CMD in the box below
    3. RIGHT-click the icon and click "Run As Administrator"
    4. A "User Account Control" box should spring up. Click Continue
    5. Type this into the prompt: netsh int tcp set global autotuninglevel=disable
    6. You should get a "Ok." response.
    7. Restart your system.
  16. If you have a proxy server such as a local ISP one, using it has helped many people improve their speeds. Go to Options > Preferences > Connection. Under 'Proxy Server', select the Type as HTTP and specify your proxy and port. Check the box 'Use proxy server for peer-to-peer connections'. Press OK and restart uTorrent.
Good luck! It all boils down to Experimenting.
 
Readers' Suggestions for Improving Speed

The following tips were posted in the comments below and found to be useful for some readers. You can try them out too.

  1. Jen says: If Utorrent is really slow on Vista (on my computer everything was really slow... I.E, Outlook) try disabling IPv6. Go to Control Panel > Network and Sharing Centre. Click on view Status for your connection, then properties and uncheck Internet Protocol Version 6 (TCP/IPv6) then OK it etc. I didn't need to restart Utorrent or do anything else. The download I was on jumped from 5k right up to 200.
  2. Jen says: Another one and it's really simple! I spent many an evening trying like hell to get my torrents to run faster and wasn't getting anywhere. a couple of weeks ago my ex was trying to download at 8pm and he was getting DL speeds like a 512 connection trouble is he's on an 8mb line. We couldn't figure it out and quite randomly whilst trying to figure it I checked the TOC for his ISP it turned out they restrict bandwidth at certain times, in his case 6pm to 9pm. Obviously I checked my ISP and mine is set 7pm to 10pm.
  3. Geeman says: I noticed drastic increased speed by increasing the disk cache size (Options > Preferences > Advanced > Disk Cache > Override automatic cache size > (set to higher number)
  4. Masterkio says: Change the following in the Advanced tab of uTorrent preferences peer. disconnect_inactive_interval from 300 to 600. You should be able to get a little bit more speed by doing this.
  5. ColdBurn says: Download only a single torrent at one time. At uTorrent > Options > Preferences > Bandwidth, set 'Global maximum number of connections' and 'Maximum number of connected peers per torrent' to 375.
 
  • Like
Reactions: ¤--bACarDi--¤
Frequently Asked Questions (FAQ)

1) What are the good/best ports to open for uTorrent?
There's no "best port" or good ports . All ports are suitable for use with uTorrent, unless you are running a program that is using the port.

However, feel free to change the default port of it by going to Options > Preferences > Connection and adjusting the "Port used for incoming connections" as necessary. Remember to re-adjust your port forwarding settings in your firewall and router too. 2) I have tried all the above and my speeds are still slow! In fact, it got worse! What can I do?
Try downloading a different torrent. A high ratio of seeds to leechers (Eg 2000 seeds to 10 leechers) will make a big difference in speeds. Make sure there is a green light at the bottom or check the possible causes.

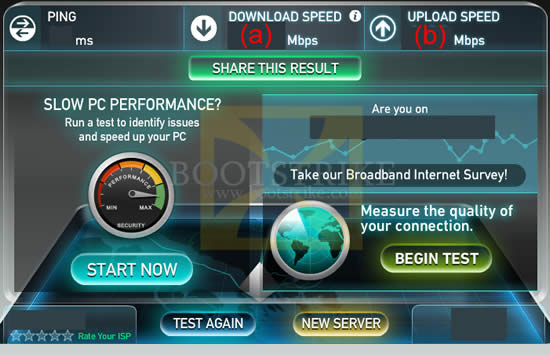
Verify your speed by running a speed test from different locations to ensure your connection is fast to the major locations in the world. For example, if you are downloading Chinese torrents, you should select a download location from China (or somewhere nearby) in the speed test.

Finally, try enabling Forced encryption and performing the extra things outlined here. If speeds still do not improve, we are also not aware of the cause. Perhaps your ISP has managed to break encryption in BitTorrent traffic and is limiting bittorrent connections (e.g. Comcast), especially if they are in this list of Bad ISPs. Or your ISP is limiting your connection speeds (Try a speed test to a local server to verify this). Do let us know in the comments if you have found a way to solve your problems even with the suggestions above. One more thing - it has been reported that reinstalling the network driver has made speed differences for many people. To reinstall, go to Control Panel, Network Connections and locate your network connection - most of the time it should be "Local Area Connection 1". Right-click the icon, Properties and note down the name under "Connect Using". There are two ways to update drivers:
AUTOMATICALLY: Click Configure > Driver > Update Driver. Allow the system to connect to Microsoft Online to check for drivers. Only manufacturers who send their drivers for WHQL certification can be updated using this method.
MANUALLY: Locate the latest driver for this device by going to the official site and downloading and installing it. Blizzard also has a nice guide here. WARNING: Installing an incorrect driver can cut off your internet! If unsure, call the technical helpdesk (e.g. Dell / HP / Acer ) and request for assistance on updating network card drivers.
3) How do I reset utorrent settings?
Note that this will delete all saved torrents and settings. Go to your C:\Documents and Settings\<username>\Application Data folder and delete the utorrent folder. To reset the max half open connections, run the lvllord utility again (for XP) or run the undopatch.bat (for yaronmaor Vista patcher) or run the half-open software and click "Restore original file" (for Vista half-open patcher). For enabling auto tuning back, the command is: netsh interface tcp set global autotuninglevel=normal 4) Does this guide apply for the BitTorrent application as well?
Yes - the application has just a name change so it is safe to use this guide. If you compare utorrent vs BitTorrent, both are almost the same in features with the differences being the naming, branding, icons and some additional links. There may be additional 'features', but all features from utorrent are there. 5) I am unable to surf the Internet or my Internet gets cut off when uTorrent is downloading?
First, try reducing the upload speed. Next, reduce the number of connections in Options > Preferences > > Global maximum number of connections in steps of 25 and see if it helps. Finally, impose a download speed limit at Options > Preferences > Connection. 6) Do I still need to port forward if I am on a wired connection to the router?
Yes. You do need to configure port forward if you are connected to a router but if you are connected directly to a modem, you don't need to port forward as the modem forwards all packets to one computer. 7) How do I undo the TCP Optimizer changes?
Open TCP Optimizer > File > Restore Backup Settings. 8) Is there any way of finding an open port in my system besides port forwarding?
If your system is behind a router, absolutely no port will be forwarded to you unless your router supports UPnP or the router is configured to port forward.

However, if you are connected to an ISP that blocks incoming connections, you can try GRC's Shield's UP (thanks Sonic_fanrs) to find open ports that your ISP allows. Click 'Proceed' and then 'Common Ports'. This requires to disable your firewall and enable DMZ mode if you are using a router, which can be very *very* risky and I would not recommend this especially if your system is not updated with the latest patches. 9) My internet got cut out / restarted / disconnected, and when it was restored, why did the speed get so slow?
First, restart utorrent. Right-click the tray icon on the bottom right and click Exit. Start uTorrent again.
Everytime you restart utorrent, it reconnects to the DHT network and obtains a new set of peers from the tracker and DHT. Although utorrent caches the peer list in your computer, there is a possibility that it may drop good speed peers. There's a way around this.
When you are experiencing good download speeds with a torrent, locate the good upload peer by clicking the torrent row, and clicking on the Peer tab. You will now see a list of peers that you are connected to. Look for the row whose Down speed is extremely high that the majority. Right-click that row and click 'Copy selected hosts'. Paste this good peer in some notepad file.
When utorrent needs to restore, click the torrent row again, click on the Peers tab, right-click any row and click "Add Peer..." and paste your good peer here. uTorrent will then attempt to establish connection to that good peer provided it has free upload slots (not choked).
10) My port forwarding still does not work! uTorrent still shows a yellow/red icon at the bottom. Help!
For users from Singapore, I can help you configure port forwarding. See our computer service site. For international users, you can contact me through e-mail, letting me know your Skype account and time range you are available. Rate will be US$30.
 
This document is Copyright(©) 2006-2009 by G.Ganesh.

COPYING:
This guide is *FREQUENTLY* updated! So if possible,
simply link to this web page -
http://www.bootstrike.com/Articles/BitTorrentGuide/
- rather than copying everything..

However, if you must copy, please LINK to the original guide somewhere so that people can view the latest version.
And don't charge for it - you got it free in the first place, and I am not charging you for it.