Latest ads
-
 Gemini AI PRO 18 months Offer
- Hawaka
- Updated:
-
koko account
- DasunEranga
- Updated:
-
koko account
- DasunEranga
- Updated:
You are using an out of date browser. It may not display this or other websites correctly.
You should upgrade or use an alternative browser.
You should upgrade or use an alternative browser.

dilansri2 said:Media Player Classic
Mokakda machan e eka nemai mama kiyanne okata wenama Software ekak tiyenawa e mokakda kiyalai ahanne machan
kmk1657 said:Mokakda machan e eka nemai mama kiyanne okata wenama Software ekak tiyenawa e mokakda kiyalai ahanne machan
machan, media player classic eken thama oya widihata karanne.
eake option ekak thiyenawa Save As Thumbnails kiyala ..
How to make screencaps
(ImageGrabberII)
This is a guide on how to easily create and add great looking screenshots to your upload.
The first thing you'll need is:
ImageGrabberII - A brilliant program:

Code: http://rapidshare.com/files/52037610/Image_grabber_2_How_to_make_screencaps_by_deen4533 .rar
Step One:
Creating screenshots
To get started open up your movie in ImageGrabber (supports wmv as well) and the movie will start playing. Click the red stop button and the movie is open and ready to go. Click this buttonand the following dialog box will appear:
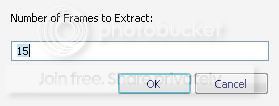
Enter the number of screens shots you would like to take of the movie. A good number for a movie is probably about 15 and you can play around with this and the number of columns explained in the settings below to see what you like.
When you click OK it will go through the movie taking the screen shots and add them to the timeline across the bottom. You can add individual selected screenshots by using the scrollbar to move to the picture you want and clicking this buttonto add the current image at the end of the timeline.
Once you have all the pics you want you can arrange the screenshots in the timeline.
* Right click a screenshot to delete it, delete all or change the text label.
* Left click a screenshot to drag it to where you want in the timeline.
Step Two:
ImageGrabber settings:
Once you have all the screens you want, on the File menu click Save File and you will see the following default settings dialog box:
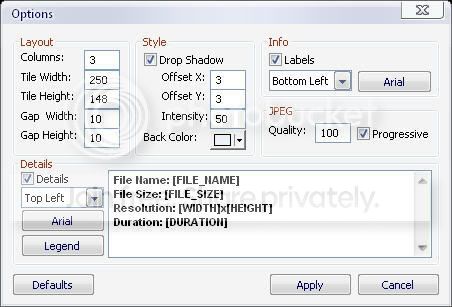
Layout: Good idea to make the dimensions of each screen (Tile) a fraction of the original to avoid distortion.
Style: Details of the drop shadow around your screens and the background color for your image.
Info: You can include the time each sample was taken in the vid.
JPEG: You can adjust the quality down to reduce the file size say for a full movie with many screens.
Details: You can include the basic movie statistics in the image.
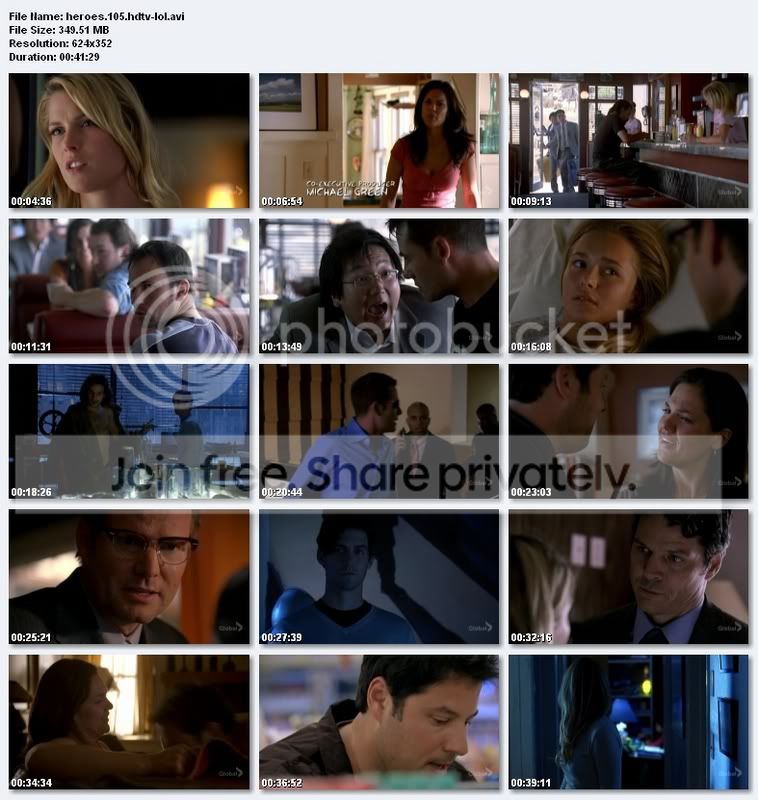
There are plenty of possible configurations, try playing around with different settings until you find a layout you like. Click the save button and using the settings shown above will produce an image with a layout similar to this screenshot:
Once you have your image you may want to resize it or modify it in some way, a nice free and easy to use image viewing/editing tool is anview:
Now you have your screenshots, the next step is hosting your cool new image.
Step Three:
Hosting screenshots:
The are a few free image hosting web sites around and most of them operate the same way.
imageshack.us
photobucket.com
Code: http://photobucket.com/
source-
.::AmaZing Software Collection::.
(ImageGrabberII)
This is a guide on how to easily create and add great looking screenshots to your upload.
The first thing you'll need is:
ImageGrabberII - A brilliant program:

Code: http://rapidshare.com/files/52037610/Image_grabber_2_How_to_make_screencaps_by_deen4533 .rar
Step One:
Creating screenshots
To get started open up your movie in ImageGrabber (supports wmv as well) and the movie will start playing. Click the red stop button and the movie is open and ready to go. Click this buttonand the following dialog box will appear:

Enter the number of screens shots you would like to take of the movie. A good number for a movie is probably about 15 and you can play around with this and the number of columns explained in the settings below to see what you like.
When you click OK it will go through the movie taking the screen shots and add them to the timeline across the bottom. You can add individual selected screenshots by using the scrollbar to move to the picture you want and clicking this buttonto add the current image at the end of the timeline.
Once you have all the pics you want you can arrange the screenshots in the timeline.
* Right click a screenshot to delete it, delete all or change the text label.
* Left click a screenshot to drag it to where you want in the timeline.
Step Two:
ImageGrabber settings:
Once you have all the screens you want, on the File menu click Save File and you will see the following default settings dialog box:

Layout: Good idea to make the dimensions of each screen (Tile) a fraction of the original to avoid distortion.
Style: Details of the drop shadow around your screens and the background color for your image.
Info: You can include the time each sample was taken in the vid.
JPEG: You can adjust the quality down to reduce the file size say for a full movie with many screens.
Details: You can include the basic movie statistics in the image.
There are plenty of possible configurations, try playing around with different settings until you find a layout you like. Click the save button and using the settings shown above will produce an image with a layout similar to this screenshot:

Once you have your image you may want to resize it or modify it in some way, a nice free and easy to use image viewing/editing tool is anview:
Now you have your screenshots, the next step is hosting your cool new image.
Step Three:
Hosting screenshots:
The are a few free image hosting web sites around and most of them operate the same way.
imageshack.us
photobucket.com
Code: http://photobucket.com/
source-
.::AmaZing Software Collection::.