How To: "Extract Movies w/WinRar, Burn & Play Movies/Videos" For The Complete Newb
This is written for help using winrar in the purpose of being able to get movies from .rar files. ,playing them on the computer and burning them to disc for the complete Newb/Beginner.
So you got yourself a copy of Winrar and you don't really know how to use it. Well, if this is your case then read on if not this isn't for you. Unless you would like to know how to play the extracted movie if so skip on to "Playing A Movie After Extraction". or if you want to learn how to burn the movie to disc skip to "Burning To Disc".
Extract Movies w/Winrar
I'm assuming you have a copy of Winrar installed and working on your computer. If not then get yourself a copy and come back. You can find a full working version of Winrar on many of my threads.
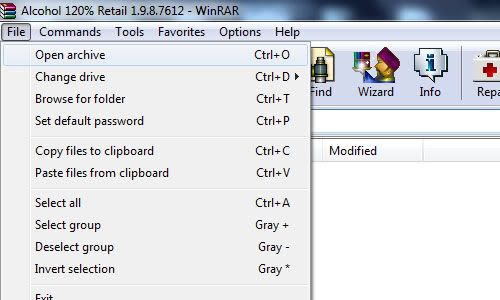
First things first open up WinRar (double click on it). It should look something simular to the below image.
Well, locate "File" Click on it and select "open archive" double click on it.
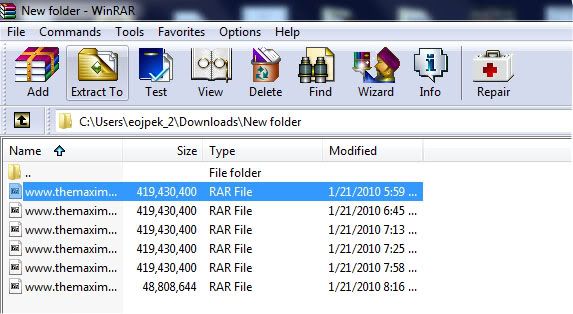
Now browse to where all parts of the movie were saved in the same folder. Open it.
Find the first part of all the .rar files. Click on it in the list to highlight it, then locate "Extract To" Click on it.
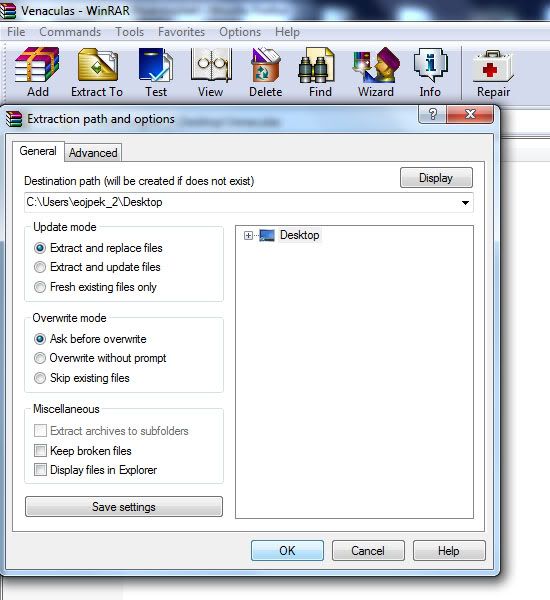
A new window will open.
select where you would wanna save it. By default it will save it to the folder in which the .rar files were located.
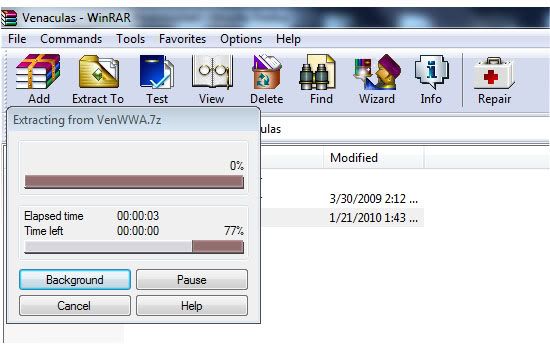
Now click "OK". Your movie/video or whatever will begin the extraction process and put whatever it was that was compressed in the .rar files into the folder that you specified.
A box like below will show up,
When this is finished check the folder you extracted to. There should be either a folder, a media file, iso, ect.. But I'm just gonna be talking about movies.
So you would have a movie/media file in a certain format. : avi, mpg, wmv, ect.. What to do with these?
Note: If you wanna extract the files quicker, locate the first part to the movie. Right click on it and select "open with" then "default program" Locate WinRar click on it to highlight it then make sure there is a click in the box that says "Always use the selected program to open this kind of file". Click "ok".
Now whenever you doubleclick on the first rar part of a movie, it will open up winrar.
or
Just right click the first part and select extract here. And it will extract to the same folder as all of the parts.
Playing A Movie After Extraction.
Well, what you would do to view these on a computer would be a "media player". If you have windows you most likely have windows media player already installed on your computer. You could right click on the movie file and select play and see if it will play like that or you could get yourself "VLC Media Player"or "GOM Player". Either one will do but I'm gonna talk about VLC.
VLC Media Player is one of the best media players out there as it can play just about any video/media file format. On a very rare occassion it won't.
You can download it here:
On that download page you will be presented 3 different packages. I myself like the last option as everything is extracted already in a folder. But, many would go with the first option "Windows Self Extracting".
If you do the first option read on. otherwise skip on to 3rd Package.
You will get a .exe file named "vlc-1.0.3-win32.exe" Locate it and double click on it.
The Installer Wizard will start and guide you through in how to save vlc on your computer. First select the lanquage in which you would like to use from the drop down box and then click ok. Ok, so a new window.
Click Next to Continue, Read the License Agreement and Agree. Select "Recommended" as Type of install or whatever you prefer, click next, select where you wanna save. Now VLC media player will start the install. When finished you can open up vlc right away.
Now that you have vlc media player installed open it up. Go to "Media" and click on it. From the list select "open file" locate the folder that you saved the extracted movie to. Find the media file of the movie and open it up. There you go you can watch movies now.
3rd Package
This is the download where everything is already extracted into a folder.
Open up the folder, There should be another folder open that up as well. Now, just look through the list for "vlc" Application. Double click on it to open up vlc media player.
Select, "Media" and click on it. From the list select "open file" locate the folder that you saved the extracted movie to. Find the media file of the movie and open it up. There you go you can watch movies now.
NOTE: after having vlc media player installed the next time you extract a movie and get a media file, just right click on the file, select "open with" then "choose default program". Unclick the box that says "Always use the selected program to open this kind of file" unless you always wanna use vlc media player to play that certain type of file. Locate VLC media Player, Click on it to highlight it and select ok. This will open up movies in a quicker manor.
Now that you have done that, right click on another movie and select "open with" again, now in that box should be a choice of vlc media player for quick access. You will need to set this up with other media files. But, once set up for all video/media file formats, it is a simple thing to watch movies/videos.
Codecs:
Now some movies are coded a certain way, in order to play some of these files after extraction you will need a specific codec to play the specified video file. Yeah, you could find the exact one you need and just install that one, but a codec pack is a better choice.
There are many codec packs out there. I myself like to use "ffdshow". Another one is "K-Lite". Just do a simple search and download and install one of the codec packs or one of your choice whatever suites you.
Now you will be able to play just about any movie/video without a hickup.
Burning To Disc
If you would like to burn the extracted movie to a DVD-R and watch on a DVD player, PS2 or whatever...read on
In order to be able to play the movie you got after extraction on a DVD player, there are several things in which you will need to do.
First you need to change the format so that it will be readable, Second you need to be able to burn these new formats to a disc. Well, figuring out how to do all this stuff would be quite the task, but thanks
to software all this can be done for us.
The Software Application I'm talking about is "Convertxtodvd". This will convert the movie to a format that can be read on a dvd player and will burn it for you as well. All you need to do is follow what I am
about to say below.
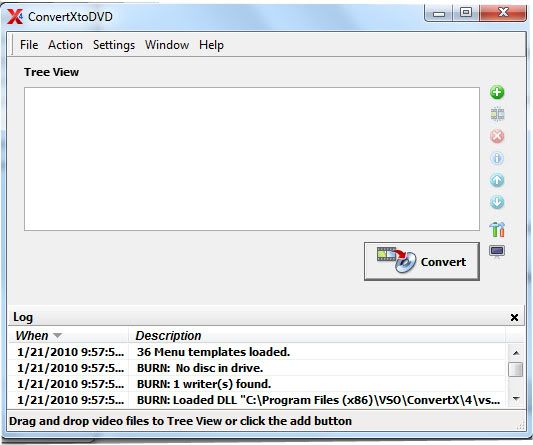
First get yourself a full working version of "Convertxtodvd" Install it. Do not use demo or you will get watermarks in your dvd.
After installed open it up. It should look something like this.
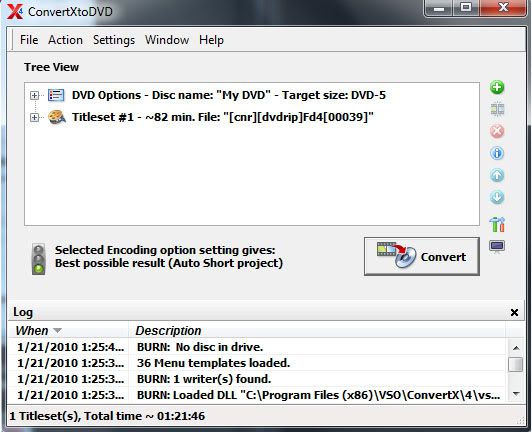
Now locate "File" click on it. Select "Add Video Files". Locate the folder that has the movie you want to convert and burn. Open up the movie and you will see it added to the list in convertx.
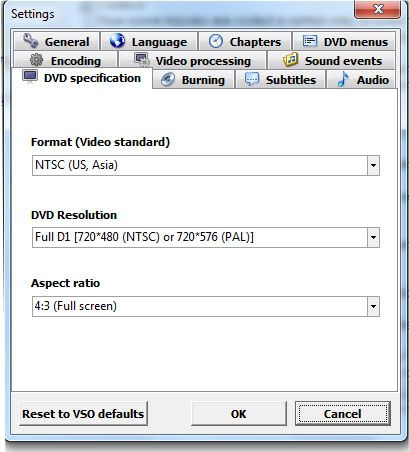
Now what you wanna do is locate "settings" click on it, and click on "DVD Specification". It will look like this.
Set your "Format (Video Standard)" to what region the DVD-player uses that you will be playing the burnt disc on. Set "DVD Resolution" to "automatic". Unless you like fullscreen like me go with "Full D1". And set "Aspect Ratio" to Automatic. Unless you want full screen like me or have a 16/9 screen tv.
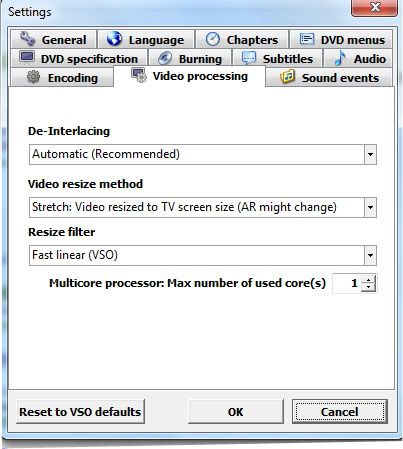
Now click on "Video Processing". It will look something like this.
Set "De-Interlacing" to Automatic. Set "Video Resize Methed" to Automatic or Stretch: Video resized to TV screen size if you want full screen. Set "Resize filter" to "Fast Linear (VSO). For "Multicore Processor: Max number of used cores" set to one if you have one CPU or if you have two and want to do other stuff while converting the movie. or two if you have a dual-core/quad-core processor. I stick with one myself.
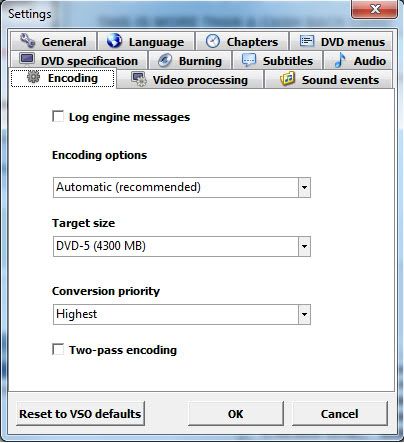
Now locate "Encoding" click on it. It will look something like this.
Set "Encoding options" to Automatic. Set "Target size" to DVD-5, Set "Conversion priority" to Normal or whatever you choose. I go with higher myself, the higher you set this the more resources convertxtodvd will use making it harder to do anything while running it.
This of course depends on your ram,cpu and such. If you have a single cpu on your computer it's best to let convertxtodvd do it's job without doing anything else on the computer. This will help ensure everything to go well. Even a two-pass encoding for the more older computer users may be best.
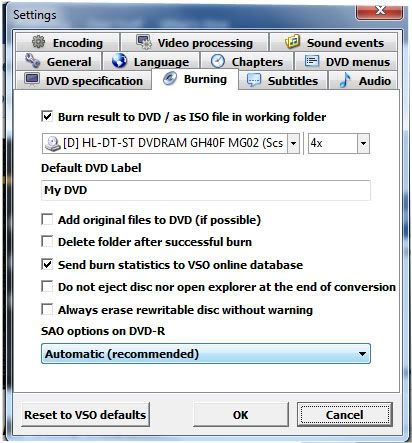
Now locate "Burning" It will look something like this.
Check the box "Burn result to DVD/ as ISO file in working folder" Then select the drive of your DVD-Rom from the dropdown list and set the speed to 4x. To help ensure a proper burn to a disc, setting any higher
most likely will cause several issues when playing the burnt disc.
Set the "Default DVD Label" to whatever you want and this will show in the menu(you can change this manually if you want). With all the boxes leave them all unchecked unless you would like one of those things to happen everytime. Set "SAO options on DVD-R" to Automatic.
Now locate "DVD Menus". It will look something like this.
Select a "Default template" from the dropdown box or browse computer for one's you downloaded. I myself like the Black Mirror with video.
Set "If a text label is too large in the menu,then" to Reduce the text.
NOTE:
If you wanna do this manually to change the name that will show up on the menu. Just go to movie in convertx click on the little box with the plus sign next to the movie on the list. This will drop down a list. click on the plus(+) sign for "In Title Menu" Now double click on the T. In the box type the name of the movie and click the checkmark to apply the changes.
Next, check the last three boxes or select something you prefer then click "OK". Everything done thus far will be your default for Convertxtodvd.
What I just provided above for convertxtodvd is a basic setup to burn a movie to disc.
Now since all of that is outa the way. You will be back to the main convertxtodvd window with your movie added in the list. Insert a DVD-R or DVD+R disc into your dvd-rom drive. (I like DVD+Rs myself for burning movies.) Now you can click "Convert" and start the converting process. This will take a extended amount of time depending on your RAM, CPU power and whatnot.
or
You could add another movie to the list so you have two movies on one disc. I tend to on occasions put two movies on one DVD+R, so I don't use as many of my discs. Depending on the size of the movies you may want to just put two hour 1/2 movies when doing this. If you have bigger movies, the quality may shun from what you may be looking for. Try to go to 3:15 max for total time of both movies together as the quality will still be great and will save you DVD discs.
NOTE: The quality will change depending on how many video files you add to the list. SP (Short Projects) Up to 110min, MP (Medium Projects) Up to 148min, LP (Long Play) 148 minutes or more. What this means is the more files you add the poorer the quality will be.
Now after conversion is done a window will show up to burn to disc. If left alone and you put or had dvd-/+ disc in your drive it will count down from a timer and start automaticly to burn to disc.
Once finished burning DVD, put it into a DVD player and see if it works. If so congrats!!! If not then you did something wrong.
Troubleshooting:
Why won't the DVD play on my dvd-player?
Because you may have not set the region/format right in settings under "DVD specification", Format. Make sure this is set right for the dvd-player you are gonna wanna watch the dvd with.
If you buy cheap DVD+/- discs in those 50packs at a cheap price, expect cheap results. What you expect? You get what you pay for, right? lol Many of these cheap discs in these 50packs are duds. Meaning you can't burn to them, they're shitty discs.
I bought a cheap 50 pack at office depot and I was only able to burn on 10 of the discs.
Go for better discs, pay the price needed to get results you expect.
Because you may have used a cheap brand of dvd-/+rs. I tend to use sony discs myself, on a rare occasion I will get some crappy discs in the 50 pack.
Maybe because your dvd-player doesn't like the type of disc used. Try a different disc, if you used a dvd-r try a dvd+r instead. Some dvd-players only like certain discs. If that doesn't do anything try
a different brand name.
You could try to burn at a slower speed or just make sure that you let the burning process just do it's course without doing anything else on the computer.
If that still doesn't help try burning the folder created by convertxtodvd with a different burning application such as "imageburn". nero ect...This has fixed burning issues with me about 99% of the time.
NOTE: If you have a older computer or a single processor I suggest you leave convertx to do it's job and not do anything on the computer while converting and burning to insure a proper conversion and burn.
Also if you have low RAM, it's best to have other applications closed before using convertxtodvd.
Anyways, I hope you find this helpful in extracting movies from rar files, playing the movies on your computer, and burning a movie to disc.
 THE END


")


