The Heatsink Guide

Anusha

Member
Jun 13, 2006
25,864
5
0
Heatsink Design

What characteristics make a heatsink a good one? There's a number of factors to consider:

* High heatsink surface. It's at the surface of the heatsink where the thermal transfer takes place. Therefore, heatsinks should be designed to have a large surface; this goal can be reached by using a large amount of fine fins, or by increasing the size of the heatsink itself.

* Good aerodynamics. Heatsinks must be designed in a way that air can easily and quickly float through the cooler, and reach all cooling fins. Especially heatsinks having a very large amount of fine fins, with small distances between the fins may not allow good air flow. A compromise between high surface (many fins with small gaps between them) and good aerodynamics must be found. This also depends on the fan the heatsink is used with: A powerful fan can force air even through a heatsink with lots of fine fins with only small gaps for air flow - whereas on a passive heatsink, there should be fewer cooling fins with more space between them. Therefore, simply adding a fan to a large heatsink designed for fanless usage doesn't necessarily result in a good cooler.

* Good thermal transfer within the heatsink. Large cooling fins are pointless if the heat can't reach them, so the heatsink must be designed to allow good thermal transfer from the heat source to the fins. Thicker fins have better thermal conductivity; so again, a compromise between high surface (many thin fins) and good thermal transfer (thicker fins) must be found. Of course, the material used has a major influence on thermal transfer within the heatsink. Sometimes, heat pipes are used to lead the heat from the heat source to the parts of the fins that are further away from the heat source.

* Perfect flatness of the contact area. The part of the heatsink that is in contact with the heat source must be perfectly flat. A flat contact area allows you to use a thinner layer of thermal compound, which will reduce the thermal resistance between heatsink and heat source.

perfectlyflat.jpg


* Good mounting method. For good thermal transfer, the pressure between heatsink and heat source must be high. Heatsink clips must be designed to provide a strong pressure, while still being reasonably easy to install. Heatsink mountings with screws/springs are often better than regular clips. Thermoconductive glue or sticky tape should only be used in situations where mounting with clips or screws isn't possible.
 
  • Like
Reactions: L KNG

Anusha

Member
Jun 13, 2006
25,864
5
0
Measuring heatsink performance; thermal resistance θ

Heatsink performance is measured in °C/W (or K/W - since we're dealing with temperature differences, there is no difference between Celsius and Kelvin scale here). We refer to this as thermal resistance (θ).

An example for what these values mean: if a thermal load of 20W is applied to a heatsink, and this causes the temperature of the heat source to raise by 10°C, the heatsink has a rating of of 10°C/20W = 0.5°C/W.

A θ value is valid only for a certain power load and a certain temperature range.

The thermal resistance of standard coolers for PC CPUs is usually not specified by the heatsink manufacturers, and if it is, it's often inaccurate or intentionally skewed for marketing purposes. You cannot judge heatsink performance by comparing θ specifications from different manufacturers.

The θ values specified by manufacturers specialized in heatsinks for industrial applications (especially large passive heatsinks) are usually more accurate, though.

Heatsink testing is not an easy task; many of the heatsink reviews found on the countless cooling-related sites on the net are not done properly. Check out my article about common mistakes in heatsink reviews to help you read reviews critically and decide which review to trust.
 

Anusha

Member
Jun 13, 2006
25,864
5
0
Heatsink materials

The thermal conductivity of the heatsink's material has a major impact on cooling performance. Thermal conductivity is measured in W/mK; higher values mean better conductivity.

As a rule of thumb, materials with a high electrical conductivity also have a high thermal conductivity. See this Wikipedia article for more information on thermal conductivity.

Alloys have lower thermal conductivity than pure metals, but may have better mechanical or chemical (corrosion) properties.

The following materials are commonly used for heatsinks:

* Aluminum. It has a thermal conductivity of 205W/mK, which is good (as a comparison: steel has about 50W/mK). The production of aluminum heatsinks is inexpensive; they can be made using extrusion Due to its softness, aluminum can also be milled quickly; die-casting and even cold forging are also possible (see part 2 of this guide for more information about production methods). Aluminum is also very light (thus, an aluminum heatsink will put less stress on its mounting when the unit is moved around).

* Copper's thermal conductivity is about twice as high as aluminum - almost 400W/mK. This makes it an excellent material for heatsinks; but its disadvantages include high weight, high price, and less choice as far as production methods are concerned. Copper heatsinks can be milled, die-cast, or made of copper plates bonded together; extrusion is not possible.

* To combine the advantages of aluminum and copper, heatsinks can be made of aluminum and copper bonded together. Here, the area in contact with the heat source is made of copper, which helps lead the heat away to the outer parts of the heatsink. The first heatsink for PC CPUs with an embedded copper piece was the Alpha P7125 (for first-generation Slot A Athlon CPUs). Keep in mind that a copper embedding is only useful if it is tightly bonded to the aluminum part for good thermal transfer. This is not always the case, especially not with inexpensive coolers. If the thermal transfer between the copper and the aluminum is poor, the copper embedding may do more harm than good.

alphap7125-bottom.jpg

Alpha P7125 base plate
The copper plate helps spread heat across the base plate.

hs_avc_round.jpg

AVC heatsink with copper core
The copper core helps the heat move to the upper parts of the heatsink.

thermalright_heatpipe_prototype.jpg

Thermalright heatsink (prototype) with large heat pipe in the center
A heat pipe provides substantially better thermal transfer than a solid piece of copper.

* Silver has an even higher thermal conductivity than copper, but only by about 10%. This does not justify the much higher price for heatsink production - however, pulverized silver is a common ingredient in high-end thermal compounds.
 

Anusha

Member
Jun 13, 2006
25,864
5
0
Heatsink production methods

Extrusion
The most popular production method for heatsinks is extrusion. With the aid of high pressure and temperature, a flow of aluminum is forced through a shaped opening. This results in a long stick having the same form as the opening. Later, the aluminum is stretched, which straightens it and improves its mechanical properties (better strength through re-alignment on a molecular level). Finally, the long aluminum sticks are cut into heatsink-sized pieces, and possibly milled to improve flatness of the contact area. Even though the concept is simple, the machines involved are huge. If you are interested in how exactly extrusion works, I suggest that you read this excellent article about the extrusion process from the William L. Bonnell company. It provides much more details than this small introduction to extrusion.

The classic extruded heatsink has a base plate with fins on one side. If a fan is used, the direction of the air flow is orthogonal to the direction of the extrusion.

hs_amd_hammer_foxconn.jpg

Extruded heatsink with classic design, made by FoxConn
This is the heatsink AMD used when they first presented their Opteron CPUs (codenamed "Hammer" back then).

With this classic extruded heatsink design, the air from the fan will at some point "hit" the base plate; it can escape only at two sides. A high pressure may occur within the heatsink, which is bad for air flow.

Modern CPUs have only a small contact area between die and heatsink. Therefore, it is possible to design extruded heatsinks where the direction of the air flow is identical to the direction of extrusion; they feature a thick core which leads the heat upwards. Air can more easily flow through the heatsink, and escape at all sides. The core is located below the fan motor, where little air flow occurs anyways.

thermoengine.jpg

Thermosonic Thermoengine
Direction of air flow same as direction of extrusion


Die-cast heatsinks
Another heatsink production method is die-casting. Unlike extrusion, it also suitable for producing copper heatsinks. It gives designers a lot of freedom as far as the form of the heatsink is concerned; however, height of the fins is limited, and fins cannot be made very thin.

diecast.jpg

Die-cast heatsinks made of aluminum and copper


Cold forging
Heatsinks with very fine and also high fins can be produced by cold forging. Cold forging uses impression dies as well, but the material is forced into the die (roughly) at room temperature. Obviously, very high pressure is required. Alpha was the cold-forged heatsink pioneer; by now, other companies, for example Taisol, also produce such heatsinks.

hs_taisol_copper_coldforged.jpg

Prototype as shown on CeBIT 2002


Milled/cut heatsinks
Heatsinks can also be milled or cut from a solid block of metal. This leaves a lot of freedom to the heatsink designer; however, such heatsinks are rather expensive to produce.

polarlogic.jpg

Milled HP/Agilent "PolarLogic" heatsink

Originally developed for HP PA-RISC CPUs, these heatsinks were, at the time, years ahead of the competition. Agilent later entered the market of PC CPU coolers, but they were never available in high volume, most likely due to high production costs. For a short time, surplus PolarLogic heatsinks were available on the market, and some retailers modified them to fit Socket 370 and Slot A CPUs.

skiving.jpg

JagWire "CoolJag" heatsink cut from a copper block
Notice the extremely fine fins; they are sometimes also referred to as "skiving" fins.


Bonded fin / folded fin
Instead of extruding, forging, or milling fins, it is also possible to simply use copper (or aluminum) plates as fins, and bond them on a base plate. If each fin is made of a separate plate, we refer to such heatsinks as bonded fin heatsinks. If all fins are made of one large plate that is folded to form the fins, we have a folded fin heatsink. Advantages of such heatsink designs include high surface, and low weight. However, the performance is only good if the bonding is done properly.

hs_thermalright_slk_800.jpg

Thermalright "bonded fin" heatsink


Heatsink surface treatment
Aluminum heatsinks are usually anodized; a choice of many colors is available. One might think that black is good, because it is best for heat emission by radiation. This is wrong. Heatsinks get rid of heat by convection (that is, heat is transferred to the air molecules travelling along the heatsink surface - if a fan is involved, we call it "forced convection"). For convection, the color does not matter at all.

Copper heatsinks are sometimes plated with silver or even gold (seriously - Zalman produced such a heatsink, model CNPS3000GOLD). This is supposed to prevent corrosion and improve thermal characteristics. But actually, the plating is too thin to have any effect on thermal conductivity. It is true that the surface of a copper heatsink may slightly corrode; but since they are operating in a dry environment, and do not have to withstand extreme temperatures, corrosion is not really a problem. During the lifetime of a PC heatsink, the corrosion layer will not get thick enough to have any negative effect on cooling.

So, do not worry about the surface treatment of your heatsinks, and do not spend extra for some special surface treatment (such as silver plating). Technically, there is no justification for it.
 

Anusha

Member
Jun 13, 2006
25,864
5
0
Information about fans

Introduction
The proper choice of fan is essential for achieving cooling performance, while keeping the noise of your computer low. This section of The Heatsink Guide will help you understand which factors influence noise and performance, and how to chose a good fan for your particular cooling problem.


Fan performance
Performance of fans is typically measured by air volume per time (usually in cubic feet per minute, CFM), or by air speed. CFM values are more meaningful than air speed measurements, since they take into account the size of the fan. Obviously, a 120x120mm fan will provide better cooling than a 50x50mm fan, even if both produce the same air speed.

Given CFM specifications are valid only when the pressure on both sides of the fan is equal; that is, when the fan is operating in free space. Under real-life conditions, when the fan is installed in a device, the specified CFM rating of the fan will not be reached; here, it depends on installation and on the overall design of the cooling system.

For tips on how to install fans in an optimal way, see the case cooling section. You can find tables for converting CFM from/to metric units on the conversion page.

Larger fans provide a better ratio between air throughput and noise. To achieve the best compromise between cooling performance and noise, chose the largest fan possible.


The bearing type
The type of bearing used has a major influence both on noise and on reliability of the fan. We distinguish between two types of bearing: Ball bearing and sleeve bearing. Generally speaking, ball bearing fans are more expensive, last longer, but are louder than sleeve bearing fans.

The cheapest sleeve bearing type simply consists of a ring made of a porous material dipped in lubricant; the fan axis rotates inside this ring. After prolonged operation, the lubricant will be used up, and the fan will become noisy and eventually fail. This is a common problem especially with small, inexpensive fans like they are used on chipset coolers or coolers of low-end graphics cards.

It may help - as a temporary solution - to lubricate the fan that has become noisy, using standard lube. However, depending on the fan design, the bearing may not be accessible to lubrication from the outside. Sometimes, removing the manufacturer's sticker from the fan will expose the bearing.

The better solution is to replace cheap fans that have become noisy by decent models with a ball bearing; a good ball bearing fan will last for many years of nonstop operation, without any lubrication.

There are also good quality sleeve bearings available, such as the "Sintec" sleeve bearings used by Papst, which use PTFE (also known as Teflon) as bearing material. These are just as expensive as good ball bearings, while maintaining the sleeve bearing's advantage of having lower noise level. Other manufacturers use ceramic materials for their bearings.

One bearing is not enough to stabilize a rotating axis. Fans have two bearings, and many of the "ball bearing" fans actually have one ball bearing, and one sleeve bearing. Larger ball bearing fans should have two ball bearings; they are often sold as "two ball bearing" or just "Two Ball" fans.


Balancing
When you install new tires on your car, they must be balanced after installation. In this process, little weights are attached to your car's rims, to compensate for heavy spots, and thus avoid imbalance. This keeps your car rolling smoothly, and reduces stress on the car's bearings and suspension.

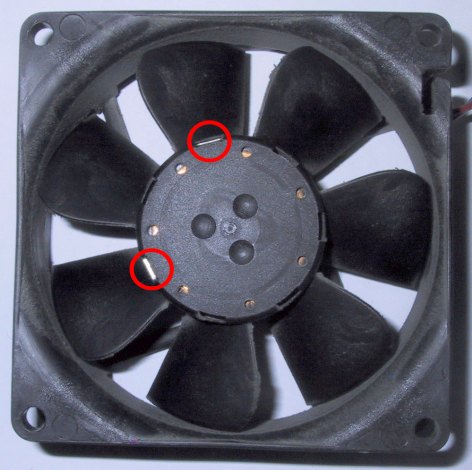
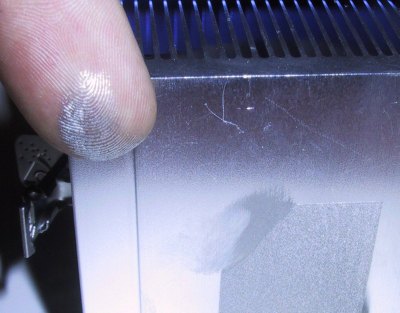
The same can be done with fans; due to tolerances in the production of the fan motor, little weights can be added to balance the fan, which will make it more quiet and last longer. This fact is rather unknown, and few fan manufacturers do it - since each fan unit produced must be balanced individually, it is an expensive process. Below, you can see a picture of an 80x80mm Papst fan. Notice the little slots around the fan motor case, and that two of the slots are filled with little metal weights to balance the fan.

fan_balanced.jpg


One might argue that other fan manufacturers do not need to do this, because the tolerances of their fan rotors are low enough, and balancing is not required. This may be a valid point; however, considering the Papst's excellent reputation as far as low noise and long-term reliability is concerned, it seems that the balancing does make sense.


Other factors that affect fan noise and fan performance
Besides motor/bearing noise, fans also produce noise created by the air flow itself. This noise can to a certain extent be optimized by smart rotor design, but all in all, one problem remains: The faster a fan's air flow is, the more noise it creates. How much noise this air flow causes, also depends on installation:

* If the air flow of the fan is obstructed, it gets noisier. Use fan grilles only when necessary (that is, when fans are accessible from the outside, which is typically not the case for CPU fans).
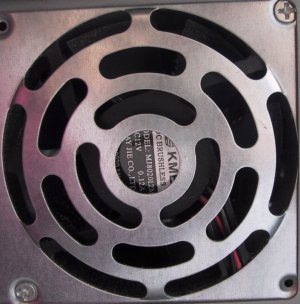
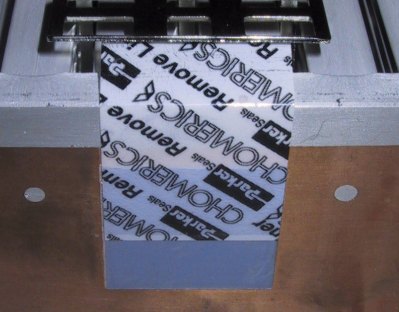
* Fan "grilles" that are simply stamped out of the case are often (not always) too thick. You can see one example of such a poorly designed grille below. Fan grilles made of chromed wire have better aerodynamics and will result in better performance and lower noise.
* The "cool" laser-cut fan grilles with various motives may look good, but often have poor aerodynamics, and often also provide only little protection.
* Putting spacers between case/fan grille may help to reduce air turbulence. As mentioned in the case cooling section, rubber spacers are available for mounting fans. They will decouple the fan from the case, and avoid the effect where the case serves as a resonance body for the fan.
* Fans with a smaller motor leave more space for rotors, and provide a more even air flow

poorgrille.jpg

Poorly designed fan grille


Fans and blowers
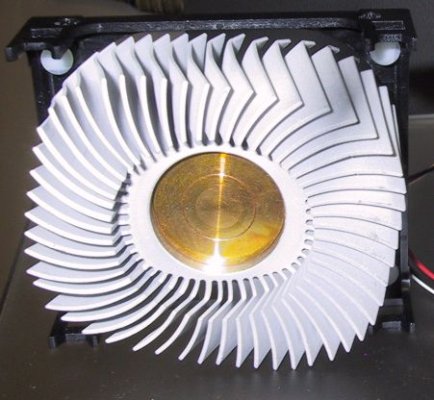
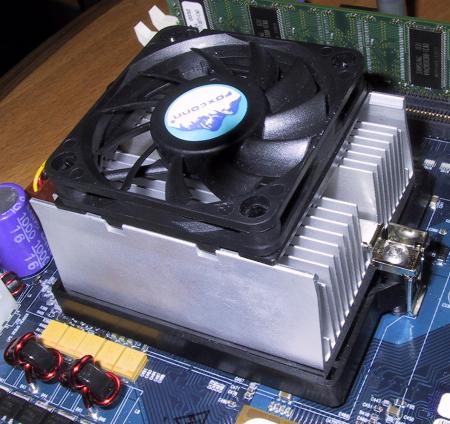
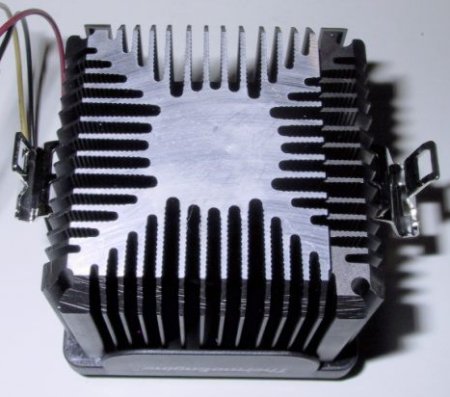
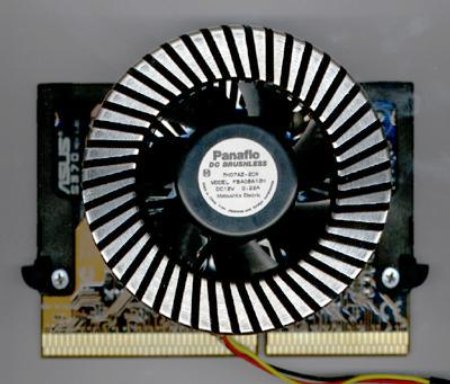
"Regular" fans are, more precisely, axial fans (the air flow is in the same direction as the motor's axis), as opposed to radial fans. Radial fans are commonly referred to as blowers or centrifugal fans. They feature a large diameter air intake on one (large) side, and an smaller air exhaust on the flat side. This results in a fast, dense airflow over a small area. This property makes blowers suitable for very targeted air cooling, especially under restricted space conditions. Blowers are used, for example, for cooling high-end graphics cards. They are also excellent for CPU cooling, provided that the heatsink they are used with is designed to take advantage of the blower's air flow characteristics. For notebook PC CPU coolers, blowers are most commonly used.

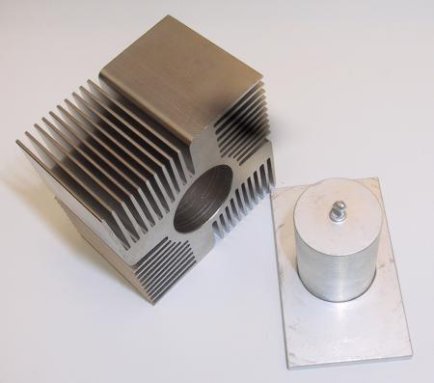
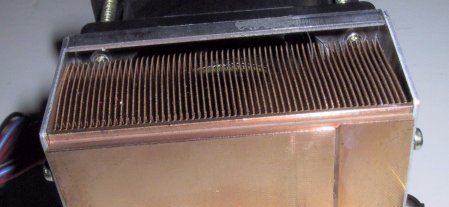
For case cooling, a regular axial fan will usually provide a better ratio between air flow and noise than a cooler. However, in conditions where space is restricted - for example in 1U rackmount servers - blowers are also commonly used for case or power supply ventilation. Below, two pictures of a Nidec blower, as it was used for the "Silverado" heatsink, which was a popular low-noise CPU cooler back in 2001.

blower.jpg


Fan temperature controls
Adding a temperature control to a fan would only add a few cents to the manufacturing cost of the fan. But most fans still come without temperature control. A temperature control integrated into the fan isn't always the best solution, for the following reasons:

* On inexpensive temperature-controlled fans, the temperature sensor is integrated in the fan case, so that it measures air temperature - not the temperature of the device to be cooled. Better and more expensive temperature-controlled fans have the sensor on a separate wire, so that it can be placed directly on the device to be cooled.
* In many cases, the temperature range at which the fan will increase its speed is not known, or not precisely specified. Even if it is, it cannot be adjusted by user. Very few fan manufacturers offer a choice of temperature different ranges.


If you are familiar with soldering, the better solution is to build yourself a temperature control, where you can adjust the temperature at which the fan speed increases yourself.


Popular fan manufacturers
I can certainly not offer a complete list of fan manufacturers, so what you see below is just a list of the most well-known fan manufacturers. For more links, see the "Links" section of this site.

* Papst - expensive, high quality. Especially the low-rpm sleeve bearing models are very quiet. Production facilities in Germany and Hungary.
* Sanyo Denki - expensive, high quality, Japan-based company.
* Verax - smaller fan manufacturer, expensive, high quality; ultra low noise fans with unusual rotor design available.
* NMB - less expensive, reliable, was founded - according to unconfirmed rumors - by ex-employees of Papst. Wide range of blowers available.
* Nidec - less expensive, reliable; Japan-based company.
* YS Tech - fans inexpensive, but reliable; Taiwan-based company, very interesting models with motor integrated into fan case available.
* Delta Electronics - fans inexpensive, but reliable; Taiwan-based with production facilities in China. High-rpm models available.
* There are countless other fan manufacturers, most of them from Asia. Quality can vary a lot, prices also vary and are sometimes amazingly low. You get what you pay for.
* Often, heatsink or case manufacturers simply put their brand sticker on fans produced by other companies. If you buy a fan under a certain brand name, this may not necessarily mean that the fan was actually manufactured by this company.


Rants about transparent fans with embedded LED lights
Recently, various transparent fan models with embedded LED lights in various colors have appeared on the market. Prices of these fans have dropped, and by now, they hardly cost more than a fan with a sober black case. Especially on eBay, such fans can be found at extremely low prices.

How is that possible? Simple: What manufacturers spend on the additional LEDs, they save on the bearing.

The most reputable fan manufacturers concentrate on improving quality, performance and noise of their fans; they usually do not manufacture transparent fans with flashy lights.

Personally, I have not yet seen a really high quality transparent LED fan. This is not a general rule, it is just my personal experience. My advice is to stay away from bargain-priced colored fans, and invest in quality, instead of stuff that supposedly looks cool.
 

Anusha

Member
Jun 13, 2006
25,864
5
0
Info about thermal compound

Why an interface material between the CPU and the heatsink?
The surface of a CPU or a heatsink is never entirely flat; if you place a heatsink directly on a CPU, there will be tiny (invisible) gaps between the two. Since air conducts heat poorly, these gaps have a very negative effect on the heat transfer. Therefore, an interface material with a high thermal conductivity is needed to fill these gaps, and thus improve heat conductivity between CPU and heatsink.

Years ago, when CPU hat power dissipations around 10 watts, a thermal interface material was optional, and most often used by overclockers to improve cooling performance. With todays CPUs, it is an absolute requirement.


Popular thermal interface materials

thermal_compound.jpg


Different thermal compounds
ArcticSilver II, AOS "HTC" Compound, standard silicone compound

The most commonly used interface material in the electronics cooling area is thermal compound, a sticky paste applied directly on the heatsink or CPU. A good-quality thermal compound will provide the best possible performance. However, the disadvantage of thermal compound is that it is quite messy to handle, and therefore not suitable for mass production.

For this reason, most heatsink manufacturers ship their heatsinks with a "thermal pad", which is supposed to replace thermal compound. The cheapest heatsinks usually come with silver/grey graphite pads. Graphite pads are inexpensive, but provide poor performance (unless a high pressure is applied to the pad, which is not the case when the CPU and heatsink are installed in a regular way). A graphite pad is better than no interface material at all, but if you have the choice, stay away from them.

Today, there are far more advanced thermal pads available, made by companies such as Power Devices, Bergquist or Chomerics, to name only a few. For links to the web sites of these companies, check out the links page. The performance of these pads can be roughly equal to standard thermal compound.

chomerics_pad.jpg

Chomerics pad, with its protective foil
The foil must be removed before installation

Newer thermal pads are usually made of a phase-change material, which melts to fill all the fine gaps between CPU and heatsink the first time the CPU is heated up. These pads are typically only suitable for one-time installation; if you uninstall the heatsink, e.g. in case of a CPU upgrade, the pad must be removed from the heatsink and replaced by thermal compound. In no case, a thermal pad and thermal compound should be used together.

preapplied_compound.jpg

A heatsink with preapplied thermal compound

Some heatsink manufacturers ship their coolers with a thin layer of preapplied thermal compound, protected by a plastic cap. This is good, since it combines the ease of handling of a thermal pad with the good performance of thermal compound. Here too, compound must be reapplied once the heatsink was uninstalled and reinstalled.

If installation time is not an issue, and you are looking to optimize the performance of your cooling system (e.g. for overclocking), the best bet is to purchase a high-quality thermal compound from a specialized retailer.


Other interface materials
Self-glueing thermal tape is very convenient for fixing small heatsinks (e.g. for memory chips), but in terms of thermal transfer, it is not as good as thermal compound.

Thermal epoxy is a two-component glue with added substances to improve thermal conductivity. It can also be very convenient for mounting heatsinks; performance is typically better than with self-glueing thermal tape, but not as good as thermal compound.


How should thermal compound be applied?
You should apply a very thin (paper thin) layer on the heatsink with your finger before installing it. Don't use too much - the thinner the layer, the better. But make sure that the entire contact area between CPU and heatsink is covered; otherwise hot-spots can form.

Then press the heatsink firmly on the CPU. Thermal compound is a very nasty substance, it is sticky and kind of hard to clean off your fingers. It does not conduct electricity, so don't panic if you spill small amounts of it on the CPU's pins. Even silver-based thermal compound has low electrical conductivity, and will not cause short circuits when spilled in small amounts.

Thermal compound normally does not get hard, it will stay sticky for years. But depending on the solvents used in the making of the compound, it may dry over the years. This is not a reason to worry; it will still do its job when dry, and there is no reason to replace dried thermal compound.


What does it consist of? Is it poisonous?
Most standard thermal compound consists of silicone. However, silicone doesn't have a high thermal conductivity, so they also contains zinc oxide to improve this. The zinc oxide also explains its white colour.

High-End thermal compounds are usually silicone-free, and use metal-based additives (e.g. aluminum oxide or nitride, or even pulverized silver!) instead of Zinc Oxide.

I have heard people saying that heat sink compound contained heavy metals and was poisonous. Neither silicone nor zinc oxide are poisonous However, especially with advanced thermal compounds, other ingredients may have been used, and are usually not declared. But despite strict laws on marking poisonous substances in Europe and the US, I have never seen a thermal compound that was marked as poisonous. Still, use common sense, and don't confuse it with tooth paste.


Performance of thermal compound
The performance of thermal compound is measured in W/mK. Standard silicon/zinc oxide thermal compound has thermal conductivities between 0.7 and 0.9 W/mK, high end compound can have thermal conductivities of around 2 - 3 W/mK or more. But not only the thermal conductivity matters. The compound should also be very smooth - if it is too grainy or too hard, then it is hard to apply a really thin layer.


Why does my CPU get hotter after I used thermal compound?
It doesn't - in no case your CPU get hotter after you applied thermal compound. However, you might think that it gets hotter, because the heatsink gets hotter. A hotter heatsink means better thermal conductivity between the CPU and the heatsink. The CPU itself will be cooler.


Also known as?
"heat sink jelly", "heatsink compound", "thermal compound", "thermal goo", "silicon compound".
 

Anusha

Member
Jun 13, 2006
25,864
5
0
Heatsink Lapping Guide #2

Source: DriverHeaven


I am sure that many of you have heard of lapping a heatsink on DH in the forums, as well as other places. This is probably one of the most common of all modifications done to a computer. That is basically because it is also one of the easiest modifications that there is to do. Lapping of the heatsink, is smoothing out, as well as making sure that it is a perfectly flat surface that makes contact with the CPU. This, along with replacing the stock thermal pad, will lower your CPU temperatures.

Every serious computer enthusiast will lap a heatsink as soon as they get it. For some of you that haven’t taken the step of building your own system yet, or may be getting ready to take a shot at it following Wildchild’s guide, this would be a very worthwhile modification for you, as well as for those of you that would just like to make your existing heatsink perform better.


Tools/Supplies Needed

• Wet/Dry grade sand paper: 320, 600, 1000 (finer grit is optional)
• Acetone based cleaner
• Rubbing alcohol
• Polishing compound
• Screw driver (flat and phillips heads)
• Dish soap
• Bowl of water
• Thermal compound (non conductive preferred)

Tools_1small.jpg

Heatsink_1small.jpg


This is the heatsink that I will be lapping for this guide. It is an older unit that came bundled with an Athlon XP 1600+ barebones kit. This unit is made by Speeze and is all aluminum. It really doesn’t make any difference what material the heatsink is made from, as this guide pertains to all heatsink’s on the market today, new and old.

Heatsink_partssmall.jpg


First thing that you want to do is prepare your heatsink for lapping by removing the fan and also the thermal pad that makes contact with your CPU. Removing the thermal pad, in some cases can be pretty tedious work. I normally use a razor blade to remove the bulk of the pad, and then clean off the rest using an acetone based cleaner. Most finger nail polish removers are acetone based and will work very well. Lay the razor blade almost flat and try to be as careful as possible, so you don’t gouge the heatsink material. A piece of plastic, like a credit card, can also be used.

Heatsink_pre-cleansmall.jpg


Once prepared, find the flattest surface that you can. This can either be a laminate kitchen counter top, marble surface, a pane of glass, or the equivalent. Once you have decided on a surface, tape your 320 grit paper on the surface, apply a few small drops of dish soap, for lubrication, in the center of the sand paper and then apply a small amount of water.

Before%20Sandingsmall.jpg


When looking at the bottom of the heatsink you will see the machining scratches on the surface. These scratches should pretty much all be going in the same direction. You will want to do what is known as “cross hatching” when sanding. To do this you will always move the heatsink in the opposite direction of the existing scratches. You need to lightly move the heatsink in a straight, back and forth motion, rotating ¼ turn every so often, until the beginning scratches have pretty much disappeared. Make sure to clean the surface of your heatsink occasionally and rinse off your sand paper if needed. Always clean your heatsink thoroughly before using a finer grit sand paper. Then change to a finer, higher numbered, sand paper, and repeat the process, making sure that you move the heatsink, crossing, the previous marks.

Sandedsmall.jpg


Once you have sanded using all of the grades of sand paper, wash off the heatsink with warm water and then dry completely. Once dried you want to then clean the surface with rubbing alcohol, to make sure that all deposits are removed. The above picture shows the sanded and cleaned surface.

Polishing the surface is not required if you have used a fine enough grade of sand paper, but really makes your work look good. And also the more mirrored your surface is, the more surface area will make contact and dissipate heat from the CPU. Always polish by hand, using a lent free cloth and move in a small circular motion.

polishedsmall.jpg


Here is a picture of the finished heatsink. All that is needed now is to reassemble your heatsink and apply your favorite thermal compound properly and install it. The finished heatsink should lower your CPU temperatures about 2-5 degree’s or more depending on how rough the surface was at the start, the material of the heatsink, and the thermal compound that you use.
 

Avengerxp

Member
Jan 15, 2009
153
1
0
where can i buy heat sink paste in sri lanka.....???
i cant find a damn place which sells them.... in unity

and anusha u r really good at copy pasting stuff.... :p
nice work guys.......
 

Thenura

Member
Apr 6, 2007
8,308
8
0
Avengerxp said:
where can i buy heat sink paste in sri lanka.....???
i cant find a damn place which sells them.... in unity

and anusha u r really good at copy pasting stuff.... :p
nice work guys.......
u should import
 

Anusha

Member
Jun 13, 2006
25,864
5
0
Avengerxp said:
where can i buy heat sink paste in sri lanka.....???
i cant find a damn place which sells them.... in unity

and anusha u r really good at copy pasting stuff.... :p
nice work guys.......
Thanks for the compliments. I don't deny I'm good at that, among other things :P
 

Avengerxp

Member
Jan 15, 2009
153
1
0
Thenura said:
u should import

come on..... heat sink compound ??? import.. no way..

when u get all the cpus and mobos here how come u dont get heatsink compound..

chk out the nearest electrical item store for heatsink paste...

dont buy the normal paste which is used for amplifiers, find the silicon paste, that would do..

and hey thanks for the advice, even though it wasn't helpfull :P