


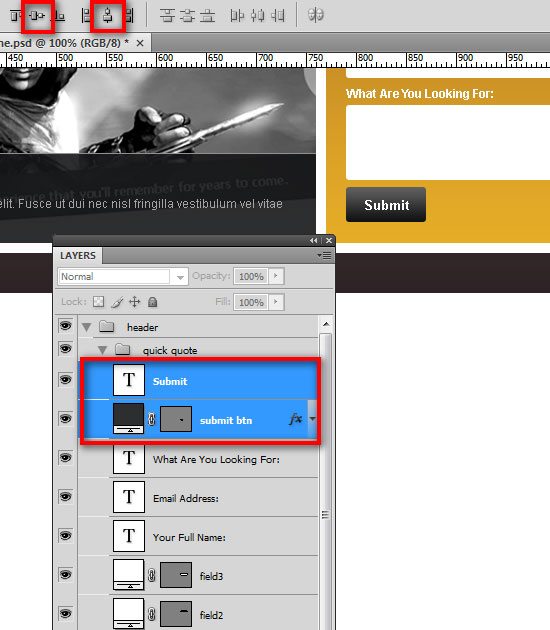
30 Choose the Move Tool (V) from the Tools panel and click Align vertical centers and Align horizontal centers from the Options bar. (Alternatively, you can get the same result by going to Layer > Align > Vertical Centers and Layer > Align > Horizontal Centers).
Creating the main content area
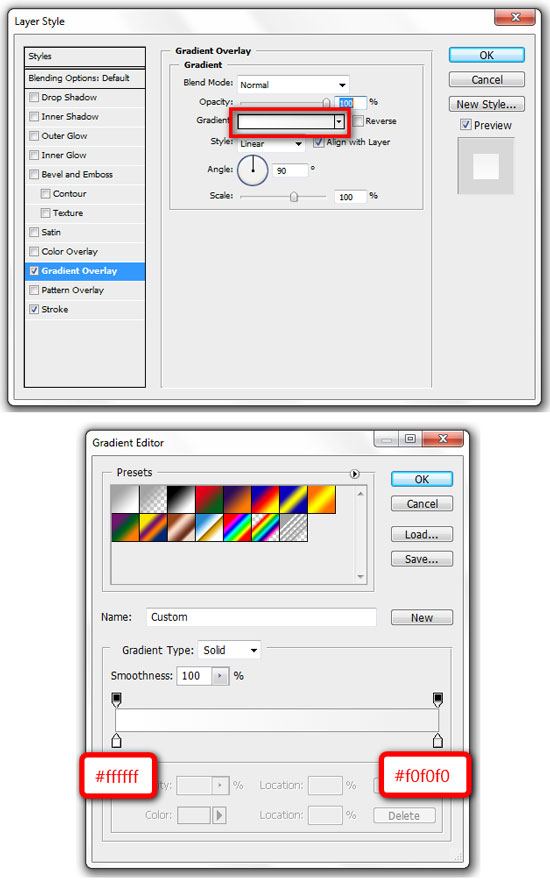
31 Create a new group and name it "content". Select the Rectangle Tool (U). Create a rectangle of 300px by 175px and name it "c01". Place this layer 30px below the header and 0px from the left guide. Double-click the layer and use the settings from the following image.
32 We are going to add content to this box now. Select the Horizontal Type Tool (T) and add the text, "About SmashingDzine". Make a selection of the "About" word using the Horizontal Type Tool (T), and then change its color to #b47825. Then make a selection of the "Smashing" word, and then change the color to #2f2f2f. Add a little description and a link text beneath the title. The following options were used for the title, description and link text. (You can adjust these options as needed).
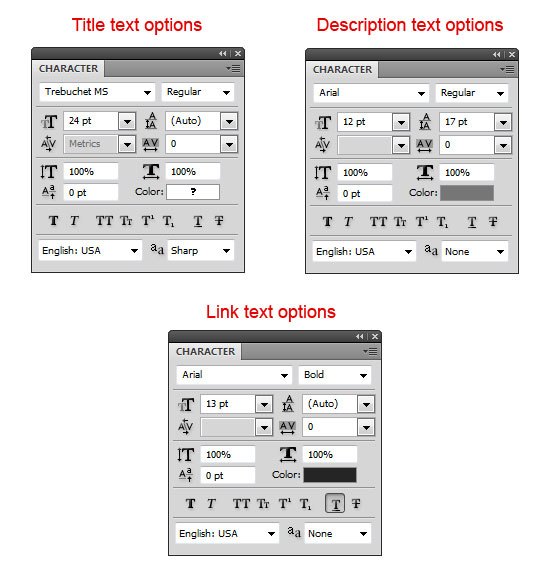
For the Title:
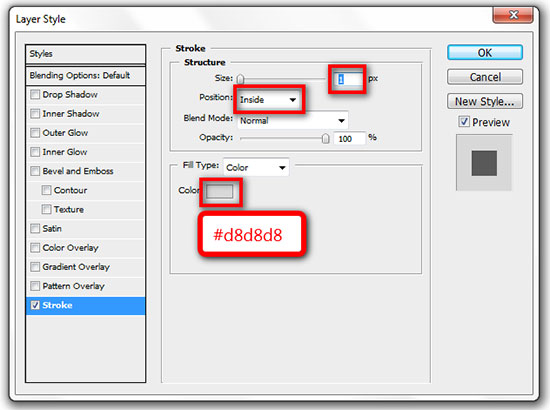
34 Create another box with the size of 82px by 82px and place it in the center of the "border" layer. Name this layer "box" and change the color of this square to #d5d5d5. Select all layers in this group ("content" group), go to Layer > New > Group from Layers (Ctrl/Cmd + G) and rename this new group "about".
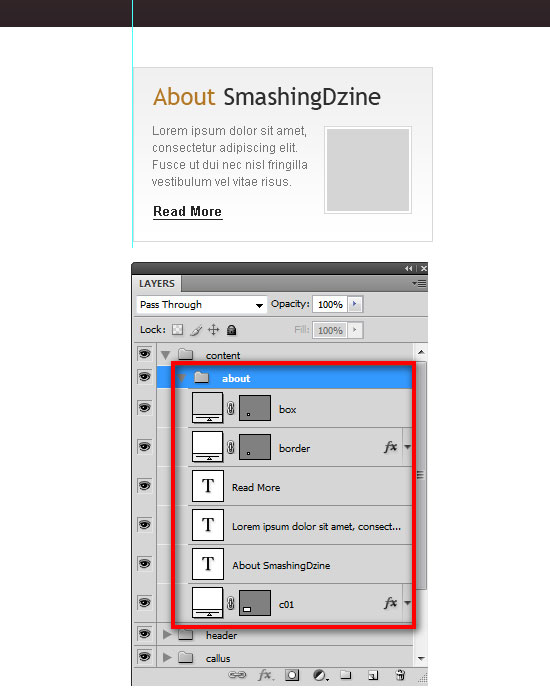
Note: The inside grey square box is a place holder for an image and can be replaced with any image of your choosing.
35 Duplicate the "about" group (Right-click on the group and select Duplicate Group) and name it "services". Right-click on the "services" group and select Duplicate Group again and name it "portfolio". We have three groups now ("about", "services", and "portfolio"). Move the last group ("portfolio") to the right guide as shown below.
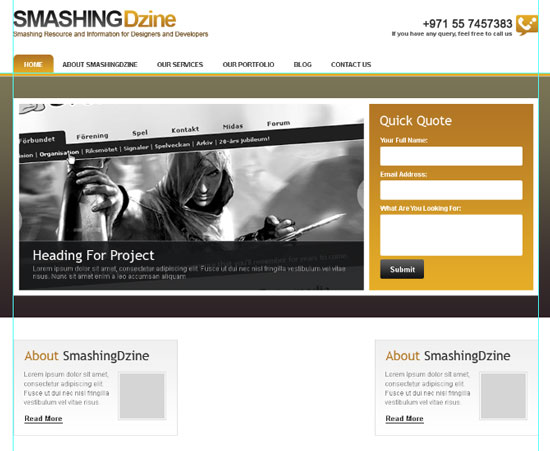
36 Select all three groups in the Layers panel, and then go to Layer > Distribute > Horizontal Centers to space them out equally. Click here to see the full size image of the following image.

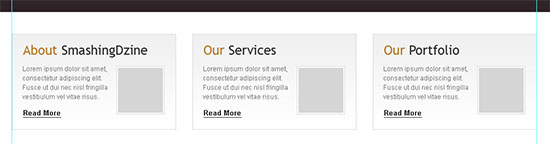
37 Change the titles for the "services" group (center) and "portfolio" group (right) as shown below. (You can change these titles according to your requirement.)
Creating the footer
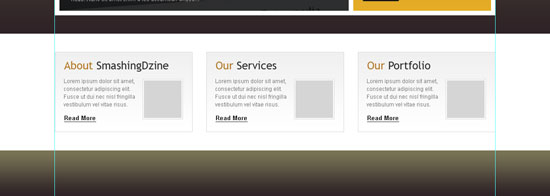
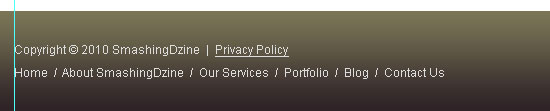
38 Create a new group and name it "footer". Select the Rectangle Tool (U) and create a rectangle with the size of of 1200px by 100px at the bottom of our design layout. Name this layer "footer bg". Use the same Gradient Overlay style as the "header bg" layer by right-clicking the "header bg" layer and choosing Copy Layer Style. Go back to the footer group, right-click the "footer bg" layer and select Paste Layer Style.
39Select the Horizontal Type Tool (T) and add copyright text and footer links text on the left using the font Arial, size of 12pt and a grey color (#dddddd).
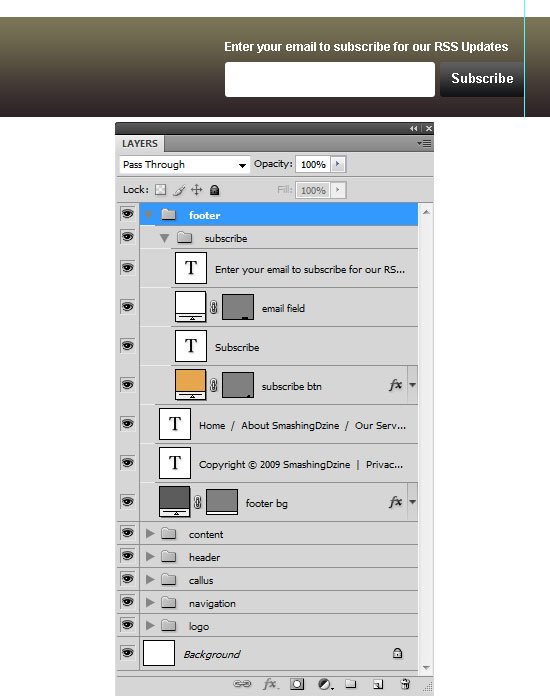
40 We are going to add the email subscription section on the right. Create a new group inside the "footer" group and name it "subscribe". Select the Rounded Rectangle Tool (U) and create a rectangle of 85px by 35px. Name this layer "subscribe btn".
41 Repeat Step 26 for adding the form fields and labels.
42 Select the Horizontal Type Tool (T) and type "Subscribe" using the font Arial, style set to Bold and size at 13pt. Select both layers ("subscribe btn" and "Subscribe text").
43 Repeat Step 28 for creating the subscribe button.
44 Select the Rounded Rectangle Tool (U) and set the radius to 3px. Create a rounded rectangle with the size 210px by 35px using a white color (#ffffff) and name this shape layer as "email field". Add a text line above "email field".
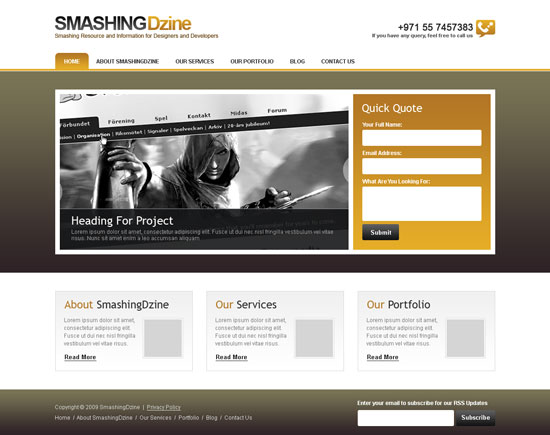
Final Result
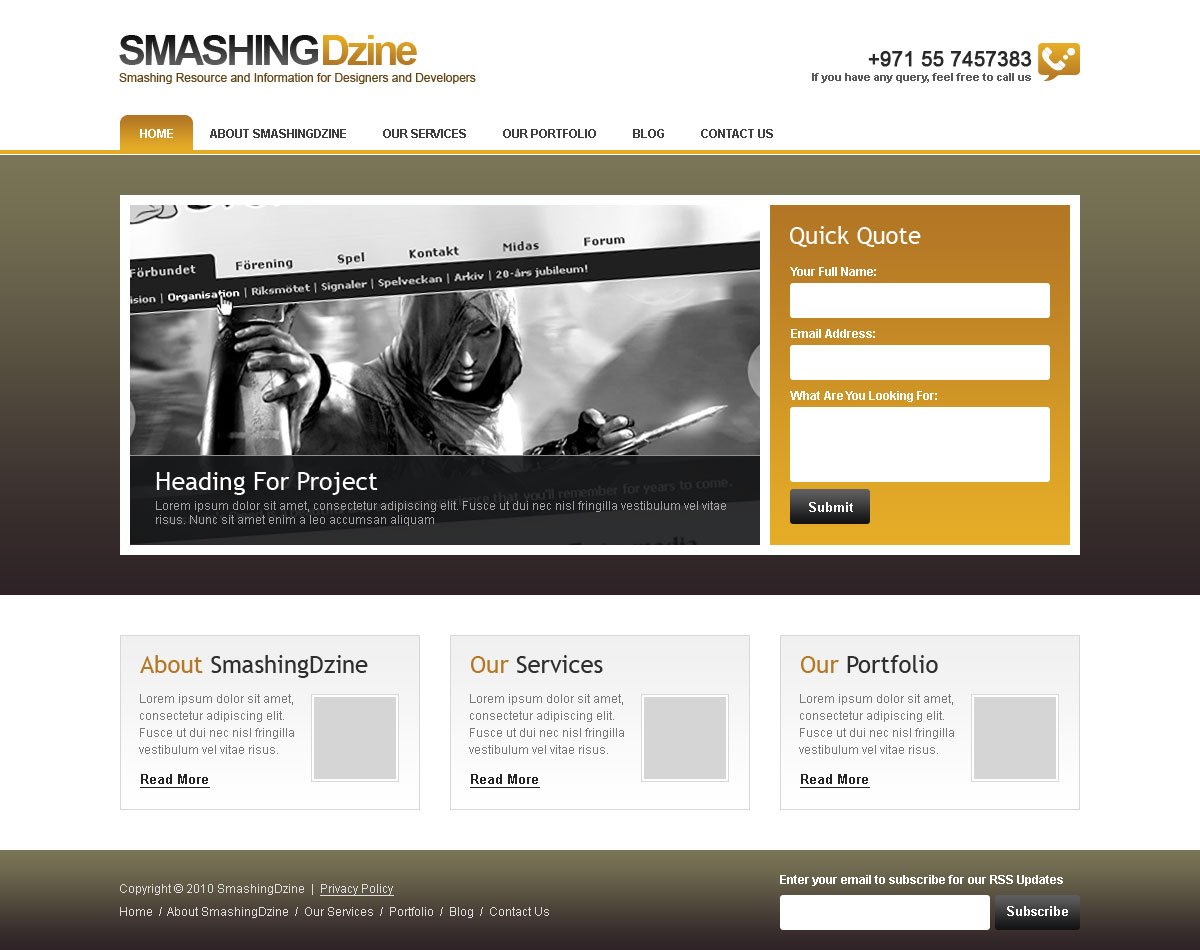
OK, that’s it and we are done. Here is the final result. Click on the image below to see the full size layout.
Thanks for following along with my tutorial. I hope you all enjoyed and learned something new from this tutorial. Kindly leave your comments below and share your thoughts and opinions, I would love to hear them. You can also share this design tutorial to your friends if you think it could be helpful to them!
Creating the main content area
31 Create a new group and name it "content". Select the Rectangle Tool (U). Create a rectangle of 300px by 175px and name it "c01". Place this layer 30px below the header and 0px from the left guide. Double-click the layer and use the settings from the following image.
32 We are going to add content to this box now. Select the Horizontal Type Tool (T) and add the text, "About SmashingDzine". Make a selection of the "About" word using the Horizontal Type Tool (T), and then change its color to #b47825. Then make a selection of the "Smashing" word, and then change the color to #2f2f2f. Add a little description and a link text beneath the title. The following options were used for the title, description and link text. (You can adjust these options as needed).
For the Title:
- Font: Trebuchet MS, style: Normal, size: 24pt, anti-aliasing method: Sharp
- Font: Arial, style: Normal, size: 12pt, anti-aliasing method: None, color: #767676
- Font: Arial, style: Bold, size: 13pt, anti-aliasing method: None, color: #252525, Underline
34 Create another box with the size of 82px by 82px and place it in the center of the "border" layer. Name this layer "box" and change the color of this square to #d5d5d5. Select all layers in this group ("content" group), go to Layer > New > Group from Layers (Ctrl/Cmd + G) and rename this new group "about".
Note: The inside grey square box is a place holder for an image and can be replaced with any image of your choosing.
35 Duplicate the "about" group (Right-click on the group and select Duplicate Group) and name it "services". Right-click on the "services" group and select Duplicate Group again and name it "portfolio". We have three groups now ("about", "services", and "portfolio"). Move the last group ("portfolio") to the right guide as shown below.
36 Select all three groups in the Layers panel, and then go to Layer > Distribute > Horizontal Centers to space them out equally. Click here to see the full size image of the following image.

37 Change the titles for the "services" group (center) and "portfolio" group (right) as shown below. (You can change these titles according to your requirement.)
Creating the footer
38 Create a new group and name it "footer". Select the Rectangle Tool (U) and create a rectangle with the size of of 1200px by 100px at the bottom of our design layout. Name this layer "footer bg". Use the same Gradient Overlay style as the "header bg" layer by right-clicking the "header bg" layer and choosing Copy Layer Style. Go back to the footer group, right-click the "footer bg" layer and select Paste Layer Style.
39Select the Horizontal Type Tool (T) and add copyright text and footer links text on the left using the font Arial, size of 12pt and a grey color (#dddddd).
40 We are going to add the email subscription section on the right. Create a new group inside the "footer" group and name it "subscribe". Select the Rounded Rectangle Tool (U) and create a rectangle of 85px by 35px. Name this layer "subscribe btn".
41 Repeat Step 26 for adding the form fields and labels.
42 Select the Horizontal Type Tool (T) and type "Subscribe" using the font Arial, style set to Bold and size at 13pt. Select both layers ("subscribe btn" and "Subscribe text").
43 Repeat Step 28 for creating the subscribe button.
44 Select the Rounded Rectangle Tool (U) and set the radius to 3px. Create a rounded rectangle with the size 210px by 35px using a white color (#ffffff) and name this shape layer as "email field". Add a text line above "email field".
Final Result
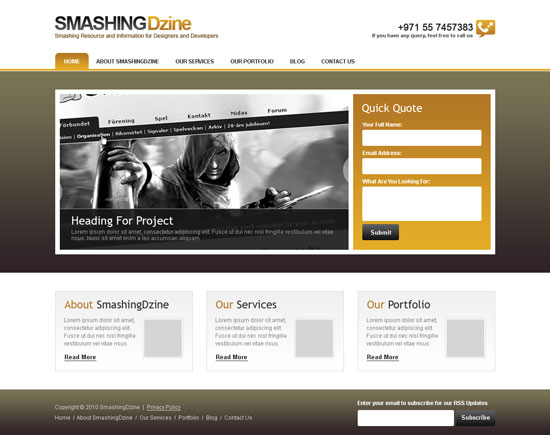
OK, that’s it and we are done. Here is the final result. Click on the image below to see the full size layout.
Thanks for following along with my tutorial. I hope you all enjoyed and learned something new from this tutorial. Kindly leave your comments below and share your thoughts and opinions, I would love to hear them. You can also share this design tutorial to your friends if you think it could be helpful to them!


 )
)


