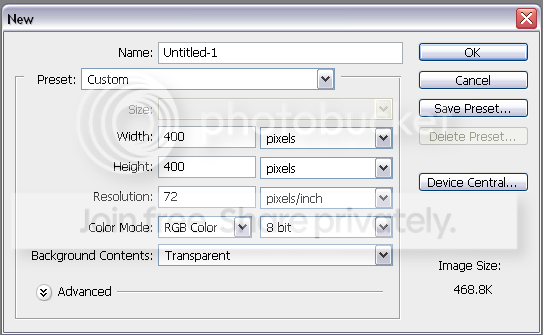
First make a new canvas that is 400 x 400
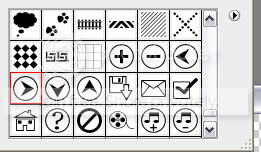
Click on Custom Shapes and find one that looks like this:
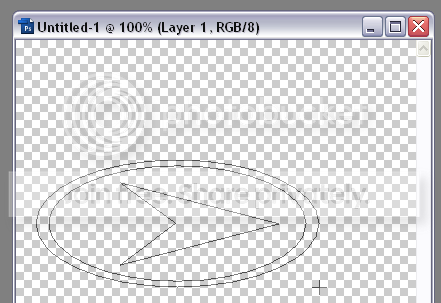
Draw it out similar to the following image.
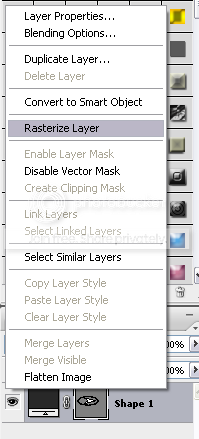
Right click on the layer in the layer palette and click on Rasterize Layer.
Select the Polygonal Lasso Tool(
 ) and select the “arrow part” of the shape.
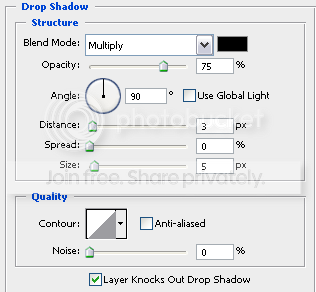
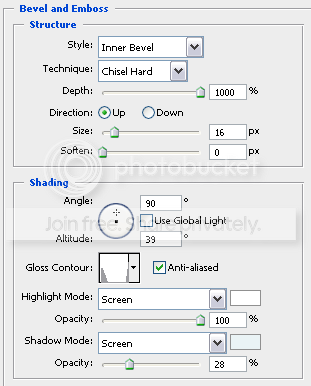
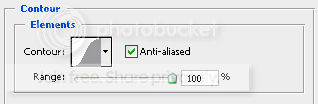
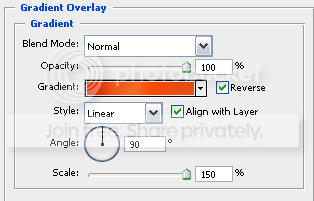
Press Ctrl +C and Ctrl + V on your keyboard. A new layer should appear in your layer palette. You might have to position the new layer so it overlaps the original arrow perfectly. Right-click on the new layer and click on Blending Options and use the following styles:

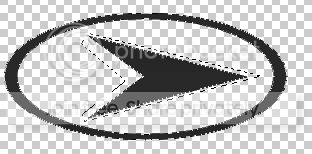
Your logo should look like this so far:
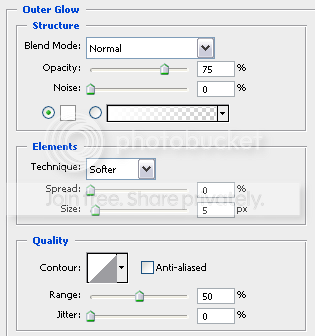
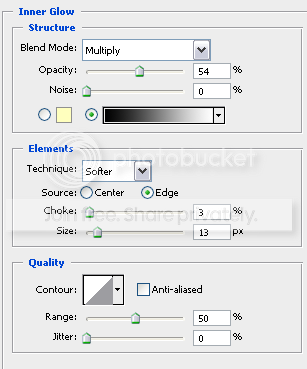
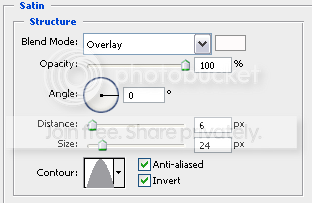
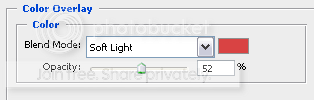
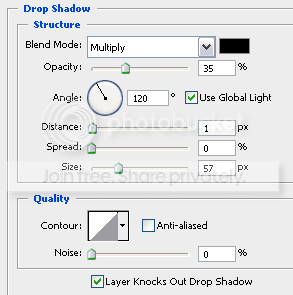
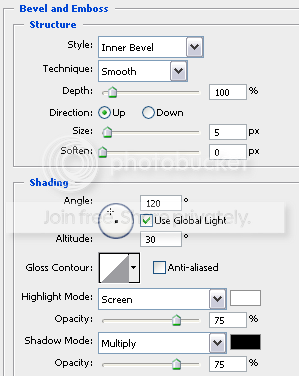
Select the original layer and go to Blending Options and add the following layer styles

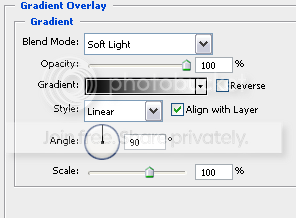
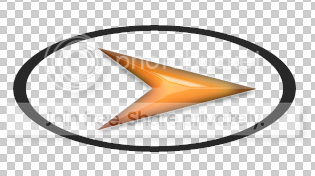
Your logo is almost finished. It should look like this so far:
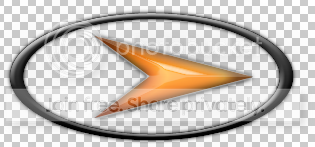
Select both of the layers by Ctrl clicking on them. Press Ctrl +E on your keyboard. This will merge the layers. Press V on your keyboard to select the move tool. Now select the one and only layer in your layer palette. Press Alt +Up arrow key twice. This will duplicate the layer twice and move it up to give a 3D effect to the logo. Your logo should look like this at the end:
Thats it! Enjoy using this effect on other custom shapes.
Click on Custom Shapes and find one that looks like this:
Draw it out similar to the following image.
Right click on the layer in the layer palette and click on Rasterize Layer.
Select the Polygonal Lasso Tool(
Press Ctrl +C and Ctrl + V on your keyboard. A new layer should appear in your layer palette. You might have to position the new layer so it overlaps the original arrow perfectly. Right-click on the new layer and click on Blending Options and use the following styles:
Your logo should look like this so far:
Select the original layer and go to Blending Options and add the following layer styles
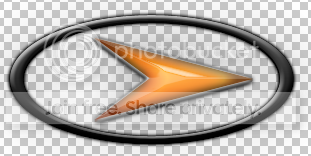
Your logo is almost finished. It should look like this so far:
Select both of the layers by Ctrl clicking on them. Press Ctrl +E on your keyboard. This will merge the layers. Press V on your keyboard to select the move tool. Now select the one and only layer in your layer palette. Press Alt +Up arrow key twice. This will duplicate the layer twice and move it up to give a 3D effect to the logo. Your logo should look like this at the end:
Thats it! Enjoy using this effect on other custom shapes.
