ඔන්න android නුලේ දෙවැනි post එක ගෙනාව
බලපු නැති අය පලවෙනි එක මෙතනින් බලන්න - http://www.elakiri.com/forum/showthread.php?p=19014715#post19014715
අපි පොඩි app එකක් හදමු...මෙන්න මේක

මේ app එකේ text එකක් type කරල show button එක click කලාම text කියන තැන ඒක පෙන්නන්න ඕනේ..clear button click කළාම ආයෙම text කියල වැටෙන්න ඕනේ..
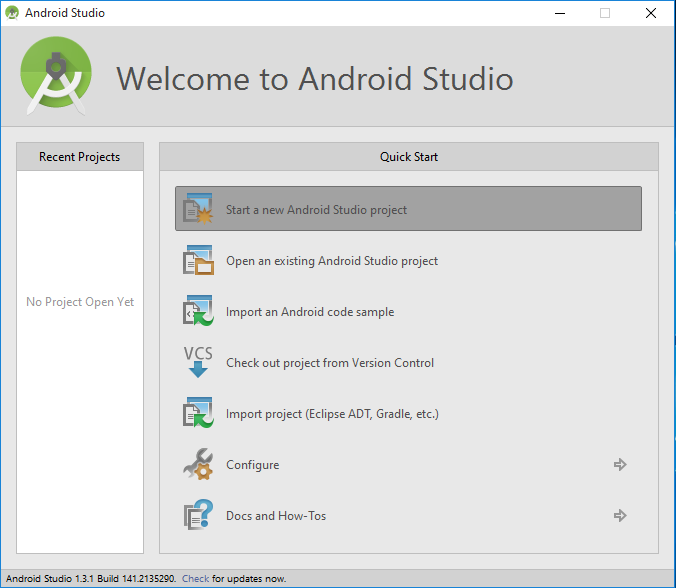
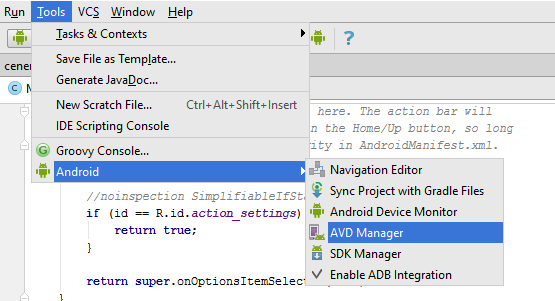
Android Studio [FONT="]එක open කරන්න...[/FONT]

[FONT="]wellcome window එකක් ඒවි..එකෙන් Start a new android studio project දෙන්න[/FONT]
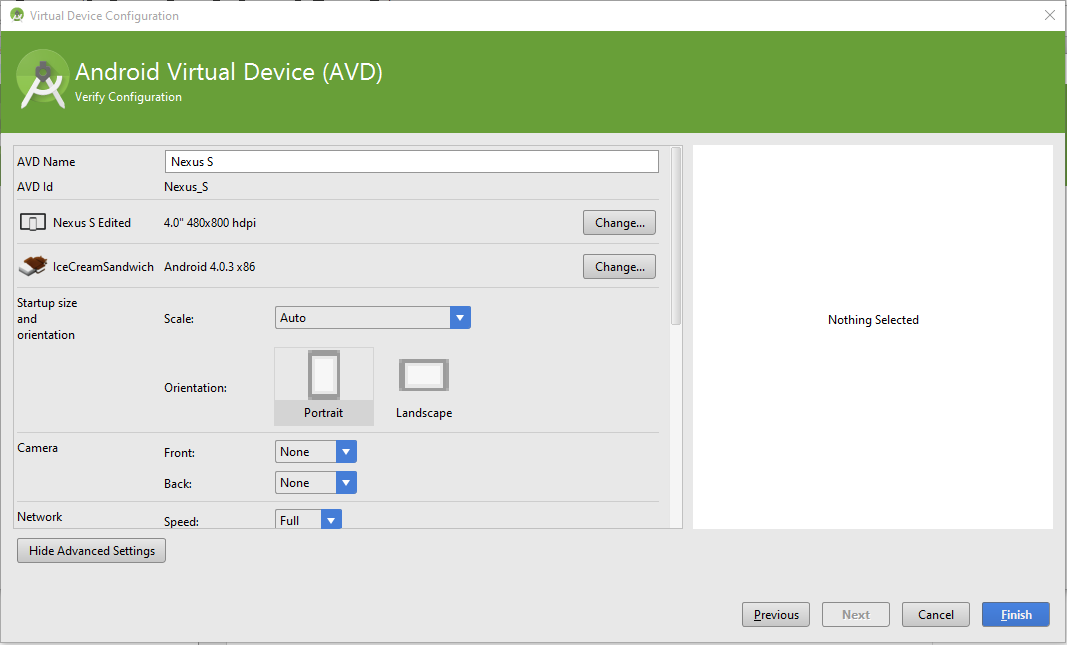
ඊළගට එන window එකෙන් app එකට නමක් දෙන්න..package name එකට කැමති නමක් දෙන්න.අගට .com කියන එක තියන්න..

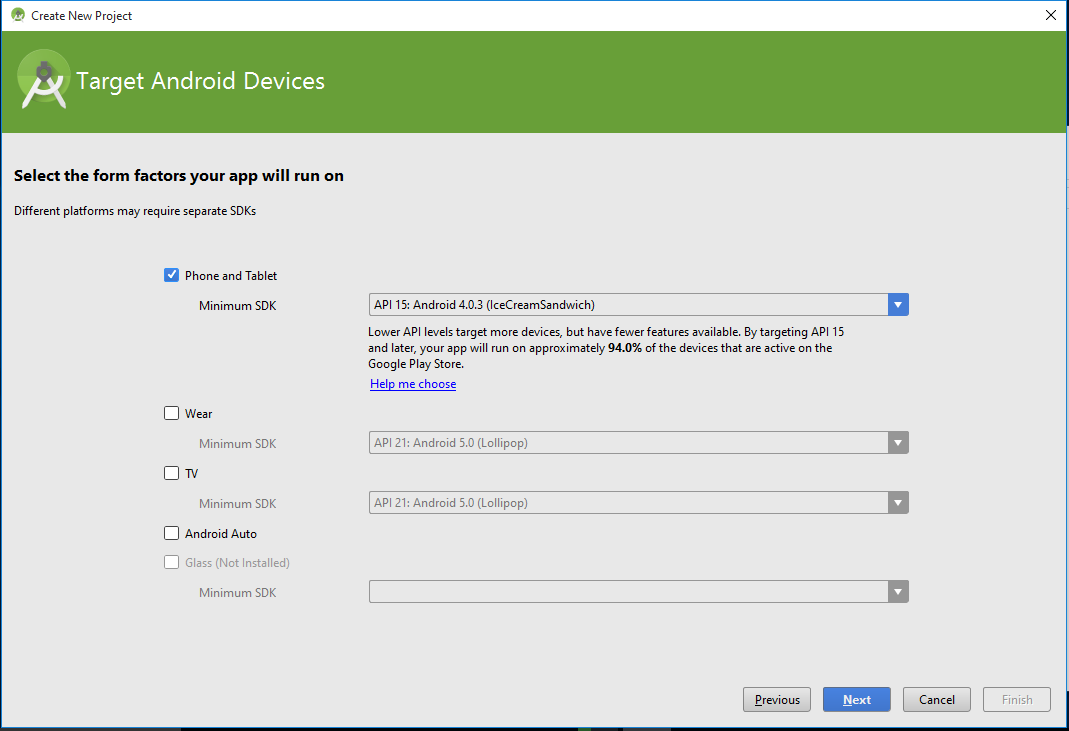
මෙතනින් minimum sdk එක ඒ කියන්නේ ඔයා ලියන app එක run වෙන්න ඕනේඅවම os level එක..මේක ice cream sandwitch තියන්න
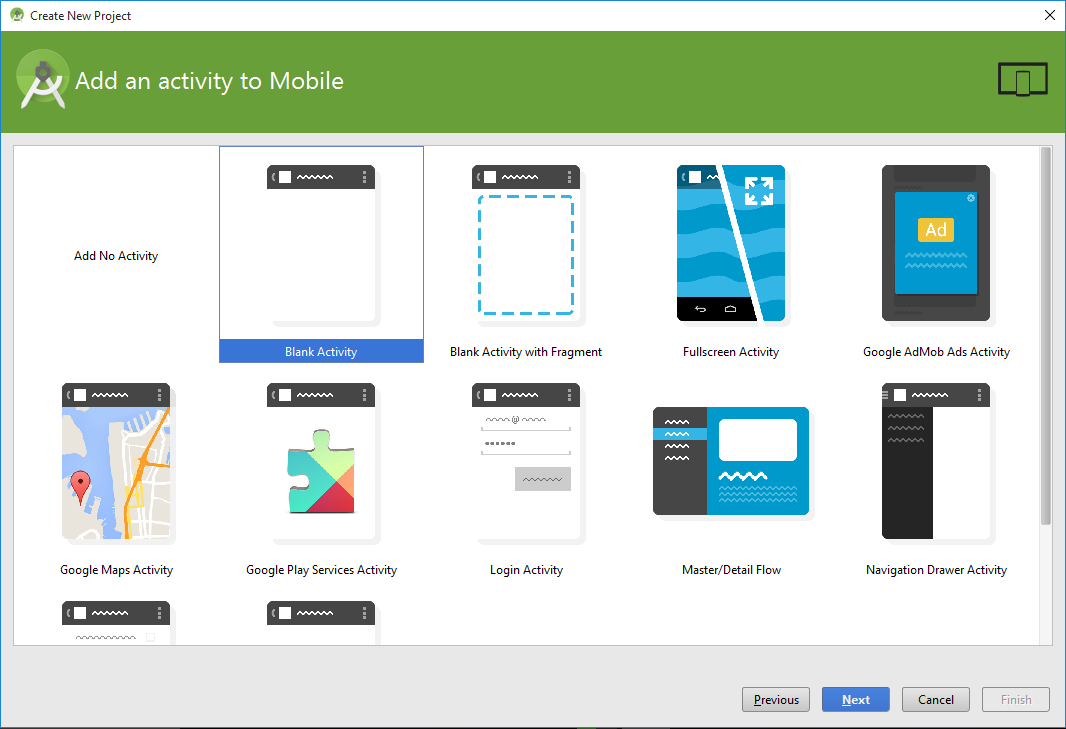
දැන් එන්නේ app එකට activity එකක් add කරගන්න window එක..මෙතනින් blank activity එකක් add කරගන්න...activity එකක් කියන්නේ java class එකක්..එකේ තමා අපි app එකට අදාල codings ලියන්නේ
මෙතනින් අපේ activity එකට නමක් දෙන්න..ඊට පහලින් තියෙන්නේ layout එකේ නම එකත් කැමති නමක් දෙන්න..මම activity එක main විදියටත්..layout එක main_layout විදියටත් තියන්න...finish කරන්න

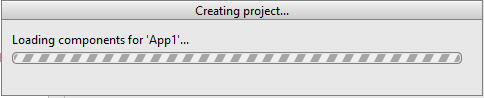
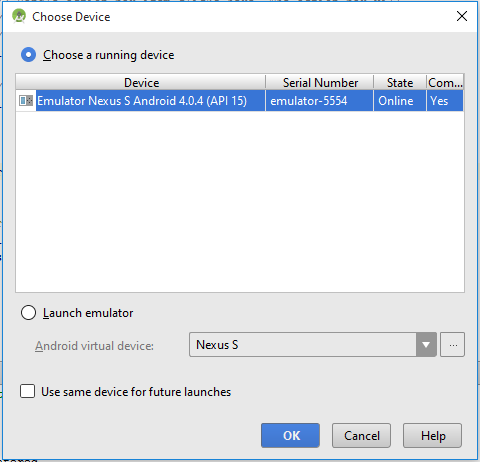
project එක create වෙන්න ටිකක් වෙලා යාවි
android sutdio open වෙලා rendering කියල වැටේවි..
ඊට පස්සේ xml file එකේ නැත්තන් layout file එකේ view එකක් පෙන්නයි..මේ view එක තමා කලින් render වුනේ..ඔයාලට rendering problem කියල error එකක් වැටුනොත් apptheme button එකෙන් theme එක මාරු කරන්න

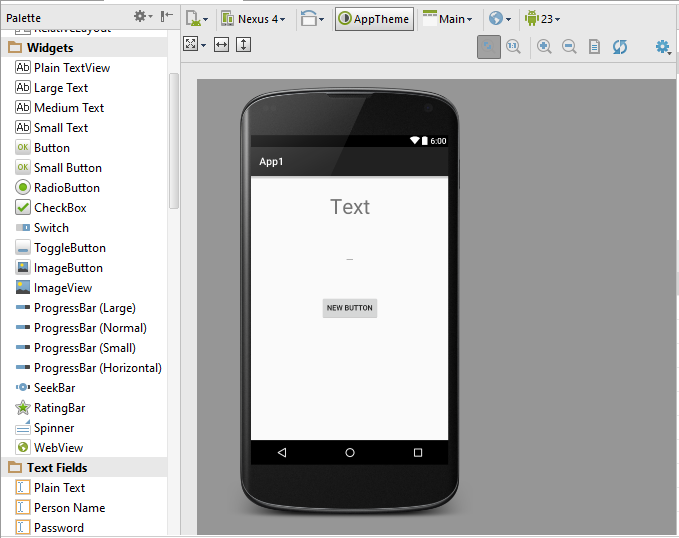
මේ තියෙන්නේ android studio window එකේ ප්රධාන කොටස් ටික..රතු පාටින් කොටු කරලා තියෙන්නේ දැනට open වෙලා තියෙන main_layout file එකේ design view එක code එක බලන්න ඕනෙනම් Text ටැබ් එක(දෙවැනි රතු කොටුව) click කරන්න..ඔය ඉලක්කම් දාල තියෙන කොටස් වලින් palette window, component tree එක සහ properties window එක අදාළ වෙන්නේ xml file වල design ටැබ් එක open කලාම විතරයි..නැත්තන් ඒවා පෙන්නන්නේ නැහැ
01 project window
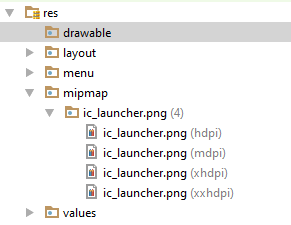
මේකේ තමයි projects පෙන්නන්නේ..project එක expand කලාම ප්රධාන කොටස් තුනක් පෙන්නනවා.ඒ තමයි manifests file එක,java classes සහ අනිත් resources..xml files,grapics,icons වගේ දේවල් තියෙන්නේ resources වල
02 palette
මේකේ තමයි අපිට අවශ්ය component තියෙන්නේ..අවශ්ය component ඇදල design එක උඩට දාල සිංහලෙන් කියනවනම් drag and drop කරලා හදා ගන්න පුළුවන්
03 properties window
component එකක් උඩ click කරලා මේ window එක හරහා ඒ අදාළ component වල properties වෙනස් කරගන්න පුලුවන්. code එකෙනුත් කරන්නත් පුළුවන්
04 Menu bar
මේ bar එකේ තියෙන්නේ categorize කරපු menus ටිකක්.
05 Tool bar
නිතරම භාවිතා වෙන tools ටික තමයි මෙතන තියෙන්නේ..tool උඩට mouse pointer එක ගෙනිච්චම පොඩි බැලූන් මෙනු එකක නම පෙන්නනවා
06
අපේ design එකේ තියෙන component ටික පෙන්නන්නේ මෙතන..component පෙන්නන්නේ ඒවා design එකේ තියෙන පිළිවෙලට..ඒ ඒ layout වලට අදාල component ඒ ඒ layout ඇතුලේ තියෙන්නේ..

දැන් xml layout එකේ code එක open කරන්න..code ටැබ් එකෙන්..එතකොට code එක බලාගන්න පුළුවන්..අලුත් window එකක් එනවා දකුණු පැත්තෙන්..preview window එක..අපි code එකෙන් කරන වෙනස්කම් එවලේම මෙතන පෙන්නනවා
මම code එකේ පොඩි වෙනස්කම් ටිකක් කරනවා..මේ දාන්නේ වෙනස් කරපු හෝ අලුතින් එකතු කරපුවා.තියෙන අනිත් code මකන්න එපා..
android:text="Text" විදියටත්
android:layout_width="match_parent" විදියටත් වෙනස් කරගන්නවා..
මුල් code එක වෙනස් කලාම helloworld කියන text එක Text විදියට වෙනස් වේවි..ඊට පස්සේ code එකෙන් textview එකේ size එක display එකේ දිගට සමාන දිගක් ගනීවි..
මේ code වලින් අපි මේ component එකේ attributes අපිට ඕනේ විදියට වෙනස් කරගන්න එකයි කරන්නේ..properties window එක හරහාත් මේක කරගන්න පුළුවන්..එතකොට මේ code ටික android studio එකෙන් auto generate කරනවා..ඊලග post එකෙන් මේ ගැන වැඩිදුර විස්තර දාන්නම්..දැනට දල අදහසක් ගන්න
android:layout_marginTop="20dp" - top margin එක dp 20ක් දාගත්ත..dp කියන්නේ Density-independent Pixels කියන එක..මේ ගැනත් ඊලග post එකෙන් පැහැදිලි කරන්නම්
android:textSize="40dp" - text එකේ size එක dp 40ක් කරගත්ත
android:gravity="center_horizontal" - text එක center allign කරගත්තා..
android:id="@+id/View1" - මේ textview එකට id එකක් දුන්නා.id එකක් දෙන්නේ code කරද්දී මේ component වෙන් කරලා හදුනාගන්න..
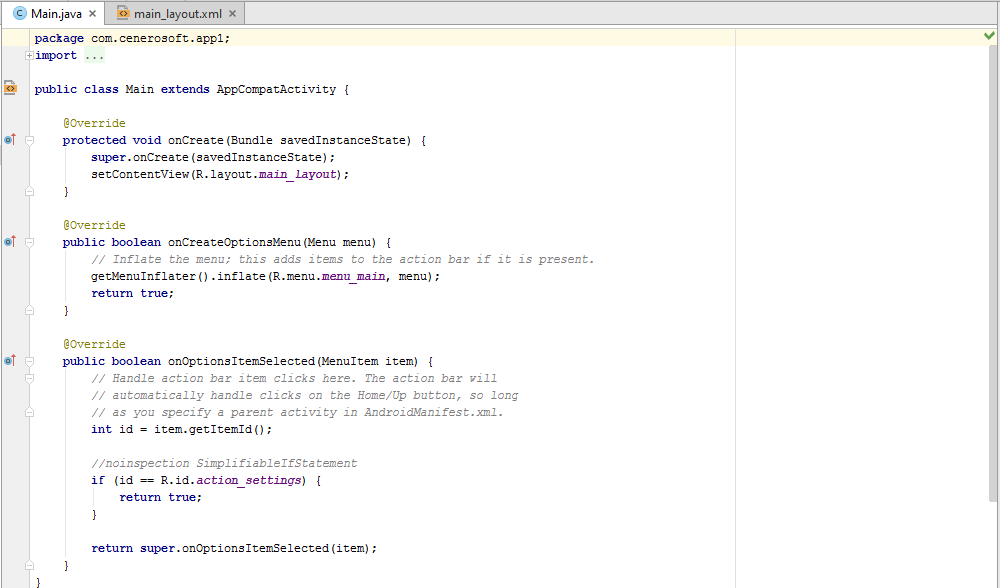
මම ආයෙත් design view එකට ගිහින් palette එකේ Text Fields කියන category එකේ තියෙන palin text එකක් drag and drop කරගන්නවා..

ඊට පහලින් Widgets කියන category එකේ තියෙන button එකක් drag and drop කරගන්නවා..

මේ විදිහට පෙනේවි දැන්
දැන් මම ආයේ code එකට යනවා..දැන් පේනවා මේ edittext ඒ කියන්නේ textfield එක සහ button වලට අදාල code auto generate වෙලා තියෙනවා..මම මෙවගේත් අර attributes ටිකම වෙනස් කරගන්නවා..
පහලින් වෙනස් කරපු code කොටස් දාන්නම්..මේ දාන්නේ වෙනස් කරපු හෝ අලුතින් එකතු කරපුවා.තියෙන අනිත් code මකන්න එපා..
<EditText
android:layout_width="match_parent"
android:id="@+id/tf"
android:layout_marginTop="20dp"
android:textSize="20dp"
android:gravity="center_horizontal"/>
<Button
android:layout_width="match_parent"
android:text="Show"
android:id="@+id/but1"
android:layout_below="@+id/tf"
මෙතන කියන්නේ මේ button එක තියෙන්නේ edittext එකට පහලින් කියල..අපි edittext එකේ id එක වෙනස් කලානේ tf කියල..මෙතනත් ඒ id එක දෙන්න ඕනේ
android:layout_marginTop="20dp"
android:textSize="20dp"
android:gravity="center_horizontal"/>

තව පොඩි button එකක් දාගන්න ඕනනේ..textclear කරගන්න..මම තියෙන button එකේ code එක copy කරලා ඊට පහලින් paste කරගන්නවා..දැන් වෙනස් කරගන්නවා.මේ දාන්නේ වෙනස් කරපු හෝ අලුතින් එකතු කරපුවා.තියෙන අනිත් code මකන්න එපා..
<Button
android:layout_width="match_parent"
android:text="Clear"
android:id="@+id/but2"
android:layout_below="@+id/but1"
android:layout_marginTop="20dp"
android:textSize="20dp"
android:gravity="center_horizontal"/>

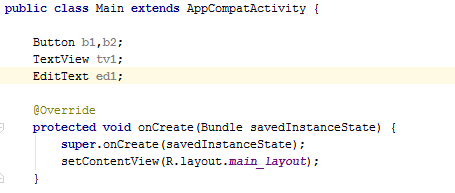
දැන් මම java class එකේ වැඩ පටන් ගන්නවා..මේ class එකේ override කරපු methods හතරක් පෙන්න තියෙනවා..මෙතනින් එක method එකයි අපි අද වැඩේට පාවිච්චි කරන්නේ..on create method එක..ජාවා app ලියද්දි constructor එකේ වෙන වැඩේ තමයි මේ method එකේ වෙන්නේ..ඒ කියන්නේ app එක ස්ටාර්ට් වෙනකොට වෙන්න ඕනේ දේවල් මෙතන ලියන්නේ
මුලින්ම අපි xml file එකේ හදපු component ටිකට reference ටිකක් define කරගන්න ඕන.
සරලව කිව්වොත් අර xml file එකේ දීපු id වලින් කතාකලාට කෙලින්ම මෙයාලව access කරන්න බැහැ..මොකද මෙයාල ඉන්නේ java class එකෙන් පිට නිසා..ඒ නිසා එයාල වගේ කට්ටියගේ object එකක් මේ class එකේ හදලා ඒ නම් වලින් xml file එකේ component ටික අල්ල ගන්න ඕනේ..එතකොට ඒ object එක හරහා අර component access කරන්න පුළුවන්..මෙතන කරන්නේ හදන එක..
මේක කරන්නේ class එක ඇතුලේ..method වල නෙවේ..oncreate method එකට උඩින් හදා ගන්නකෝ
button වල b1,b2 කියලා මම කමා දාල දෙකක් define කලේ..දෙපාරකට define නොකර එකම code එකෙන්
 දැන් ඒ හදාගත්තු reference ටිකට xml file එකේ component ටික initialize කරන්න ඕනේ.
සරලව කිව්වොත් xml file එකේ component ටික අල්ල ගන්න ඕනේ.
මම එක code පේලියක් පැහැදිලි කරන්නම්
b1=(Button)findViewById(R.id.but1);
b1 කියන්නේ හදාගත්තු button refference එකක්..findViewById() කියන method එක පාවිච්චි කරනවා xml component එක හොයාගන්න..
R.id.but1 කියන කොටසේ R කියන්නේ මේ අපි ලියන app එකේ auto generate උන java class එකක්..එකේ තමයි xml component ගැන විස්තර තියෙන්නේ..එකේ id වල but1 1 කියන xml component එක තමා R.id.but1 කියල ලිව්වේ..
මම කිව්වනේ මේ class එකේ object එකක් හදල xml component එක අල්ල ගන්නවා කියල..ඇත්තටම වෙන්නේ auto generate වෙන R class එකෙන් තමා ඒ component අල්ලන් ඉන්නේ..අපි කරන්නේ R එකේ තියෙන component අල්ලගන්න එක

දැන් අපි show button එක click කරද්දී වෙන්නඕනේ දේ ලියාගන්නඕන..මුලින්මbutton එකට onclick listner එකක් දාගන්න ඕනේ
සරලව කිව්වොත් මේ button එක ඔබනවද කියල අහන ඉන්න method එකක් දාගන්න ඕනේ.
onclick listner කියල class එකක් android api එකේ හදල තියෙන්නේ.එකේ තියෙනේ onclick කියන method එකෙන් අපිට මේ වැඩේ කරගත්තැහැකි..අපිට එක පාවිච්චි කරන්න විතරයි තියෙන්නේ
මම මේ class එක implement කරගන්නවා onclick listner class එකට.implement කරනවා කියන එක නම් මෙතන පැහැදිලි කරන්නේ නැහැ..එක Java OOP වලට අදාළ දෙයක්..දන්නේ නැත්තන්..net search පාරක් දාන්න..සිංහලෙන් ලිපි තියනවා
කරන්නේ මෙහෙමයි..code කරද්දී ctrl+space ගහල suggetion ගන්න
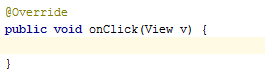
public class Main extends AppCompatActivity මෙන්න මෙතන type කරන්න OnClickListener කියල {
ctrl+space ගහන්න
onclick listner දෙකක් පෙනේවි දාගන්න ඕනේ android view.View එක.
implement කලාම method override කරලා පාවිච්චි කරන්න ඕනේ..error පෙන්නන්නේ method override කරලා නැති නිසා

මම java class එකේ පහලම..ඒ කියන්නේ අවසාන සඟල වරහනට } උඩින්.click කරලා ctrl+o ඔබනවා
එන window එකේ android view.View.OnClickListener යටතේ තියෙන onClick method එක select කරන්න
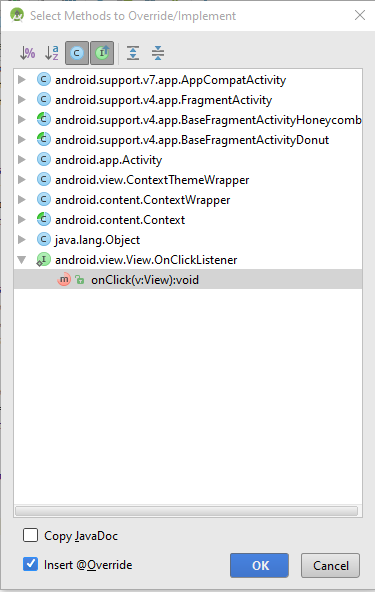
override උනා
ඒක ඇතුලේ swith case එකක් හදාගන්න
case දෙකට දාගන්නේ..button දෙකේ id දෙක..(xml file එකේ දීපු id..මොකද ඒ button වල original id කියන්නේ xml file එකේ දීපු id.අනිත්ව ඒ කියන්නේ b1,b2 කියන්නේ අපි හදපු reference වල නම්)
switch (v.getId()){
case R.id.but1:
මෙතන තමා but1 click කලාම වෙන්න ඕනේ මොනාද කියල ලියන්නේ
break;
case R.id.but2:
මෙතන තමා but2 click කලාම වෙන්න ඕනේ මොනාද කියල ලියන්නේ
break;
}

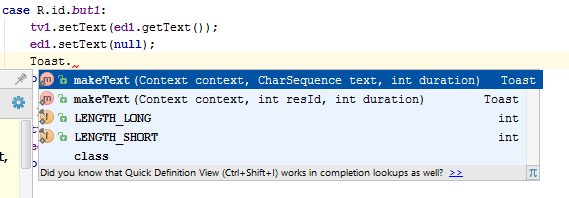
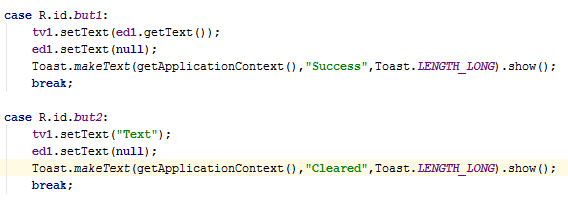
දැන් button වලට අදාළ code ලියමු
switch (v.getId()){
case R.id.but1:
tv1.setText(ed1.getText());
ed1.setText(null);
break;
case R.id.but2:
tv1.setText("Text");
ed1.setText(null);
break;
}
 තව වැඩක් කරන්න ඕනේ.onclicklistner එක හැදුවට button වලට තාම onclicklistner එක දැම්මේ නෑනේ
ඒක දාන්නේ oncreate එක ඇතුලේ
b1.setOnClickListener(this); - this කියන්නේ onclicklistner එක මේ class එකේම හදල තියෙන නිසා
b2.setOnClickListener(this);

බලපු නැති අය පලවෙනි එක මෙතනින් බලන්න - http://www.elakiri.com/forum/showthread.php?p=19014715#post19014715
අපි පොඩි app එකක් හදමු...මෙන්න මේක

මේ app එකේ text එකක් type කරල show button එක click කලාම text කියන තැන ඒක පෙන්නන්න ඕනේ..clear button click කළාම ආයෙම text කියල වැටෙන්න ඕනේ..
Android Studio [FONT="]එක open කරන්න...[/FONT]

[FONT="]wellcome window එකක් ඒවි..එකෙන් Start a new android studio project දෙන්න[/FONT]

ඊළගට එන window එකෙන් app එකට නමක් දෙන්න..package name එකට කැමති නමක් දෙන්න.අගට .com කියන එක තියන්න..

මෙතනින් minimum sdk එක ඒ කියන්නේ ඔයා ලියන app එක run වෙන්න ඕනේඅවම os level එක..මේක ice cream sandwitch තියන්න

දැන් එන්නේ app එකට activity එකක් add කරගන්න window එක..මෙතනින් blank activity එකක් add කරගන්න...activity එකක් කියන්නේ java class එකක්..එකේ තමා අපි app එකට අදාල codings ලියන්නේ

මෙතනින් අපේ activity එකට නමක් දෙන්න..ඊට පහලින් තියෙන්නේ layout එකේ නම එකත් කැමති නමක් දෙන්න..මම activity එක main විදියටත්..layout එක main_layout විදියටත් තියන්න...finish කරන්න

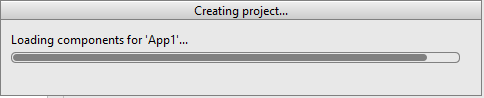
project එක create වෙන්න ටිකක් වෙලා යාවි


android sutdio open වෙලා rendering කියල වැටේවි..

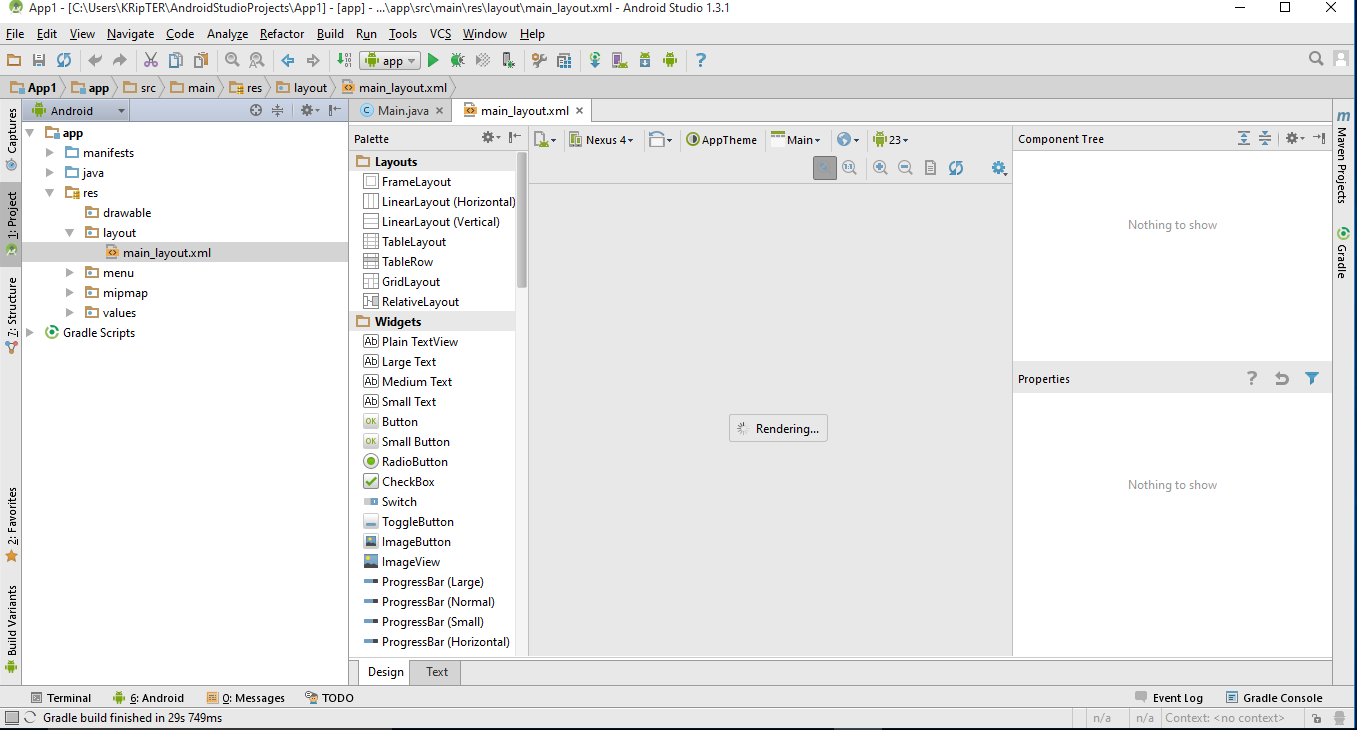
ඊට පස්සේ xml file එකේ නැත්තන් layout file එකේ view එකක් පෙන්නයි..මේ view එක තමා කලින් render වුනේ..ඔයාලට rendering problem කියල error එකක් වැටුනොත් apptheme button එකෙන් theme එක මාරු කරන්න

මේ තියෙන්නේ android studio window එකේ ප්රධාන කොටස් ටික..රතු පාටින් කොටු කරලා තියෙන්නේ දැනට open වෙලා තියෙන main_layout file එකේ design view එක code එක බලන්න ඕනෙනම් Text ටැබ් එක(දෙවැනි රතු කොටුව) click කරන්න..ඔය ඉලක්කම් දාල තියෙන කොටස් වලින් palette window, component tree එක සහ properties window එක අදාළ වෙන්නේ xml file වල design ටැබ් එක open කලාම විතරයි..නැත්තන් ඒවා පෙන්නන්නේ නැහැ
01 project window

මේකේ තමයි projects පෙන්නන්නේ..project එක expand කලාම ප්රධාන කොටස් තුනක් පෙන්නනවා.ඒ තමයි manifests file එක,java classes සහ අනිත් resources..xml files,grapics,icons වගේ දේවල් තියෙන්නේ resources වල
02 palette
මේකේ තමයි අපිට අවශ්ය component තියෙන්නේ..අවශ්ය component ඇදල design එක උඩට දාල සිංහලෙන් කියනවනම් drag and drop කරලා හදා ගන්න පුළුවන්
03 properties window
component එකක් උඩ click කරලා මේ window එක හරහා ඒ අදාළ component වල properties වෙනස් කරගන්න පුලුවන්. code එකෙනුත් කරන්නත් පුළුවන්
04 Menu bar
මේ bar එකේ තියෙන්නේ categorize කරපු menus ටිකක්.
05 Tool bar
නිතරම භාවිතා වෙන tools ටික තමයි මෙතන තියෙන්නේ..tool උඩට mouse pointer එක ගෙනිච්චම පොඩි බැලූන් මෙනු එකක නම පෙන්නනවා
06
අපේ design එකේ තියෙන component ටික පෙන්නන්නේ මෙතන..component පෙන්නන්නේ ඒවා design එකේ තියෙන පිළිවෙලට..ඒ ඒ layout වලට අදාල component ඒ ඒ layout ඇතුලේ තියෙන්නේ..

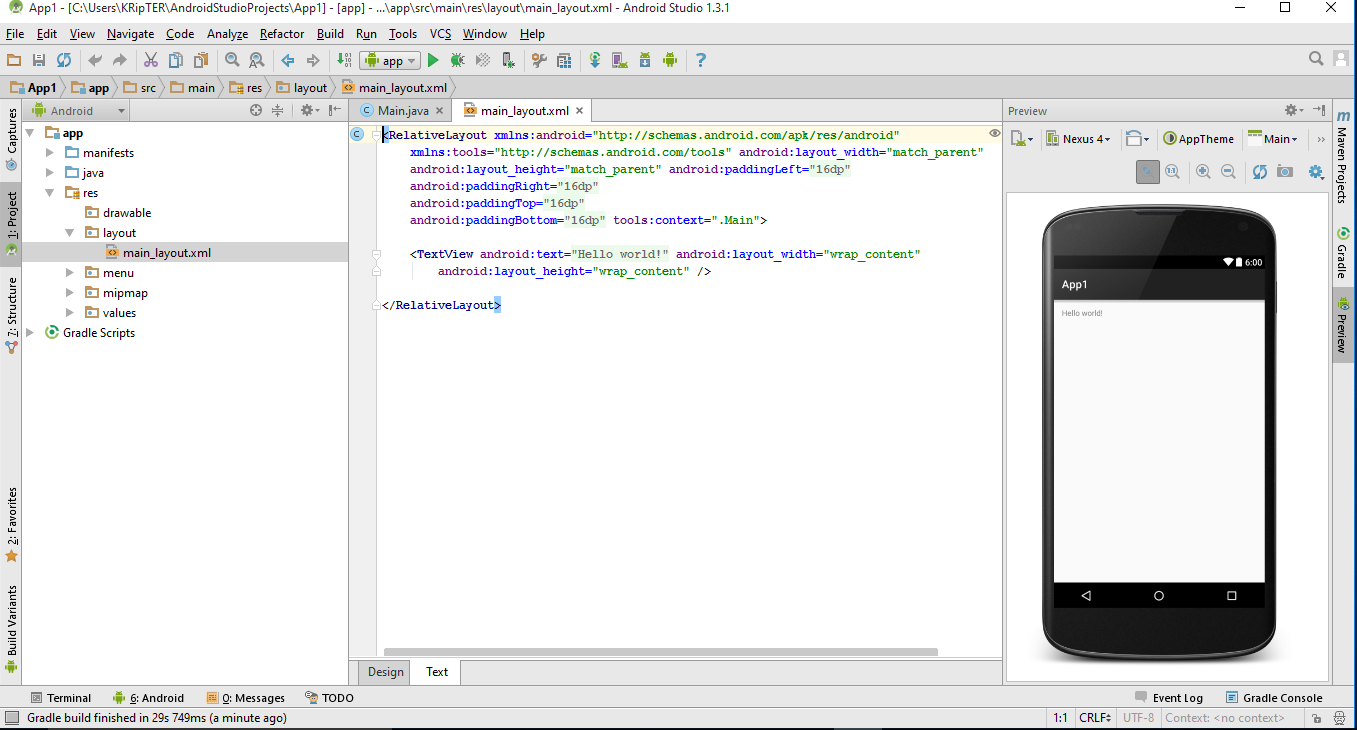
දැන් xml layout එකේ code එක open කරන්න..code ටැබ් එකෙන්..එතකොට code එක බලාගන්න පුළුවන්..අලුත් window එකක් එනවා දකුණු පැත්තෙන්..preview window එක..අපි code එකෙන් කරන වෙනස්කම් එවලේම මෙතන පෙන්නනවා


මම code එකේ පොඩි වෙනස්කම් ටිකක් කරනවා..මේ දාන්නේ වෙනස් කරපු හෝ අලුතින් එකතු කරපුවා.තියෙන අනිත් code මකන්න එපා..
android:text="Text" විදියටත්
android:layout_width="match_parent" විදියටත් වෙනස් කරගන්නවා..
මුල් code එක වෙනස් කලාම helloworld කියන text එක Text විදියට වෙනස් වේවි..ඊට පස්සේ code එකෙන් textview එකේ size එක display එකේ දිගට සමාන දිගක් ගනීවි..
මේ code වලින් අපි මේ component එකේ attributes අපිට ඕනේ විදියට වෙනස් කරගන්න එකයි කරන්නේ..properties window එක හරහාත් මේක කරගන්න පුළුවන්..එතකොට මේ code ටික android studio එකෙන් auto generate කරනවා..ඊලග post එකෙන් මේ ගැන වැඩිදුර විස්තර දාන්නම්..දැනට දල අදහසක් ගන්න
android:layout_marginTop="20dp" - top margin එක dp 20ක් දාගත්ත..dp කියන්නේ Density-independent Pixels කියන එක..මේ ගැනත් ඊලග post එකෙන් පැහැදිලි කරන්නම්
android:textSize="40dp" - text එකේ size එක dp 40ක් කරගත්ත
android:gravity="center_horizontal" - text එක center allign කරගත්තා..
android:id="@+id/View1" - මේ textview එකට id එකක් දුන්නා.id එකක් දෙන්නේ code කරද්දී මේ component වෙන් කරලා හදුනාගන්න..
මම ආයෙත් design view එකට ගිහින් palette එකේ Text Fields කියන category එකේ තියෙන palin text එකක් drag and drop කරගන්නවා..


ඊට පහලින් Widgets කියන category එකේ තියෙන button එකක් drag and drop කරගන්නවා..

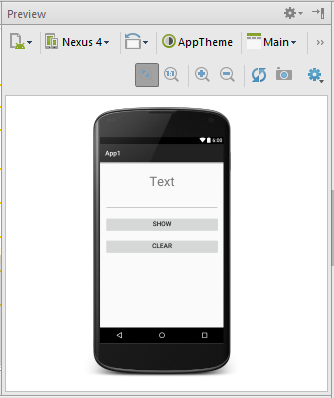
මේ විදිහට පෙනේවි දැන්

දැන් මම ආයේ code එකට යනවා..දැන් පේනවා මේ edittext ඒ කියන්නේ textfield එක සහ button වලට අදාල code auto generate වෙලා තියෙනවා..මම මෙවගේත් අර attributes ටිකම වෙනස් කරගන්නවා..
පහලින් වෙනස් කරපු code කොටස් දාන්නම්..මේ දාන්නේ වෙනස් කරපු හෝ අලුතින් එකතු කරපුවා.තියෙන අනිත් code මකන්න එපා..
<EditText
android:layout_width="match_parent"
android:id="@+id/tf"
android:layout_marginTop="20dp"
android:textSize="20dp"
android:gravity="center_horizontal"/>
<Button
android:layout_width="match_parent"
android:text="Show"
android:id="@+id/but1"
android:layout_below="@+id/tf"
මෙතන කියන්නේ මේ button එක තියෙන්නේ edittext එකට පහලින් කියල..අපි edittext එකේ id එක වෙනස් කලානේ tf කියල..මෙතනත් ඒ id එක දෙන්න ඕනේ
android:layout_marginTop="20dp"
android:textSize="20dp"
android:gravity="center_horizontal"/>

තව පොඩි button එකක් දාගන්න ඕනනේ..textclear කරගන්න..මම තියෙන button එකේ code එක copy කරලා ඊට පහලින් paste කරගන්නවා..දැන් වෙනස් කරගන්නවා.මේ දාන්නේ වෙනස් කරපු හෝ අලුතින් එකතු කරපුවා.තියෙන අනිත් code මකන්න එපා..
<Button
android:layout_width="match_parent"
android:text="Clear"
android:id="@+id/but2"
android:layout_below="@+id/but1"
android:layout_marginTop="20dp"
android:textSize="20dp"
android:gravity="center_horizontal"/>

දැන් මම java class එකේ වැඩ පටන් ගන්නවා..මේ class එකේ override කරපු methods හතරක් පෙන්න තියෙනවා..මෙතනින් එක method එකයි අපි අද වැඩේට පාවිච්චි කරන්නේ..on create method එක..ජාවා app ලියද්දි constructor එකේ වෙන වැඩේ තමයි මේ method එකේ වෙන්නේ..ඒ කියන්නේ app එක ස්ටාර්ට් වෙනකොට වෙන්න ඕනේ දේවල් මෙතන ලියන්නේ

මුලින්ම අපි xml file එකේ හදපු component ටිකට reference ටිකක් define කරගන්න ඕන.
සරලව කිව්වොත් අර xml file එකේ දීපු id වලින් කතාකලාට කෙලින්ම මෙයාලව access කරන්න බැහැ..මොකද මෙයාල ඉන්නේ java class එකෙන් පිට නිසා..ඒ නිසා එයාල වගේ කට්ටියගේ object එකක් මේ class එකේ හදලා ඒ නම් වලින් xml file එකේ component ටික අල්ල ගන්න ඕනේ..එතකොට ඒ object එක හරහා අර component access කරන්න පුළුවන්..මෙතන කරන්නේ හදන එක..
මේක කරන්නේ class එක ඇතුලේ..method වල නෙවේ..oncreate method එකට උඩින් හදා ගන්නකෝ
button වල b1,b2 කියලා මම කමා දාල දෙකක් define කලේ..දෙපාරකට define නොකර එකම code එකෙන්

සරලව කිව්වොත් xml file එකේ component ටික අල්ල ගන්න ඕනේ.
මම එක code පේලියක් පැහැදිලි කරන්නම්
b1=(Button)findViewById(R.id.but1);
b1 කියන්නේ හදාගත්තු button refference එකක්..findViewById() කියන method එක පාවිච්චි කරනවා xml component එක හොයාගන්න..
R.id.but1 කියන කොටසේ R කියන්නේ මේ අපි ලියන app එකේ auto generate උන java class එකක්..එකේ තමයි xml component ගැන විස්තර තියෙන්නේ..එකේ id වල but1 1 කියන xml component එක තමා R.id.but1 කියල ලිව්වේ..
මම කිව්වනේ මේ class එකේ object එකක් හදල xml component එක අල්ල ගන්නවා කියල..ඇත්තටම වෙන්නේ auto generate වෙන R class එකෙන් තමා ඒ component අල්ලන් ඉන්නේ..අපි කරන්නේ R එකේ තියෙන component අල්ලගන්න එක

දැන් අපි show button එක click කරද්දී වෙන්නඕනේ දේ ලියාගන්නඕන..මුලින්මbutton එකට onclick listner එකක් දාගන්න ඕනේ
සරලව කිව්වොත් මේ button එක ඔබනවද කියල අහන ඉන්න method එකක් දාගන්න ඕනේ.
onclick listner කියල class එකක් android api එකේ හදල තියෙන්නේ.එකේ තියෙනේ onclick කියන method එකෙන් අපිට මේ වැඩේ කරගත්තැහැකි..අපිට එක පාවිච්චි කරන්න විතරයි තියෙන්නේ
මම මේ class එක implement කරගන්නවා onclick listner class එකට.implement කරනවා කියන එක නම් මෙතන පැහැදිලි කරන්නේ නැහැ..එක Java OOP වලට අදාළ දෙයක්..දන්නේ නැත්තන්..net search පාරක් දාන්න..සිංහලෙන් ලිපි තියනවා
කරන්නේ මෙහෙමයි..code කරද්දී ctrl+space ගහල suggetion ගන්න
public class Main extends AppCompatActivity මෙන්න මෙතන type කරන්න OnClickListener කියල {
ctrl+space ගහන්න
onclick listner දෙකක් පෙනේවි දාගන්න ඕනේ android view.View එක.
implement කලාම method override කරලා පාවිච්චි කරන්න ඕනේ..error පෙන්නන්නේ method override කරලා නැති නිසා

මම java class එකේ පහලම..ඒ කියන්නේ අවසාන සඟල වරහනට } උඩින්.click කරලා ctrl+o ඔබනවා
එන window එකේ android view.View.OnClickListener යටතේ තියෙන onClick method එක select කරන්න

override උනා

ඒක ඇතුලේ swith case එකක් හදාගන්න
case දෙකට දාගන්නේ..button දෙකේ id දෙක..(xml file එකේ දීපු id..මොකද ඒ button වල original id කියන්නේ xml file එකේ දීපු id.අනිත්ව ඒ කියන්නේ b1,b2 කියන්නේ අපි හදපු reference වල නම්)
switch (v.getId()){
case R.id.but1:
මෙතන තමා but1 click කලාම වෙන්න ඕනේ මොනාද කියල ලියන්නේ
break;
case R.id.but2:
මෙතන තමා but2 click කලාම වෙන්න ඕනේ මොනාද කියල ලියන්නේ
break;
}

දැන් button වලට අදාළ code ලියමු
switch (v.getId()){
case R.id.but1:
tv1.setText(ed1.getText());
ed1.setText(null);
break;
case R.id.but2:
tv1.setText("Text");
ed1.setText(null);
break;
}

ඒක දාන්නේ oncreate එක ඇතුලේ
b1.setOnClickListener(this); - this කියන්නේ onclicklistner එක මේ class එකේම හදල තියෙන නිසා
b2.setOnClickListener(this);

Last edited:


")